Oh I hope y’all can help (assembly screw up)

Signed-In Members Don't See This Ad

Redcoat

Member
Joined
Jul 7, 2024
Messages
5
Location
Yuma, AZ
Morning all.

I screwed up and pressed a coupler into the wrong side of a blank. Normally I'd say screw it and remake the piece, destroying the blank and the tube to get the coupler free, unfortunately this piece is a gift and I don't have time to get the replacements.

I was thinking of putting the blank in the oven on low for 10-15minutes and see if the heat would loosen it up.

Are there any tried and true methods to separate assembled kit pieces without ruining the pieces?
 
Signed-In Members Don't See This Ad
I use a punch set to drive out the pieces. Holding the blank in my hand so as not to damage it and hitting the punch with a hammer. It takes 5 or 10 minutes to drive out the piece but it is still usable and can be re-assembled. I have never tried it but perhaps a drill bit or metal rod close to the inside diameter of the tube??
 
I use a punch set to drive out the pieces. Holding the blank in my hand so as not to damage it and hitting the punch with a hammer. It takes 5 or 10 minutes to drive out the piece but it is still usable and can be re-assembled. I have never tried it but perhaps a drill bit or metal rod close to the inside diameter of the tube??
You've given me hope, thank you so much!
 
Now first you did not tell us what kit it is. Next is did the coupler have a black plastic end on it? A photo would help. But many times the answer is always a transfer punch set will get out most components. Takes some care. Work over a soft landing spot such as a carpeted area or a table where the pieces will not roll off and also land with out scratching. Do a few of these repairs and you learn how much to hit hammer and when to just about stop and be able to pull the piece out before it falls. Do not ask how I know this. (embarrassing) Make sure the punch you use fits almost exactly in the tube. Less play the better. There usually one in the set that is perfect for all tubes we use.


When you do get it out, now that side of the tube has been stretched somewhat so when you go to install the correct part you may have to use a little red locktite to hold the piece in for it maybe a loose fit. Please do not use CA. It will cause havoc on the coating of the parts and could get very messy if you get on the blank. Red locktite will wipe clean. While picking up a transfer punch set if you do not have one get some red locktite. Good luck and let us know how it went.
 
I have been successful with several types of disassembly. Pushing out plastic parts though is usually problematic regardless of the method. In that case, sometimes the plastic gets damaged and needs to be replaced. For example, Ed at Exotic Blanks sells a Center Band Insert for their Diamond Knurl Rollerball kits for just that purpose. They also sell inserts for the Jr. Emperor and Jr. Gent-statesman, etc. for the same reason. If the parts are metal though it shouldn't be an issue.

I have a PSI Assembly/Disassembly Pen Press that I have used on occasion for disassembly, but more often than not, I go the route of using a Pen Disassembly Punch Set like many have already commented about before me. They are usually paired with a Locking Soft-Grip Pliers for Pen Disassembly, however I prefer the Soft Jaw Barrel Gripper over the pliers. I like that the gripper provides more surface area for gripping the blank than the pliers so I am less likely to damage my blank by crushing down too hard on it. Although, I occasionally clamp the gripper in a vise rather than holding it in my hand. I have also switched to a hard plastic non-marring mallet rather than a hammer for hitting the punch as the mallet is less likely to mushroom out the end of the punch.

Here is a video by Zac Higgins, Two Ways to Disassemble Pen Kits, that shows a couple of ways of doing disassembly.

Good Luck.
Dave
 
Last edited:
Do not ask how I know this. (embarrassing) Make sure the punch you use fits almost exactly in the tube. Less play the better. There usually one in the set that is perfect for all tubes we use.
SAME!

When you do get it out, now that side of the tube has been stretched somewhat so when you go to install the correct part you may have to use a little red locktite to hold the piece in for it maybe a loose fit.

John; Yep! One note; Put the locktite on the inside of the tube, NOT on the fitting. This reduces the amount of squeeze out and the result is permanent. Push together with a twisting motion to spread the locktite.
 
I also picked up the PSI pen press. I have needed punches from my transfer punch set for a good fit. I have not tried red Loctite, I used a tiny drop of medium CA applied with a toothpick and was very careful.
And the pen press works great for assembly.

Mike
 
I also picked up the PSI pen press. I have needed punches from my transfer punch set for a good fit. I have not tried red Loctite, I used a tiny drop of medium CA applied with a toothpick and was very careful.
And the pen press works great for assembly.

Mike
Mike, I really like my PSI pen press too. I did make a set of sleeves for it out of UHMW though. One to cover the aluminum end with something a little more cushion against kit parts when pressing. The other one covers the other end so there is a flat instead of the hole/dimple in it. I have had some markings on the nib/tips of some kits I have made from the tapered hole. Here is a post from earlier this year about them with pictures: New UHMW Sleeves for my PSI Pen Assembly/Disassembly Press. - Dave
 
Dave, I have not had any damage from the tapered hole or aluminum, but it has worried me. I will have to make your mods on my press.
Will have to find some UHMW. Or I might have a piece of Delrin that will work, will have to look in my scrap bins.


Thanks,
Mike
 
PSI disassemble press. Just bought one. Holding a blank and hammering a part out was getting to my arthritic fingers.
 
Morning all.

I screwed up and pressed a coupler into the wrong side of a blank. Normally I'd say screw it and remake the piece, destroying the blank and the tube to get the coupler free, unfortunately this piece is a gift and I don't have time to get the replacements.

I was thinking of putting the blank in the oven on low for 10-15minutes and see if the heat would loosen it up.

Are there any tried and true methods to separate assembled kit pieces without ruining the pieces?
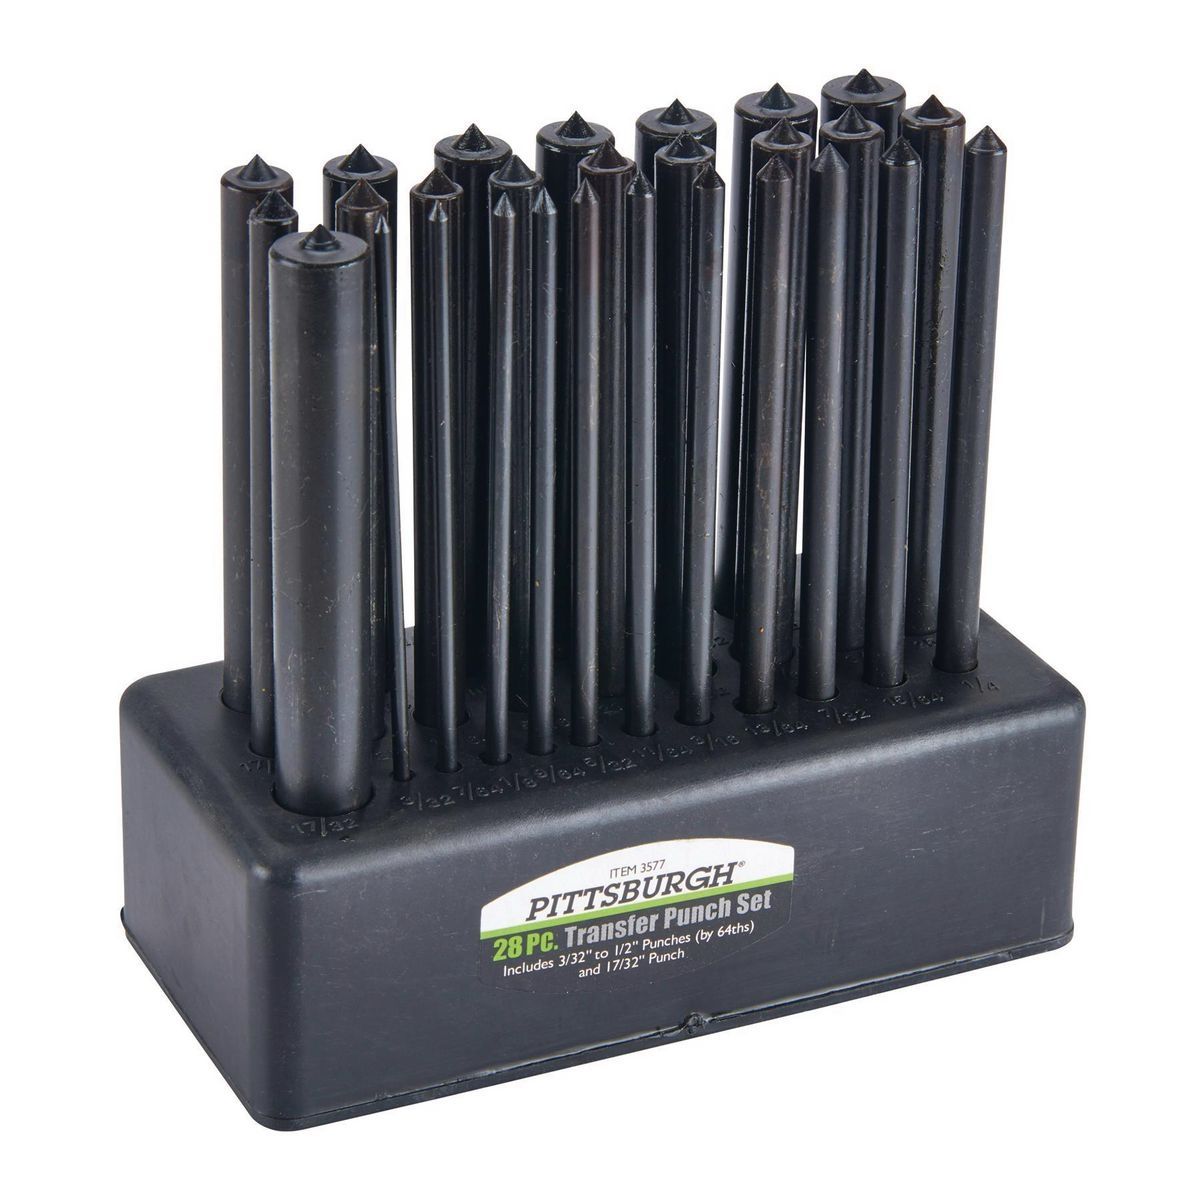
The punch set is a must. Get yourself a golf club vise device Hirecko has them. Put the pen tube in and squeeze down in a vise. You can drive out the offending part and protect the tube.
 
The punch set is a must. Get yourself a golf club vise device Hirecko has them. Put the pen tube in and squeeze down in a vise. You can drive out the offending part and protect the tube.
Oooooo Ahhhhhh - I never saw those golf club clamp vise things before. I use one of the Soft Jaw Barrel Grippers from PSI that looks a lot like the GolfWorks Deluxe Heavy Duty Club Shaft Clamp Gripping Vise Tool on Amazon, and I clamp it in my bench vise for use, but I've never seen one like this Golf Shaft Clamp, Golf Club Vise Clamp, Golf Grip Removal Tool, Golf Club Regripping Kit one on Amazon that combines the gripper and a quick release De-Sta-Co type toggle clamp and thumb wheel mechanism. What I have works, but I just might have to get one of these just because of the cool factor! - Dave
 
Back
Top Bottom