Dec. Pen Swap Pictures

Signed-In Members Don't See This Ad
I was about to post pics of the pen and ornament that I received from Stuart, but I see he beat me to it. Great pen and ornament, love it. The ornament has found its spot on the tree, and the pen is making its rounds to be shown off. I look forward to the next swap.

I finally finished both pen and ornament today so Stuart it will be on its way tomorrow.
 
Found a box on my doorstep this morning. No return address or note inside. The source of these natural edge beauties is a mystery, but they don't look Texan. They have more of that South Dakota flair to them.

Here's a picture of my mystery swap pens.

Ed
 

Attachments

  • NatEdge.jpg
    NatEdge.jpg
    343.9 KB · Views: 319
Found a box on my doorstep this morning. No return address or note inside. The source of these natural edge beauties is a mystery, but they don't look Texan. They have more of that South Dakota flair to them.

Here's a picture of my mystery swap pens.

Ed

Does that constitute construction material in South Dakota?
 
Lance - At first I thought it might be Hawaiian Signature tree, but the leaves aren't right and I didn't swap with anyone from Hawaii.

Cody - I think this might be some of what's left after you build a teepee so I guess it qualifies as construction material.

Ed
 
I can tell you for sure that nothing like that grows anywhere in the great state of Texas. It's definitely of foreign origin.
 
I think those are some mighty fine writing instruments, but I can't take credit for them. They are above the caliber of work I do.
You know, I didn't want to come right out and say that, but now that you did....I knew something wasn't right when I looked at those pens. They were way nicer than what I was expecting to get from north of the Badlands!! :biggrin:

Ed
 
My PITH from Plantman

Here is the pen and ornament I received from Jim.

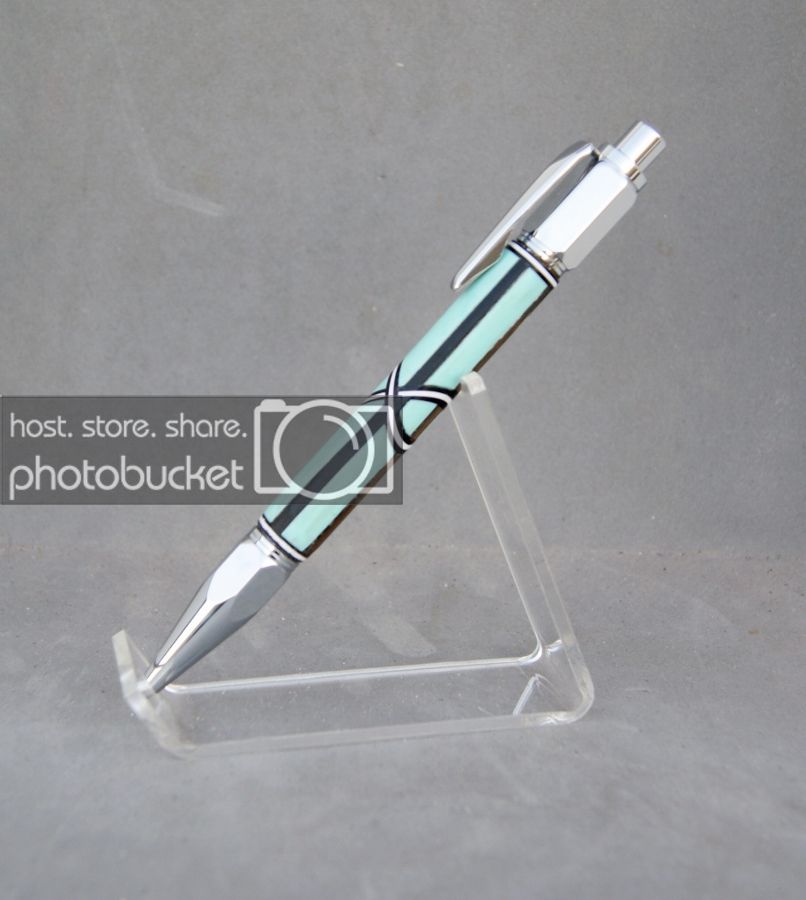
The pen is a Chrome Vertex click made with Blue PVC Pipe, Ebony, and Pickguard. It's a really cool pen. Thanks Jim!

DSC05220 (806x900).jpg


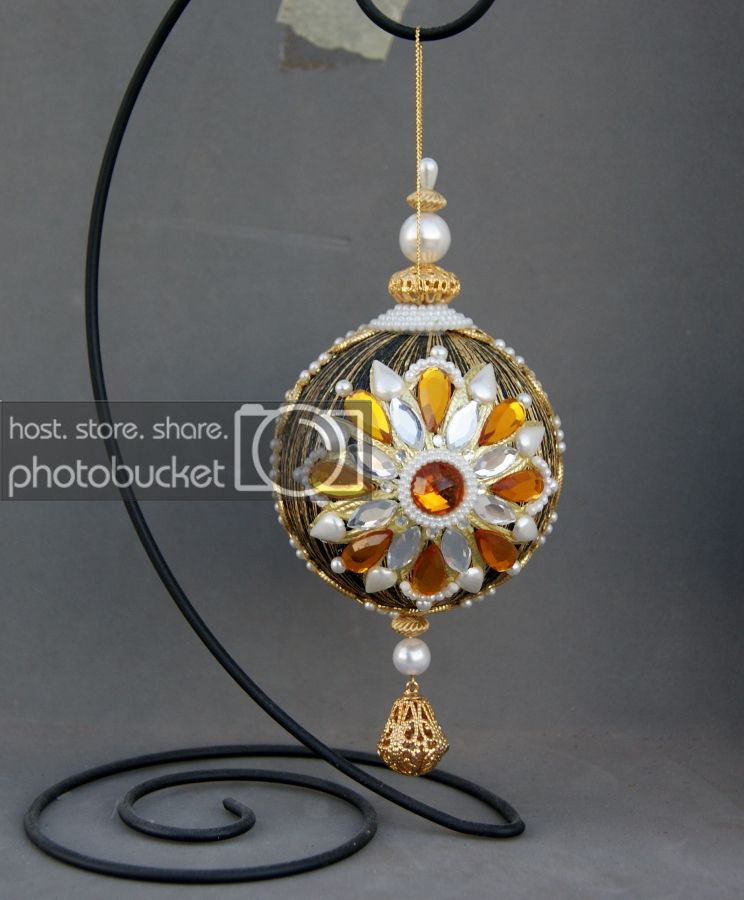
I'll let Jim elaborate more on the construction of the ornament, but I have to say it's fricken cool! We haven't put up our tree yet (we procrastinate badly with this every year) but once it's up it'll have a predominate spot.

DSC05217 (744x900).jpg


I'm running behind on making my pen for him. All I can say is that the tap I've been needing to get the job done came in yesterday as well :wink::biggrin:
 
Here is the pen and ornament I received from Jim.

The pen is a Chrome Vertex click made with Blue PVC Pipe, Ebony, and Pickguard. It's a really cool pen. Thanks Jim!

View attachment 126041


I'll let Jim elaborate more on the construction of the ornament, but I have to say it's fricken cool! We haven't put up our tree yet (we procrastinate badly with this every year) but once it's up it'll have a predominate spot.

View attachment 126042


I'm running behind on making my pen for him. All I can say is that the tap I've been needing to get the job done came in yesterday as well :wink::biggrin:

Thank you Jonathon !! Glad you liked the pen and ornament. The ornament started out with a styrofoam ball wraped in gold and black thread. Gold braid seperates the ball into 2 equal parts with pearls added over the braid. Gold foil filagree was placed in the center of the open spaces of the ball. Topez and clear Bavarian Crystals, Tear drop pearls, half pearls, and pearls rings were added along with full pearls, pearl headed pins, and gold bezel beads. Everything is hand glued one piece at a time. I think there are about 200 jewels and pearls in the mix. Hope you and your's enjoy for many years to come. Happy Holidays !!! Jim S
 
Last edited:
Mark's pen showed up in today's mail for me. What a great rollerball in some fun colors. I'll let Mark describe the brass and aluminum lamination on the cap, and share better photos if he has some. Here's my so-so camera phone picture!

Thanks for the great ornament and pen, and the extra packing material! The ornament is already hanging, and the pen is going to work with me before anyone here claims it on me!!

My package is ready to go out, but I won't be able to make it to the post office until Friday!

Another great PITH!!
 

Attachments

  • image-2138978389.jpg
    image-2138978389.jpg
    152.8 KB · Views: 284
juteck;1724804 Another great PITH!![/QUOTE said:
I agree this was FUN!

I've not done much beyond rounding a stick of wood... But would like to start segmenting.

So... some ...."silver and gold" to go with the Holiday candy cane! The aluminum was a bit thicker than the previous project, and the brass was new for me. It splattered once..., but in the end it actually came out nice! An Altrax. I liked it just fine, but will vote for a postable kit next time!

Merry Christmas to everyone!

John - no hurries! I'm also busy till this Friday. :)
 

Attachments

  • IMG_1641.jpg
    IMG_1641.jpg
    121.6 KB · Views: 245
Now that MarkD has his shipment, he asked me if I would like to share some photos of the pen and ornament. I have to say I wasn't very proud of the ornament, so I didn't photograph it, but if Mark wants to embarrass me, in front of all of you, I'll leave it to him. :eek:

The pen is a Jr Gent Rollerball in Rhodium. The material is Structural Composite Lumber (SCL) that was salvaged from a build site in the high desert in Southern California. The application that the SCL was being used for was a high tech stairway being built in an architect's own home. I thought the material was interesting and, in the end, I think it made a nice looking pen. Its finished in CA.

I had a great time with this swap and I'm really looking forward to the next one. Thanks to you guys for pushing me a little bit outside my comfort zone.

Merry Christmas to Mark and to all of you!
Eric
 

Attachments

  • IMG_20141130_130902.jpg
    IMG_20141130_130902.jpg
    166.3 KB · Views: 242
  • IMG_20141130_131008.jpg
    IMG_20141130_131008.jpg
    176.8 KB · Views: 220
Hi Eric,

The SCL pen is quite nice; looks like it's pine. Is that so?
I wonder how it would look if you cut it on the bias and drilled at an angle so that multiple layers were exposed in the finished pen?
 
Hi Eric,

The SCL pen is quite nice; looks like it's pine. Is that so?
I wonder how it would look if you cut it on the bias and drilled at an angle so that multiple layers were exposed in the finished pen?

Gary,
Yes, I believe it is pine. I only received two 1x1x5 pieces, the unturned blank in the photo is the raw state. A friend of mine came up with the wood and cut the stock for me. Its too late for me to cut it on the bias but I could have probably drilled at an angle to highlight the layers better.

I really didn't know how it would turn out before I started working with it. In fact I assumed that the layers would be more evident by looking at the jumble in the second photo. As it is, most of the dark lines are adhesive, it just ended up looking more like spalted wood than what I expected.

Perhaps it will be an inspiration for someone, like yourself, to try another technique! Be aware, though, that the wood was pretty splintery and I had to soak it with CA a couple of times while turning to keep it all together.

Cheers,
 
Last edited:
Hi Eric,

The SCL pen is quite nice; looks like it's pine. Is that so?
I wonder how it would look if you cut it on the bias and drilled at an angle so that multiple layers were exposed in the finished pen?

Gary,
Yes, I believe it is pine. I only received two 1x1x5 pieces, the unturned blank in the photo is the raw state. A friend of mine came up with the wood and cut the stock for me. Its too late for me to cut it on the bias but I could have probably drilled at an angle to highlight the layers better.

I really didn't know how it would turn out before I started working with it. In fact I assumed that the layers would be more evident by looking at the jumble in the second photo. As it is, most of the dark lines are adhesive, it just ended up looking more like spalted wood than what I expected.

Perhaps it will be an inspiration for someone, like yourself, to try another technique! Be aware, though, that the wood was pretty splintery and I had to soak it with CA a couple of times while turning to keep it all together.

Cheers,

Gary, When my partner posts pictures of the pen I sent him you might just get your wish :biggrin:

And even though the wood is pressed together with lots of epoxy or glue, it is very splintery. In fact, I had a couple of blow outs that fortunately I was able to fix. Like Eric, I used thin CA to help stabilize it when I was turning it....
 
Last edited:
Recieved Exchange From Argo13

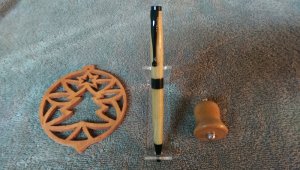
I recieved My exchange package from Jason, ie Argo13 this evening. I recieved two Pens and two Ornaments. ( he must have thought I was twins) The 1st Pen was a Slimline Black made from a 2X4 tree, with a custom Corian centerband.
The Ornaments are a " Bell" made fron a child's recycled block set out of Maple. The second is a Scroll Sawed " Christmas Tree" out of Baltic Birch.
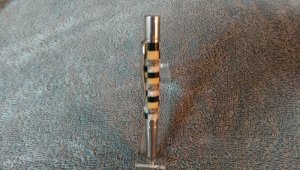
The Second Pen is a ; Segmented Corian on a Stainless Steel " Cyote " Pen kit. For only turning for two years Jason you did an outstanding job !!!
I'm proud to have been your Partner. sorry for the pictures they don't due it justice.
The tracking says you should recieve your package tomorrow. I hope you'll be just as pleased. ( Remember I've only been turning for 5 months)
Thanks to All for allowing me to participate in this PITH exchange. Merry Christmas, and Blessings to All.

 
Hi Eric,

The SCL pen is quite nice; looks like it's pine. Is that so?
I wonder how it would look if you cut it on the bias and drilled at an angle so that multiple layers were exposed in the finished pen?

Gary,
Yes, I believe it is pine. I only received two 1x1x5 pieces, the unturned blank in the photo is the raw state. A friend of mine came up with the wood and cut the stock for me. Its too late for me to cut it on the bias but I could have probably drilled at an angle to highlight the layers better.

I really didn't know how it would turn out before I started working with it. In fact I assumed that the layers would be more evident by looking at the jumble in the second photo. As it is, most of the dark lines are adhesive, it just ended up looking more like spalted wood than what I expected.

Perhaps it will be an inspiration for someone, like yourself, to try another technique! Be aware, though, that the wood was pretty splintery and I had to soak it with CA a couple of times while turning to keep it all together.

Cheers,


Gary, When my partner posts pictures of the pen I sent him you might just get your wish :biggrin:

And even though the wood is pressed together with lots of epoxy or glue, it is very splintery. In fact, I had a couple of blow outs that fortunately I was able to fix. Like Eric, I used thin CA to help stabilize it when I was turning it....


I can't wait!
 
Pen I sent

USPS tracking says it was delivered so here's the pen I sent out. Cell phone pic, but it will do.. I forgot to get pictures of the ornament.

Modified PennState Tower Twist pen. Orange/White acrylic segmented to look like a construction barrel with a piece of corian for the base.
 

Attachments

  • ItWasACone.jpg
    ItWasACone.jpg
    35.3 KB · Views: 211
Last edited:
It took me a while to figure out how to up load a picture. There must be an easier way. The way Woodbarter dies it is much easier.
Anyway thanks very much alankulwicki7.
 
Here is a photo of the pen my partner, alankulwicki7, sent me. A beautiful Jr. Gent made from part of a laminated beam. And the ornament a birdhouse complete with teeny bird in residence.
Glad you like the pen. I originally tried two attempts at a copper wire/solder pen but failed. Then I settled on the laminated beam. I had a couple of blow outs but was able to fix them successfully finish the pen.

FYI I think the little birdie fell off its perch. At least that's where it was when I mailed the package to you!:)
 
PITH pen from Lance

I received my pen an ornament from Lance. He claims to be turning only a short while. But he showed a lot of creativity and skill. The pen is a gun metal bolt action sporting a blank made of 12 gauge copper wire and filled with silver solder. His fit and finish are right on.

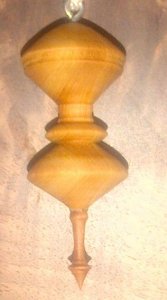
The ornament is a combination of spalted pecan and Rahador. Turned the outside then split apart and turned the inside. Glued back together with bell inside. The package was ringing with a the bell. Very festive.

You did great Lance. It was fun.

Jason
 

Attachments

  • image.jpg
    image.jpg
    197.5 KB · Views: 261
Glad, You appreciated it Jason. I have been waiting in anticipation for your response. Especially after I read that two or three fellow turners ( that I really respect ) on this site tried the Copper wire and Solder and then changed. I await the Opinion of my fellow turners ... I thought it was a pen that I was proud of as a Turner, and would be proud to use.
I want to give credit though. My inspiration was from an article in the Library; from " Kenn Osborne" thanks Kenn. If anyone wants a larger picture, I'll post one tonight after I get off work.
Thanks Jason for the Exchange.
Merry Christmas To All.

( hopefully, no one will be afraid to be my Partner on the next Exchange)
Lance
 
Here are the ornament and pen for my swap partner Steve (SMJ1957).

The ornament is my first--it's cypress with a sapele mahogany finial.
1_Ornament.jpg


Keeping with the construction theme for the pen:
1_SwapPenDec2014.jpg


Here's the description I sent Steve about the pen:
My very first thought was a wood hammer but Skippy posted his gorgeous version right away.
I knew I couldn't compete with a master.
So, what to make?
My wife and I have done a couple of 'owner/builder' homes; we did one by and for her parents.
As I contemplated your pen, I found two shims my Father-in-law and I had made; most of which were used for hanging windows and doors.
The wood just happened to be old growth, antique heart pine.
It seemed like a natural.
I glued two in opposing directions creating one nearly parallel piece of wood about 16" long.
I cut it in 1/2 and stacked and glued the two 8" long pieces.
I kept cutting, stacking and re-gluing until it was thick enough for a blank,
but I was also rotating the cut-offs so the grain of the pieces were running in different directions.
The result is a variation on the usual brickwork blanks.
I wanted a solid CB and had some nice padauk which worked well.
So, that's the story. The finish is Mahoney's oil burnished 'til it cured, then CA.
 
Last edited:
Signed-In Members Don't See This Ad
Back
Top Bottom