Finally had a quiet weekend all to myself (at least until about dinner time this evening)! Slipped into the shop last night after outside temperature fell to something reasonable (and remembered to keep my resin in the HOUSE instead of in the GARAGE this time..difference of at least 25 degrees!).
Sadly, something had caused my Alumilite Clear B Side to turn into very thick gel. From what I've read, apparently it was stored wrong. Ah well, soaking it in hot water eventually returned it to normal(ish). But, by then, it was very late AND I needed to let the B Side cool before using it...so, packed everything away and went to bed last night slightly disappointed.
After breakfast this morning, back in the shop for a rematch! :biggrin:
I had several color combinations I've been itching to try and had to settle on just one for starters.
I consoled myself while the B Side was soaking last night by re-watching one of Curtis' videos on casting with Alumilite. Picked up a couple subtle things I'd missed the first time I watched it and decided I'd try it his way (mixing all the A & B together, then splitting it to add color, etc). He's been casting Alumilite for 7+ years and the videos are very helpful (despite having the nasty side effect of creating serious shop-envy).

I had a new mold I wanted to try...taller and narrower than Curtis' posted design. I wanted to be able to make custom bottle stopper blanks as well as experiment with 2-blank thick castings...
I measured the inside width and length, figured out what depth I wanted to fill to initially, multiplied all that together and then times 0.554 to figure out how many ounces I'd need. The formula is somewhere on Alumilite's sight I think, or you can find it in a post Curtis recently added in another thread on casting. Very helpful tidbit to know!
I wanted to experiment with some Duo-Tone powders I'd recently picked up...they're from Pearl Ex and looked interesting. That meant using Alumilite Clear and I like to tint the resin as well with dyes because it's one more thing to experiment with.
I set up two spare cups and had the dyes already sitting in the bottom of each cup before mixing A&B sides together in a larger cup. I'm slow at dispensing the amount of dye I want and figured this would let me drop in what I want without feeling rushed.
I added some florescent green and regular green dye (about 4 drops of florescent green and a couple of regular green) to the green-purple Duo-Tone and added a few drops of florescent yellow and plain white to the purple-brass Duo-Tone cup. Each cup would end up with about 6 1/2 ounces of mixed resin so I targeted roughly 6 drops of dye (1 drop per ounce was mentioned in Curtis's video).
Mixing A & B with no dyes in the way definitely makes it easier to see if you've stirred enough. I've yet to have a problem with not mixing enough when adding dye to the A Side in advance but pre-adding the dye to A means you mix one cup, set it aside, mix the other...and if it's too warm in your shop/garage, the first cup might go off faster than you expected (as reported by me in a different thread a while back).
I like Curtis' "mix all your A & B then split it for dying" approach (with the slight tweak of having the dye already waiting in the cups the mixed resin will be split into).
The dye likes to stick to the bottom of the cup. So, be sure to stir really well (a narrow spatula, rubbed repeatedly on the bottom, would be much handier than my full sized spatulas which are a bit bit for the cups I'm using).
I poured all of one color into the mold (I think it was the green-purple), then added the other while trying various things to see if they'd affect how the two mixed/swirled. If the cup is held higher above the mold, you'll get a thinner and faster stream which should punch deeper into the first color...go lower for a slower stream if you want it to accumulate higher. Sadly, I couldn't tell how deep it was going...going to have to try with the initial pour just being clear some day to better visualize the effects!
I also deflected the second color's stream several times by letting it hit a spatula or tongue depressor held just barely above the surface...that seems to spread out the incoming resin quite nicely, but again, I had no way of seeing how deep that would going or if it was just sitting on the surface...
After all of the second color was streamed in, I used the tongue depressor to stir/swirl a bit...made sure to not just go side-to-side, but to try using it to lift whatever was at the bottom upwards (hoping to avoid some of the pooling I've seen with other pours I've made).
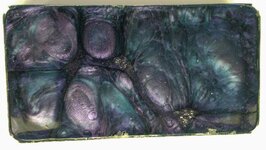
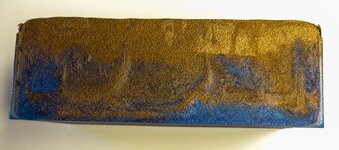
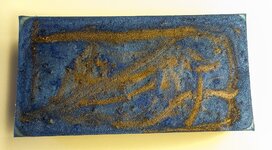
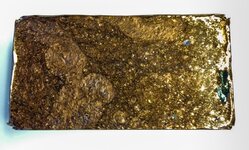
The colors in the cups looked GREAT! The resulting block looks really cool (despite the weak phone photo attached here). The bottom has a different effect but it's also pretty cool and has real promise.
I don't think I can cut this one into pen blanks...I'm thinking maybe knife scales or something else that will keep a wider chunk of the cool effect showing. I'll slice into it next weekend most likely and decide then whether to slice it thin or use it thicker.
The translucent resin and the Duo-Tone powders give an interesting "depth" to the block. I'm really hoping that shows up in whatever ends up "wearing" pieces of this block...

