TimS124
Member
I know that newbies generally aren't where rational people turn for advices, tips, or hints…but I'm pigheaded enough to try offering some anyway. :biggrin:
Most of what follows is likely old news to experienced casters but I haven't seen it mentioned and thought it might be useful for others starting down the slippery slope of casting.
I'd like to end with a big THANK YOU to Curtis for his wonderful videos on casting Alumilite as well as his plans for the mold and caddy. His videos saved a lot of mistakes (the only mistake worth mentioning was when I skipped one piece of his advice in a rush to get my first batch into the pressure pot).
Most of what follows is likely old news to experienced casters but I haven't seen it mentioned and thought it might be useful for others starting down the slippery slope of casting.
- Your first umpteen batches will likely have problems…colors too weak/strong, swirling too lame/intense, resin not stirred well enough due to rushing…
The plans for the standard mold are intended to create a block of something like 10 blanks. Making multiple mistakes on that scale gets expensive quickly.
I'm starting with a narrower mold…wide enough for two blanks, the saw blade that will slice them apart, and maybe a hair more so the outer edges can be trimmed away (there seems to be less character/swirling there but they'll mostly be turned away on the lathe so this extra bit isn't critical).
The height of my narrow mold is the same as the "standard" mold, so the resulting block can produce two layers of blanks or just one (depending on how much resin I pour into the mold).
If you use a narrow mold, you'll need to adjust how much resin you mix. For the first batch, as long as the cast block ends up at least 3/4" thick, it'll work fine for blanks.
Measure the resulting first block's height and you can calculate how much more resin to mix for the next batch to get a block that's high enough for two blanks plus the saw blade that will separate them…i.e.: a block that will yield four blanks…if you don't like the colors, swirling, etc, you've wasted far less resin than the standard mold.
- Your new mold will likely leak the first few times you use it. That's called out explicitly in Curtis' video on casting if I recall correctly. As the video explains, the problem goes away on its own as leaked resin sets in the cracks, but it's still messy until that happens.
It's worth considering using a good tape across the seams to help minimize the mess until the seams seal themselves. For my first casting attempt, I had resin leaking on my work surface from the first color as I was mixing the dye into the second color. Fortunately, my work surface was a spare cardboard box so it didn't matter…but the lost resin and general mess could've been avoided with a bit of duct tape.
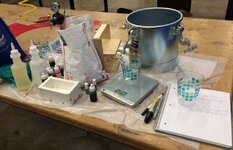
- I found some of the dyes to be too thick to squeeze out of the built-in dropper mechanism on the 1 ounce bottles. When I removed the dropper, I found it difficult to accurately/consistently control how much dye was going into the mix.
I found that drilling the eye dropper mechanism out with a 5/64" bit helped considerably. That happened to be the size pilot bit I had handy and was just slightly larger than the dropper's original hole. The drops came out more like a very thin stream, but they flowed well enough to no longer need to remove the dropper mechanism so I think I'll be able to judge how much I'm using a bit better.
Test this on just one bottle first in case you want to use a smaller bit instead. Also be certain to clean the bit off after each color dye's dropper has been drilled. I simply drilled a scrap of wood between each bottle...
The dropper likes to spin while drilling, but a bit of thumb pressure was enough to stop that.
- Some of the Alumilite dyes seem stronger than others. This isn't meant as a complaint…I believe it's a natural side effect of certain colors being inherently stronger (like blue and red) vs. others (yellow or florescent green). The resin is clear(ish) during mixing but sets to white…so it will lighten the colors you're trying to create.
If the color looks weak during mixing, it will be even weaker when the white coloring kicks in!
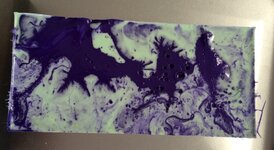
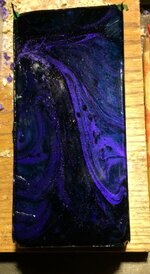
It's probably worth mixing enough resin for a single-height block, splitting it into two or three cups, then adding different amounts of the SAME dye color to each cup. Don't try to swirl them a bunch…keep them fairly separate to make it easy to see the final colors from each cup in the resulting block. This should let you quickly get a sense of how much of a given dye is needed to produce light/medium/dark colors.
- If you're mixing equal amounts of a light color and a dark color in your mold, and you don't plan to pour both at the same time, I suggest pouring the lighter color in first. It will be much easier to see where/how the darker color is flowing into the lighter color. Trying to see how a lighter color affects a darker color doesn't work well.
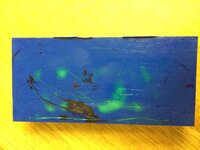
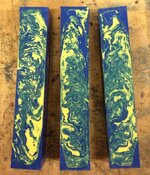
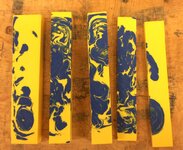
I used blue and yellow for my first batch. The blue was fairly dark and went into the mold first. The yellow was almost invisible as I added it into the mold. I stirred some after they were together so I'd also have some shades of green but it was all guesswork as it was very difficult to see where the yellow ended up until after the block came out of the pressure pot.
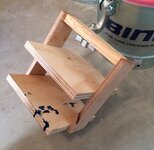
- I'm not currently planning to cast double batches in a single pressure pot, so I simplified the design of the caddy (mold rack) that holds the mold in the pressure pot. The folding handle and top air shield were skipped (those are parts E, F, and C in Curtis' design).
Instead, the upper Part A acts as an air shield for the mold that sits on the lower Part A in his plans. Also, a simple 1x2 runs across the top where Part D would normally sit…that creates a fixed handle which doesn't hit any of the fittings underneath my pot's lid and it simplifies construction of the caddy.
I'd like to end with a big THANK YOU to Curtis for his wonderful videos on casting Alumilite as well as his plans for the mold and caddy. His videos saved a lot of mistakes (the only mistake worth mentioning was when I skipped one piece of his advice in a rush to get my first batch into the pressure pot).


