I have some experience making canes. My lathe has an 18" (nominal maximum) bed; taking into account chucks and tail stock live centers, the actual maximum length of a spindle it can handle is shorter. (Is that a 'truth in advertising issue?) So my approach is to turn the shaft of the cane in four sections that I join together with dowels.
To make a shaft that is 32" long, I start with a billet from '6-quarter' stock that is a heavy 32" long, and then cut it into four 8" sections, noting the ends where the each cuts were made so that when I do the final assembly, I can match the grain across the joints. I turn them to round between centers, and then turn a tenon on one end, keeping the overall diameter in the 1-1.25" range. I put a tenon on each end that I can use to grip the blank from one end in a scroll chuck. Then with my Jacobs chuck in the tail stock, I drill a 2" deep centered hole in the ends that have to be joined together. Then, I go back between centers to finish turn each section to the desired final diameter. (turning away those mounting tenons). I generally try to taper the shaft from 1 1/8" at the handle end to about 7/8" at the bottom, losing about 1/16" of diameter across each section of the shaft.
Next, I make the tenons that will join the shaft sections. I generally drill the holes in the shaft using a 3/8" bit, and then make 4" long dowels about the same diameter, or perhaps very slightly thinner (perhaps 23/64"); I don't want to make the dowel joint too snug because if there isn't room for glue, the joint will be weak. Note that I make the diameter of the dowel joint about half the overall shaft diameter, and the joint is 4" long with half of a dowel glued into each side of the joint. My intuition tells me that will be a reasonably strong joint, and larger or smaller could be weaker. I've asked experience cane makers for their opinion on that approach but have never gotten an answer.
Next, I join the shaft sections in pairs without glue, and mount each pair between centers for sanding. Sanding the sections in pairs like this assures that the seam between sections is reasonably smooth. After sanding, I disassemble the sections, and then glue them back together, making sure to match the grain at the joints. I use ordinary PVA glue, and clamp the entire length of the shaft overnight while the glue cures. The next day, I can finish sand the entire shaft, and apply finish.
There are two variations on this process. One is to add cut a shallow tenon, about 5/8" diameter and perhaps 1/4" long at one end of each of the shaft sections. I then take a scrap of contrasting timber that is 1/4" thick, drill some 5/8" holes, and then cut that scrap into small squares that I glue to the 5/8" tenons. Then, I turn the sections to the final diameter leaving a contrasting ring at the point where it joins the adjacent section of the shaft. 'Celebrating' the joints with these contrasting rings disguises any grain mismatch that might occur across the joints.
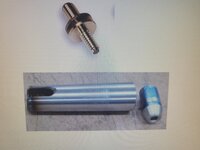
The other variation is to give the cane the ability to be 'broken down' for more compact packing for travel. To do this, I make a threaded coupling for the center joint, but rather than using a commercial cane coupler, I make my own from a section of 3/8x16tpi all-thread and a threaded insert. The section that will become the 'male' half of the break-down joint is made the same way as a glued joint, with the all-thread rod epoxied into a hole in the shaft. To make the 'female' side, I drill a larger diameter hole, and glue in a brass threaded insert. I usually aim to have about 1" of threaded rod exposed on the male side. The length of threaded inserts can vary, so I will typically drill a 25/64" X 1" deep hole in the female side, and then enlarge a portion of that hole to receive the threaded insert. One caution here - I've found that trying to screw a threaded insert into a relatively thin shaft is a good way to create a nasty split. So I make the hole for the insert large enough that it just slips in, and then use epoxy to glue it in place and fill the gap around the insert. I particularly like to do the contrast ring on this center joint because getting a grain match across a threaded joint would be rather tricky.


