Pen Press: Try to fix or toss?

Signed-In Members Don't See This Ad

naynay

Member
Joined
May 20, 2019
Messages
105
Location
Fallon, NV
I like this pen press. It's simple to use and doesn't take up much space. I have a small storage space I turn pens in then take them inside to press together. It's hit or miss but I'm tired of the tips getting small dents in them. If I plug the small hole with epoxy, you think this will stop the denting of pen tips? I used clamps when I first started turning then found this WEN pen press that I've used but tired of the every once in a while a tip gets bent. Not a good look. Here is what the cup looks like where the tip sits. I was going to fill it with epoxy but thought I'd inquire here. Again, space is at a premium so I can't set up a vice like I've seen in youtube videos. and I like to assemble pens inside after turning which is why I don't get the rubber cups for my lathe.
IMG_0874.jpg
IMG_0874.jpg

IMG_0875.jpg
 
Signed-In Members Don't See This Ad
A Pen press has a HUGE mechanical advantage and you can easily press too hard on the blank. I use a woodworkers vise with wood jaw covers to press in fittings. It gives me a good "feel" on how hard I am pressing.

You should not have to use excessive force on the pen nib to seat it. I suspect you want to take a 1/8" drill bit and drill the center of the nylon piece a bit deeper. The tip of the pen nib should not bottom out. The bearing surface should be on the sides of the nib.

Best Practices:
Clear out any glue or gunk on the inside of the brass tube. It has to be clean!
Use a camphering tool to put a bevel on the inside of the brass tube. This reduces the force needed to seat the nib. I campher every brass tube end.
 
@randyrls is on the mark, but if you still want to eliminate that divot--a piece of 3/4" thick hardwood could be stood on the base between the nib and the pen press. Fancy solution, since you have a lathe--make piece of wood 2" or so in diameter, and hollow the backside the same as the diameter of that white thing, leaving 1/4" of so thickness. That would allow you use it when needed, remove it if you need to for some rason.

Edit--@montmill solution is even better, and much faster than mine!!
 
My wife will attest to my passion for tools of all kinds. When it comes to pen turning there are no exceptions, usually. I have tired a couple pen presses over the years but they usually get covered with dust from not being used. I always go back to what works for me, one of my drill presses. I keep Delrin stock on hand so I turned myself a couple soft-faced pieces over the years along with one of my "drilling aids" (piece of 2x4) I have laying around and viola, my drill press becomes an arbor press. I use a deburing tool to clean up the inside of the tube ends and this also creates a slight taper which aid with the parts aligning easier and more quickly for and during insertion. I also found that for me, maintaining parts alignment is easier in a vertical position than a horizontal one. Excuse my mess, been busy and haven't cleaned.
 

Attachments

  • PEN PRESS.jpg
    PEN PRESS.jpg
    400.9 KB · Views: 36
I found that I was cracking CA coatings. It was due to excess CA glue...removed it with sandpaper and moving the blank in a figure 8 pattern. Yes, not a lot of pressure to insert a nib or transmission, etc.
 
I have a similar style pen press and the dimple sometimes caused deformation (marks) on the nib/tips of my kits - especially visible with shiny finishes like chrome and gold. It also seems like it happened on Cigar style pens more than it did on other kits.

To fix it I did what Earl (greenacres2) suggested, I made sleeves out of HDPE to slip over the ends of the press. I did both ends, one side to eliminate the "dimple" and the other side to provide an HDPE surface to press against instead of the aluminum piston. I also made one with a 31/64" inch recess drilled into it to accommodate the rounded top on Sierra/Gatsby type pens to help hold things square while pressing. Here is a link to the thread "New UHMW Sleeves for my PSI Pen Assembly/Disassembly Press" that has some pictures.

Dave
 
I clean the tubes inside very well so I know that's not the problem. I go slow but the slimline tips still have a casualty now and then and I want to eliminate them entirely. I tried drilling out the hole more but ended up drilling through the cap. I'll try putting a small piece of wood over it to prevent the tip from going into the hole. Such a simple issue ruining work I put into pens.
 
I've done the same thing. I covered the end with a felt pad like you put on the legs of a chair. As has been suggested, go easy.
This is it👍
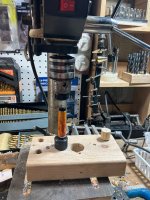
. The last pen I pressed the tip got slightly distorted...had to gently filed with a round file. Also the "cup" marred the finish. It's felt pad time.
 
Back
Top Bottom