Whoa, hold up there, partner ...
You said you got Harbor Freight tools ... I use those a lot, myself, and they're quite fine, though pretty dull right out of the box.
If you have a belt sander or a grinder of some type, touching up those edges will be your best investment in time. Getting yourself a sanding disc setup for your LATHE so that you can control the speed for putting the edges and finishing touches on your lathe chisels is an excellent idea. You can MAKE your own sanding discs - quite cheaply and they are very effective.
Get some metal nuts that fit your spindle arbor. Get some relatively flat material (countertop material that's being thrown out or off cuts ... particle board or MDF, perhaps some decent plywood). Double it up, using any decent wood glue or gorilla glue, perhaps epoxy. Drill a hole in that is large enough to sink the nut down into it (chisel out the corners). Make sure the hole is DEEP enough to clear the entire spindle thread. Epoxy the nut in place and let it cure. Once it's all set, put it on your lathe spindle, ensuring that the nut goes on far enough to lock against the spindle shoulder. If it doesn't, you didn't make the hole deep enough ... chisel it out and/or drill it out and try again. It's got to ride flush against the shoulder.
Once it's seated properly, get your tool rest set up safely and power on the lathe ... turn the outsides round and true up the face. Sand it down and finish it .... using a good CA finish helps, when working with bare wood. Use PSA discs or use some spray-on releasing adhesive on the back of the sandpaper you want to use and apply it. Repeat for as many grits as you want a dedicated wheel for, or just peel and swap sanding discs whenever you wish to change grits. (If using pre-finished countertop materials that have melamine on them, finishing isn't necessary ... the melamine releases PSA agents easily.)
When using these to sand/grind your lathe chisels ... pass your tool to the BACK OF THE WHEEL, so that the tool's cutting edge faces the same direction that the wheel is traveling. This ensures that you cannot catch the tool on the wheel or the paper, tearing it off and possibly causing injury.
Now .. as for where to get your sandpaper ... Harbor Freight has multipacks at a low price and they are of reasonable quality. In fact, I'ld go so far as to compare them to the 3M brand favorably, especially pricewise. You can get packs that start at around 220 grit and go up to 1500 grit (1 or 2 sheets of each).
Typically, when using sandpaper, you are only removing the marks left behind by the previous grit. The first grit you start with gets the heaviest use, as that one not only needs to remove all the tooling marks on the project, it also needs to reach your final ideal dimensions. The lowest grit you use most often will be the one you go through the most of ... Thus, if you plan to use 120 or 180 or 240 or something as your "starting grit" most often, buy yourself a full 10-sheet pack of it from Harbor Freight to start with. Everything else you use should only see light use.
To make it easier to use your sandpaper, you should prep it in strips or smaller pieces, so that you aren't tearing off irregular chunks all the time or folding and re-folding a big sheet so as not to waste it ... doing this is quite easy. Take an old hacksaw blade you don't need anymore and screw it down using the 2 mounting holes onto a flat board or a door frame or even a door ... a windowsill works, anyplace accessible. Leave it just loose enough to be able to slide a sheet of sandpaper under the blade ... using the toothed side of the blade, hold the paper in place by putting your hand on the blade and pressing it against the work surface, lining up the strip you want to take, take the corner of the paper with your free hand and tear a neat strip. Move the paper and work your way through it, making strips to use of whatever width you desire. It doesn't matter too much if your strips are a little angled, you're just making yourself smaller pieces to work with.
This is cheap and effective and dead simple, but once you decide you want to invest in "better quality" paper that lasts quite a bit longer, I suggest you save up your money and invest in some Mirka "Abranet". The variety pack offered by PSI is decent, though a little on the expensive side. It still works great. One multipack of that stuff lasts me through over 80 projects. The current offering at $19.99 sale (or around that price) from WoodCraft and some other vendors of the thin abranet variety pack rolls is an excellent deal.
The finish on the BACK of your lathe chisels is important. If it's rough, using the bevel may result in a rougher finish that you would expect or want. If it's very smooth, like mirror smooth, the bevel can assist in burnishing the wood fibers down, leaving a very smooth nearly finished surface. This doesn't accept a stain or finish especially well, however, so you'ld want to sand that off, but you could start with 400 grit or higher, rather than starting with 120 or 180. This saves you a lot of time, as well as money on sandpaper.
And finally, about finish sanding ... Many people have many different theories concerning the best sandpaper to end their project with. A lot of people STOP sanding at 220 or 240 grit and begin sealing and finishing their project right there. The higher grits are reserved for sanding the finish itself for the final shine, if at all.
Some people like to sand up to 400 grit, to further enhance the wood grain through their finish of choice, and again continue sanding after finishing to show off their beautiful wood grain.
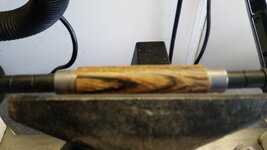
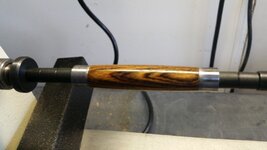
I've lately been sanding bare wood all the way up to 1000 grit, and then sealing and finishing my wood in CA (Harbor Freight brand superglue). I feel that this best shows off all the hidden features and highlights within the wood ... I then sand the CA finish (6 to 9 coats of it) from 1000 grit all the way up to 12,000 grit (wet sanding), and then polishing with Meguair's Plast-X and giving it a coat of Turtle Wax Hard Coat (you can get these or similar products at an auto parts store). The results I get look like I encased the wood in silky smooth crystal clear glass.
Not everybody likes that look ... some people think it's too artificial, some people want to be able to feel the wood grain, ect ...
You'll find what works best for YOU. I won't judge, but I may suggest alternative methods that may work better for you ... it's up to you to try them and see if it helps or not.
Just let me end by reiterating that last comment one more time ... YOU are the final judge of your work. Don't let anybody tell you that you are doing it WRONG. If it works for you, then keep doing it, as long as you are working safely and getting the job done.


