Vacuum before or after pour

Signed-In Members Don't See This Ad

micharms

Member
Joined
Nov 8, 2004
Messages
681
Location
Port Elgin, Ontario, Canada.
I'm going to try my hand at pouring some bottle stopper blanks this weekend. I want to get some swirl in the blanks by using 2 different colours. I am going to use pill bottles as my molds. Should I mix up the 2 different colours, add the MEK, put it under vacuum for a few minutes, then pour and swirl. Or mix let sit, pour and swirl, then vacuum, and then pressure. Maybe I'm making things too complicated for my self.

Thanks for any suggestions!
Michael
 
Signed-In Members Don't See This Ad
vacuuming before swirling won't gain you much because the mixing/swirling is where most of the air will be incorporated into the resin.

If I were doing it this is how I would do it: mix several cups with resin and different colors. When the colors are right, add mekp and mix. Vacuum to remove bubbles. Let sit until it just starts to show some signs of beginning to thicken. Pour and swirl gently so as to introduce the least amount of new air. Pressure until hard.

GK
 
I haven't found a need to use vacuum or pressure when doing color pours. I have found that the majority of bubbles are introduced into the resin when pouring it into the mixing container. Try poring the resin down the side (inside of course!) of the mixing container instead of directly into the bottom of the container and the resin itself. I use popcicle sticks to stir with and one doesn't need to whip the mixes, just gently stir. Once the colors and MEKP are mixed, with no waiting, I pour right into the mold(s).

This works for me . . .

2008-08-09_141325_HOMEFIRE2.jpg

2008-08-09_142534_HOMEFIRE1.jpg
 
Thanks Greg and Scott.

Greg - I had heard before that separation occurred if you didn't wait for things to thicken up. I gather from your response that you don't have that problem.

Scott - I like the idea of the cleaner to vibrate the bubbles out but of course HF want an arm and a leg to ship to Canada.

Today is experiment day so wish me luck.

Michael
 
First lesson learned

Although I thought I had mixing cups that wouldn't melt - guess I was wrong. Things were going okay and I used kind of a combination of the suggestions from above. Added pigment put a vacuum on it, took it out and added MEK, put it back under vacuum, opened up the pot and thankfully only one cup had melted enough to leak. At least I had everything in the pot inside a plastic bucket! Don't know what the blanks will look like when they come out from the pressure pot but I kinda started to freak with the mess.

My next lesson will come when I get a chance to turn these. The pigments I used (HotCoat Powder coat) seemed a bit stubborn to mix in. I don't know whether or not I'll have a lot of pigment pockets to deal with. Oh well I expected a learning curve so I'll keep on plugging away.

Michael
 
Last edited:
Greg:
Thanks, this is a great place to learn and everyone is so willing to share. I wondered about using glass and will from now on.

I'll be interested to see what the blanks look like and will post photos of the blanks and turned stoppers when they are done.

Michael
 
Thanks Greg and Scott.

Greg - I had heard before that separation occurred if you didn't wait for things to thicken up. I gather from your response that you don't have that problem.

Not quite sure what you mean about separation occuring. Like I said, I go from mixing to pouring with no significant waiting. Just long enough to mix the colored resin with the MEKP. And I am usually mixing 8 ounces per color at a time. I used to wait but getting the time period down pat is a tough one. And since I am presently only mixing at 3-5 drops per ounce, one might have to wait several hours prior to any gelling being noticed!!!:star:
 
I think it must depend on what you use to color. I did a 3 color pour of oranges (for my tennessean BIL) and it all blended together in one big mess; no separation left at all.

Cozee uses auto paint as his colorant. I used various stuff from Michael's and Woodcraft.

GK
 
I had read that someone tried to do a swirl of colours and had done the pour and swirl right after mixing. When they went back and checked the two colours had separated out into layers instead of staying swirled. I guess they had two different densities of material and that must have resulted in the separation.

Michael
 
I think it must depend on what you use to color. I did a 3 color pour of oranges (for my tennessean BIL) and it all blended together in one big mess; no separation left at all.

Cozee uses auto paint as his colorant. I used various stuff from Michael's and Woodcraft.

GK

I have been experimenting with the pigments from Mr. Fiberglass and have seen some blending but that is due to the pouring technique and the use of less MEKP. I feel that more importantly than the pigments, I use a different method to obtain my swirls and feel this not only allows swirls like no other but also eliminates the stirring after the pour. Stirring (or plunging) after the pour would encourage blending of the individual colors just as it does when adding the pigments to the resin and aslo the MEKP to the mix.

I do believe I will be sticking with the automotive paints as I prefer the overall end results better.
 
Last edited:
Am I being impatient?

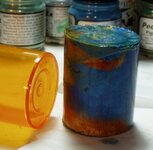
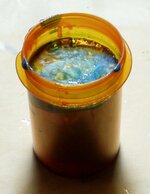
I used pill bottles as molds and even sprayed them with mold release but the blanks won't come out without breaking the pill bottles. Am I just rushing things (I poured these at least 24 hours ago)? Maybe I'm not using enough MEK since the outside of the blanks still seem tacky.

Michael
 
If they are still tacky, you could heat them up a bit to help the cure out. I place my blanks in a hot box (old fridge with a 100 watt bulb controlled by a rheostat) at a desired temp for the cure I want. A 100w bulb burning at full strength can get my box up to around 130F on the shelf the bulb is above. Lower shelves have a lower temp with the bottom still around 115F -120F.

If you still have problems getting them out, try putting them into the freezer till they are chilled good. Also, you could try drilling a small hole in the bottom of the bottle and using a bit of air to help get the blank out of the mold.

What is the ambient air temp? The colder the temps the more the MEKP you'll need or a hot box to help them set up.
 
Temperature here was in the 80's. I did actually heat them up in a small convection oven we no longer use and then did put them in the freezer. I guess I'll have to go with the hole in the bottom next.

Michael
 
Temperature here was in the 80's. I did actually heat them up in a small convection oven we no longer use and then did put them in the freezer. I guess I'll have to go with the hole in the bottom next.

Michael

The PR should shrink some from the sides. Give the pill bottle a squeeze and kinda roll it. You should hear and feel it break free from the sides. After that just upend it and tap on your table or bench and it should pop out. If in doubt give a shot of air down one of the sides and it should come shooting out. You might want to have a catcher handy.
 

Attachments

  • Bottle stopper cast in 30 dram pill bottle 2.jpg
    Bottle stopper cast in 30 dram pill bottle 2.jpg
    60.1 KB · Views: 112
  • Bottle stopper cast in 30 dram pill bottle out of the bottle.jpg
    Bottle stopper cast in 30 dram pill bottle out of the bottle.jpg
    79.5 KB · Views: 125
Glass Scratcher:
I wish things worked the way you described. I even have one pill bottle that I've broken up to get at the blank that still has some material stuck to the side. I have squeezed and rolled and thrown in a few curses along the way. I'm going to try some more casting this weekend and try and put to use everyone's suggestions here and see what I get. The stoppers I have turned look pretty good to me, so despite the problems I'm happy.

Michael
 
Go to Tap Plastics and buy a bottle of mold release spray. It should fix you right up.
(provided you have a tap plastics near you)
 
Greg:
I used the mold release spray from Michaels. I'll try using more when I cast tomorrow. Unfortunately I don't have access to the variety of places for supplies that you folks have. I'll keep on trying though.

Michael
 
Is that the little pump bottle of mold release made by Castin'Craft? You would probably be better off using Pam cooking spray in the pill bottles. You could use a Carnuba based car wax on your pill bottles if you have some laying about. Just apply several coats and buff it in.
 
Yup that's what I was using. Also didn't help that I didn't read the directions before using it. Hmmmmm there goes that guy thing again. I'll experiment today with the ideas you've given me and figure out which one works best.

Thanks
Michael
 
1 1/2" pvc cut to length and use good ol' duct tape to seal the end and make sure it is sealed well!!!
 
Is there a difference in pvc pipe? A flyer is advertising something it calls SCH 40 pvc pipe. I want to make sure if I spend some more money on this venture that things are going to work.

I think I've pretty well struck out on the pill bottle mold thing. Tried Pam this weekend and the casts still aren't coming out even with force. I haven't tried the carnauba wax idea since I've run out of pill bottles.

Michael
 
The SCH or schedule, for the layman deals with the wall thickness. SCH 40 1/2" PVC will yield a blank of smaller diameter than one from a 1/2" SCH 20, which is what I use for the most part. I get 10' sticks of SCH 20 at Menard's for $.99 each and cut up you'll end up with around 22 5 1/4" long molds.
 
Schedule 20 and Schedule 40 are the same material, just different thickness and therefore different size "blank" will come out. Schedule 80 is a different material in that it is grey rather than white.
 
Okay. I have my pvc and got it cut to length at school today. I'm going to try a couple of different things with this and hope I have better luck. Even better is that Michaels just sent an email out with a 50% off coupon - 1 coupon per day. Hopefully i can get my son to pick up a few cans for me as I am no where near a Michaels.

Michael (Hmmmmm seems like I should be able to go to the store and get a discount just for having that name - think I should give it a try?:biggrin:
 
I like pvc! I tried some new casts today and just went to check on them. I used a cap to close off one mold and then did two with duct tape sealing them. I pulled the cap off the one and went to put it down and the next thing I knew the blank was on the floor. The other two I had to push a bit - don't really understand why since all three had been sprayed with pam - but they came out pretty easily also. So tomorrow I'll get to see how my new swirling technique worked.

Michael
 
Back
Top Bottom