robutacion
Member
Hi peoples,
Warning, it will be done in various steps/posts so it will be LONG...!:biggrin:
This will be a thread where I will point out and exemplify some of the problems and situations that some may be confronted with when starting stabilising. What you use and how you use it, is detrimental to the success of the end result and also the minimisation of problems that are typical/associated with, in this "new" process now reachable to anyone...!
The varieties of sizes and shapes of stabilisation chambers and pumps, is quite overwhelming however, I strongly recommend Curtis (Turn Tex) small and medium vacuum chambers, they are the best out there for small amounts users. Things get a little more complicated when you want to stabilised also pieces that are quite large compared to a average pen blank, and I'm talking about round bowl blanks of 12" diameter and less.
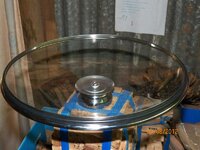
I discussed the building of such large chamber with Curtis, using his thickest acrylics but, it became obvious that, it wouldn't be save due to the combination of a few important factors so, I opted to try a combination of what I saw already available on eBay (cooking pot with a clear acrylic lid) and my believe that, a quality stainless steel pot with the handles welded and not pinned (leaking) and its factory glass lid, would be strong enough to do the job.
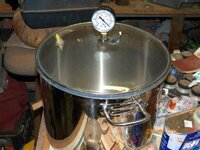
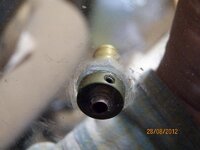
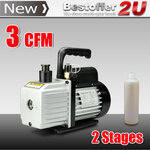
Every person that I shared my idea, did not believe the factory lid glass with withstand the pressures, and that would be almost impossible to seal the lid however, I prove everyone wrong when I purchased a quality 16 lt capacity stainless pot ($130.00), made up an experimental gasket that worked but didn't last, got all the accessories from Curtis, the very same ones he uses on his chambers, got myself a so so 2 stage pump ($200), a few extra accessories from here and there and I was ready to test it.
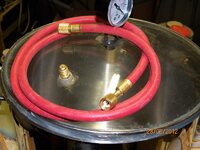
I knew that was a good possibility that the glass lid would explode or shatter, whatever would happen, if it went wrong, the glass would be going innards as it as under "suction" so, and to prevent any damage inside the pot, I put an old towel inside.
I had also installed/glued a special pressure sensor connected to my laptop, safely positioned close but out of any boom effect. These sensor are very sensitive and read any expansion or contraction of the material they are glued to but, the readings were (0) as the test went fine and nothing happened I mean, nothing bad happen.
Here is actually the test I done, one head cam and another on a tripod registering that moment, I actually had some money on it/bets, I won, obviously...! I set it up long enough to reach full vacuum and then, let it go for a few more minutes and see it the lid would fail but it never did.
This video and the next were done at the same time, but from 2 different cameras, this one was on a head cam, while I was preparing everything but some how stop recording without warning, the other was on the tripod...!
About 3 minutes...!:frown:
http://www.youtube.com/watch?v=gUXwPMtE2_
Very repetitive clip, 10 minutes of nothing happening but, it could have...!:wink::biggrin:
http://www.youtube.com/watch?v=dhjb63Kbxdk
Have you noticed the silicone gasket I make to separate on the right end side, as it reached full vacuum...??? yeah, that was the end of that idea.
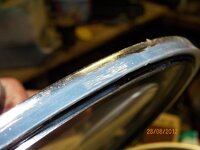
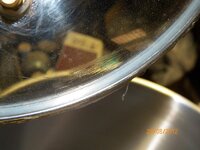
I tried a few other materials but none did last until I though of an O'ring, that wasn't going to be easy but, I found a place in Adelaide that sell big O'rings so I took the pot and lid to try one that could look suitable to the lid edge and the pot top ring...!
A $20.00 O'ring that took me for an almost 4 hour drive to go and get it, still was no guarantee that would work and when I got home and installed it and tried, the O'ring was not thick enough, in compression would squash far to much and than would be sucked in slightly and lose the seal.
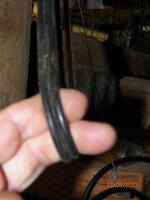
I proceeded to glue the O'ring to the lid but, still not right, I just could get it to seal. Decided to ring this time and order one more the same and another same diameter but slightly thicker, there was another $50.00 gone, as the first O'ring had to be destroyed to be removed from the lid.
This time, as spend some time looking at the way the lid and pot ring would touch/form I though that gluing the 2 different size O'rings in a certain way, I could follow the contour of the gap in between lid and pot so I glue them first and then glued it to the lid using the black rubberised CA, it did work but within a couple of weeks, wouldn't seal as the O'rings become too hard, part from the glue and the other part from the juice that I found out, hardens certain rubbers...!
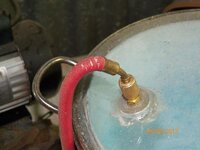
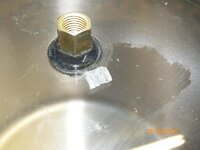
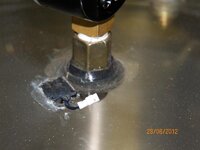
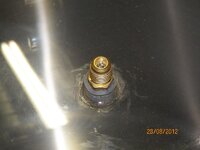
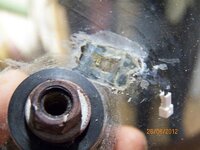
By then, all the fittings I had on the lid (gauge, air coupling) started leaking also, I had used industrial grade clear silicone but it didn't last...!
So, new plastic washers made, clean all that mess left and start again, this time I had some clear liquid rubber CA that I purchased from Monty just before he closed shop. Got that in and so far, no leaks, not pretty but effective...!
To be continued...!
Cheers
George
Warning, it will be done in various steps/posts so it will be LONG...!:biggrin:
This will be a thread where I will point out and exemplify some of the problems and situations that some may be confronted with when starting stabilising. What you use and how you use it, is detrimental to the success of the end result and also the minimisation of problems that are typical/associated with, in this "new" process now reachable to anyone...!
The varieties of sizes and shapes of stabilisation chambers and pumps, is quite overwhelming however, I strongly recommend Curtis (Turn Tex) small and medium vacuum chambers, they are the best out there for small amounts users. Things get a little more complicated when you want to stabilised also pieces that are quite large compared to a average pen blank, and I'm talking about round bowl blanks of 12" diameter and less.
I discussed the building of such large chamber with Curtis, using his thickest acrylics but, it became obvious that, it wouldn't be save due to the combination of a few important factors so, I opted to try a combination of what I saw already available on eBay (cooking pot with a clear acrylic lid) and my believe that, a quality stainless steel pot with the handles welded and not pinned (leaking) and its factory glass lid, would be strong enough to do the job.


Every person that I shared my idea, did not believe the factory lid glass with withstand the pressures, and that would be almost impossible to seal the lid however, I prove everyone wrong when I purchased a quality 16 lt capacity stainless pot ($130.00), made up an experimental gasket that worked but didn't last, got all the accessories from Curtis, the very same ones he uses on his chambers, got myself a so so 2 stage pump ($200), a few extra accessories from here and there and I was ready to test it.

I knew that was a good possibility that the glass lid would explode or shatter, whatever would happen, if it went wrong, the glass would be going innards as it as under "suction" so, and to prevent any damage inside the pot, I put an old towel inside.
I had also installed/glued a special pressure sensor connected to my laptop, safely positioned close but out of any boom effect. These sensor are very sensitive and read any expansion or contraction of the material they are glued to but, the readings were (0) as the test went fine and nothing happened I mean, nothing bad happen.
Here is actually the test I done, one head cam and another on a tripod registering that moment, I actually had some money on it/bets, I won, obviously...! I set it up long enough to reach full vacuum and then, let it go for a few more minutes and see it the lid would fail but it never did.
This video and the next were done at the same time, but from 2 different cameras, this one was on a head cam, while I was preparing everything but some how stop recording without warning, the other was on the tripod...!
About 3 minutes...!:frown:
http://www.youtube.com/watch?v=gUXwPMtE2_
Very repetitive clip, 10 minutes of nothing happening but, it could have...!:wink::biggrin:
http://www.youtube.com/watch?v=dhjb63Kbxdk
Have you noticed the silicone gasket I make to separate on the right end side, as it reached full vacuum...??? yeah, that was the end of that idea.


I tried a few other materials but none did last until I though of an O'ring, that wasn't going to be easy but, I found a place in Adelaide that sell big O'rings so I took the pot and lid to try one that could look suitable to the lid edge and the pot top ring...!
A $20.00 O'ring that took me for an almost 4 hour drive to go and get it, still was no guarantee that would work and when I got home and installed it and tried, the O'ring was not thick enough, in compression would squash far to much and than would be sucked in slightly and lose the seal.

I proceeded to glue the O'ring to the lid but, still not right, I just could get it to seal. Decided to ring this time and order one more the same and another same diameter but slightly thicker, there was another $50.00 gone, as the first O'ring had to be destroyed to be removed from the lid.
This time, as spend some time looking at the way the lid and pot ring would touch/form I though that gluing the 2 different size O'rings in a certain way, I could follow the contour of the gap in between lid and pot so I glue them first and then glued it to the lid using the black rubberised CA, it did work but within a couple of weeks, wouldn't seal as the O'rings become too hard, part from the glue and the other part from the juice that I found out, hardens certain rubbers...!

By then, all the fittings I had on the lid (gauge, air coupling) started leaking also, I had used industrial grade clear silicone but it didn't last...!
So, new plastic washers made, clean all that mess left and start again, this time I had some clear liquid rubber CA that I purchased from Monty just before he closed shop. Got that in and so far, no leaks, not pretty but effective...!
To be continued...!
Cheers
George

