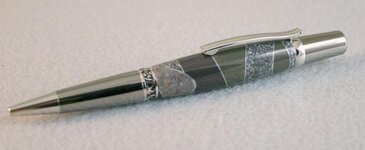
Some new segmented blanks

Signed-In Members Don't See This Ad

mpex

Member
Joined
Nov 18, 2012
Messages
152
Location
Columbus, Ohio
Just finished my first blank jig last night. Here are a couple segments I put together. I plan on turning them tonight. And of course a few questions.

Note that a couple of them are not straight. I'm not sure I'm doing the best job of gluing, taping and clamping.

This is what I did,
1.Cut segments as exactly as I could.
2.Layed down 3 pieces of Duct tape next to each other on a table.
3.One by one, glued the pieces together. Tried to keep them as lined up as possible. On some I used a straight piece of wood behind them to try to keep them straight.
4.Once all segments have been assembled, wrap the duct tape around the other sides.
5.Clamp together.

Questions:
1.The clamp step is when they started to slip out of place. Not sure what to do about that. I just clamped them lightly. Not sure if there will be any gaps as a result. Any advice on how to do this better?
2.Do I need to wait a full 24 hours before cutting and turning? Is 15-20 hours ok?

Thanks!
 

Attachments

  • segments2web.jpg
    segments2web.jpg
    52.6 KB · Views: 1,180
  • segment1web.jpg
    segment1web.jpg
    36.9 KB · Views: 2,491
Signed-In Members Don't See This Ad
When I segment that type of blank I try to keep all the pieces the same size such as blank #2 and #4. That way I can use two pieces of small corner molding on opposite edges to hold everything straight while clamping. As far as the glue time goes I would go by the directions on the bottle. Remember theres a difference between set and cure time. Good luck. Kenny
 
There you go. Now you are getting a taste of segmenting. I have to step out for a few hours and you have alot of questions and yes there are things you can do to help in the future with your problems and a few suggestions, so I will post my opinions when I get back. In the mean time I am sure others will be here to post some help. One thing yes let the blanks cure no matter what glue you used.
 
Looks great.
Don't know if it will help, but for stacking small pieces on top of each other to get rings, I drill the fairly long (depends on pen...and number of rings)blanks first. Then cut into 1/8" or 1/4" square pieces. I stack them (sand the flats as necessary) and glue them on the tube at the same time. Clamp lengthwise. Trim/square the ends. Turn.

Drilling first eliminates the pain of keeping a pile of little square pieces straight while gluing into a pen "blank" (they're already centered on the tube). Of course, you don't need to drill through glue either.
Works for me. Have fun.
 
Looks great.
Don't know if it will help, but for stacking small pieces on top of each other to get rings, I drill the fairly long (depends on pen...and number of rings)blanks first.

A typical blank for me is 5" long. How would I drill through that? Do I need a longer drill bit?
 
Mostly anymore, I "build" the blank as I go....like one or two segments at a time...but I have done some similar to yours only I split the blank and do each section separately. I had some success using a wood vise and a narrow clamp.

I used a 7" wood vise with a trimmed down piece of the gum block to 7/8 sq (the used to clean up sanders), then glued the blank together, wrapped it in wax paper, out the gum block below it, LOOSELY closed up the vise and used a narrowed clamp to hold it all together. It takes 3 or 4 hands, but worked ok.... The gum block compressed with the vise pressure and the sides of the vise kept in in register, then the clamp kept it tight.

Just my .02
 
Sometimes you have to use 2 clamps. One to hold the piece down and one to hold it together. It is easier if all the pieces are the same size. Sometimes it also helps to clamp a board to the table and use it to clamp against.
 
Hello Moishe

I looked at your blanks and each one can be drilled ahead of time and assembled on the tube. This makes for easy alignment and easy gluing and clamping. Of course you need to do all the dry fitting before you start the gluing. You also do not have any ryme or reason to your glueup. Need to do a better job of laying out the blank and I will explain abit.

To start I suggest like someone else mentioned to sqaure your stock and always work with uniform size pieces. Next you need to be able to cut accurate segments with whatever tool you choose (tablesaw, bandsaw, or mitersaw) You need to be able to sand the ends abit to remove tool marks and give a tight joint. I usually have a piece of sandpaper glued to a piece of MDF or piece of glass for a flat surface. Just need to run the piece over a couple times without tilting. Very easy to do. You need the tubes from the kit you are making. You need to be able to drill down the center of the squared blank you milled and that is done by means mentioned here many times (drill press or lathe) Up to you on that one. No need to have any longer bits than what you have. You can always drill to a certain point, cut some segments off and then continue drilling to make enough segments for the tube size. Have a plan of what you want the blank to look like and layout the segments so they match the plan which may mean calculating your size of cuts better. Uniformity is always eye pleasing. Lining up top and bottom is a whole other set of instructions.

Now if doing flat pieces such as your first blank that is the most basic simple form of segmenting. (Again this is one of those blanks that can be assembled and drilled latter. I keep going back to this because you will eventually start to see why when doing a few of these. There is no special effects you are after) The big key on these type blanks again is the layout and uniformity. You want the same amount material of whatever color on each end so no haphazard size blanks unless that is the look you are going for and I highly suggest don't go there.

The same applies for the angle pieces. Layout the tubes and size the pieces according to the plan you drew up. Again cutting each piece accurately after it is drilled is critical. Remember the 180degree rule to get a piece to stand straight. What you cut on one piece you need the same cut on the next unless a spacer is used for effect between them just mounted opposite of each other. Hope that makes sense. Don't forget to sand tool marks off the ends. As you look at your center blanks you see they have the leaning tower of Pizza look. Because you did not accurately cut each piece the same and line them up properly. One piece is sticking way too forward of the last piece and so forth. You eliminate this with square blanks and predrilled holes.

What I would do with each tube is get my pieces cut sanded and dry fitted, making sure the last two end pieces are flat and square to the tube and sticking proud of the tube about 1/16 to 1/8". What this does is allow you to center your tube with the same amount of material on each end and use a bar clamp to clamp all together without any shifting. Now when ready to glue you do not have to rush because you are only gluing a small amount of pieces for each tube as opposed to one long length to make up 2 tubes. See the advantage.??? I like to use Epoxy but the glue of your choice. I would not use thin CA. You are both gluing the segments together and gluing them to the tube.

Let these set overnight. Do not be in a hurry. You spent so much time making the blank why rush it. True up the ends and turn accordingly. I hope this helps in some way. I am sure I left out a few things but ask questions.

One other trick if you are building a blank and planning on drilling later there is no reason why you ahve to glue it all together in one shot. Like in segmenting platters and bowls and other vessels they are done in stages. I like to use a piece of angled aluminum which you can get from Home Depot and set my pieces against that with a piece of wax paper attached to it. I then can clamp the blank pieces to the angle and also to each other as I see fit. I use this method all the time with Celtic Knots. Good luck and happy segmenting.


By the way, never use duct tape for holding your pieces. Painter's tape, blue or green or purple.
 
Last edited:
Just finished my first blank jig last night. Here are a couple segments I put together. I plan on turning them tonight. And of course a few questions.

Note that a couple of them are not straight. I'm not sure I'm doing the best job of gluing, taping and clamping.

This is what I did,
1.Cut segments as exactly as I could.
2.Layed down 3 pieces of Duct tape next to each other on a table.
3.One by one, glued the pieces together. Tried to keep them as lined up as possible. On some I used a straight piece of wood behind them to try to keep them straight.
4.Once all segments have been assembled, wrap the duct tape around the other sides.
5.Clamp together.

Questions:
1.The clamp step is when they started to slip out of place. Not sure what to do about that. I just clamped them lightly. Not sure if there will be any gaps as a result. Any advice on how to do this better?
2.Do I need to wait a full 24 hours before cutting and turning? Is 15-20 hours ok?

Thanks!


Good start.

I have some segmenting I started again working on last night.

My biggest problem is getting the edges flat/smooth enough for glue up.

Can't wait to see the results of your blanks.

Larry
 
I use a 1" x 1" aluminum angle that is about 3 feet long. But it doesn't need to be that long.
I use it to keep things aligned at least on 2 sides. I often glue up a 3-piece section this way and using smaller clamps on each section helps maintain the straightness. I think that if the angle on your pieces were off just a bit them each piece would add to the error and you would end up with an arc. Do a dry fit first and if you see it forming an arc, adjust the angle ever so slightly to compensate.
 
My biggest problem is getting the edges flat/smooth enough for glue up.

The edges I'm getting are incredibly flat and smooth. I think it's just the great brand new blade I got. Forest wood worker II, thin kerf, 48 tooth w/stabilizer. From what I can tell they come out glue ready (but we will see about that when I turn them I guess.)
 
Guys, thanks so much for the post. Got a LOT of things in there I will try on my next round. Might have a chance to work on some tomorrow.
 
I only use CA when I make my blanks and haven't had a problem yet.
If you keep your surfaces smooth and clean CA should work fine.
I have used CA on wood, corian and corian with aluminum.

IMG_5774-001.jpgIMG_5778-001.jpgIMG_5789-001.jpg

I quess I just hate waiting to to see how they turn out.

Mike
 
My biggest problem is getting the edges flat/smooth enough for glue up.

The edges I'm getting are incredibly flat and smooth. I think it's just the great brand new blade I got. Forest wood worker II, thin kerf, 48 tooth w/stabilizer. From what I can tell they come out glue ready (but we will see about that when I turn them I guess.)


When I'm cutting small pieces I don't usually had a problem with keeping the edges flat for glue up. I'm having issues when doing the random segmenting method found in the tutorials. I think instead of cutting them on a bandsaw (which my blade broke two days ago :( ) and sanding on the 8" disc sander I may create another sled for the table saw and cut them that way.
 
I usually drill my hole first. I've also drilled a smaller hole (like 1/8")- and used a piece of dowel to stack and glue my segments on it. I've made it as short or as long as I wanted. This allows redrilling for whatever size tube - and also allows for interesting effects - drilling off-center or at an angle.

>>>Rod<<<
 
Back
Top Bottom