egnald
Member
Hello all and Greetings from Nebraska!
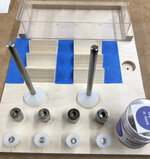
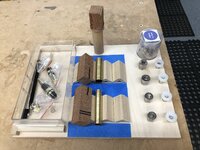
This is a handy little gadget I made out of some bits of scrap Baltic Birch Plywood, a few pieces of outside corner molding, and some 1/4-inch shelf pins. The pictures pretty much show how it was made and what the purpose is.
The blanks overhang the 90-degree holders so that any glue, paint, or anything else that drips out of them drips down onto a layer of blue masking tape that can be replaced when it gets too messed up. The shelf pins hold bushings and a set of non-stick bushings. I always have the nib end on the left and the cap end on the right, so the bushings, blanks, and tubes are lined up in that fashion. There is a spot to hold my little bushing jar and a 3/4-inch spot to hold my custom finial glue up. The holes for them were made with Forstner bits. There is also a spot built up with some bits of scrap that holds in a small plastic drawer converted to a parts tray for holding the bits and pieces of the kit until assembly. (Note: for custom finials I hot melt glue the blank cutoff to a 3/4-inch dowel and use a collet chuck for turning).
I use this to keep everything together and organized through all of the processes.
Regards,
Dave
Here are the thumbnail pictures of it Unloaded:
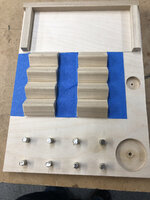
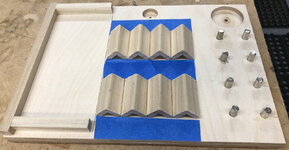
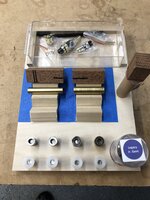
And Loaded with a Jr. Gent and Lacewood Blank, ready to be drilled:
This is a handy little gadget I made out of some bits of scrap Baltic Birch Plywood, a few pieces of outside corner molding, and some 1/4-inch shelf pins. The pictures pretty much show how it was made and what the purpose is.
The blanks overhang the 90-degree holders so that any glue, paint, or anything else that drips out of them drips down onto a layer of blue masking tape that can be replaced when it gets too messed up. The shelf pins hold bushings and a set of non-stick bushings. I always have the nib end on the left and the cap end on the right, so the bushings, blanks, and tubes are lined up in that fashion. There is a spot to hold my little bushing jar and a 3/4-inch spot to hold my custom finial glue up. The holes for them were made with Forstner bits. There is also a spot built up with some bits of scrap that holds in a small plastic drawer converted to a parts tray for holding the bits and pieces of the kit until assembly. (Note: for custom finials I hot melt glue the blank cutoff to a 3/4-inch dowel and use a collet chuck for turning).
I use this to keep everything together and organized through all of the processes.
Regards,
Dave
Here are the thumbnail pictures of it Unloaded:


And Loaded with a Jr. Gent and Lacewood Blank, ready to be drilled:


