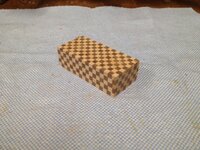
Very nice Tom.
The "cut and flip" is well accepted for many designs. What you ended up with was excellent.
Now... Consider shorter segments

.
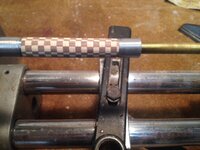
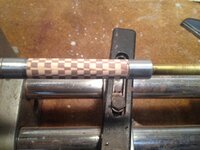
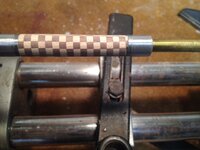
So, I took Mark's suggestion and continued to cut, flip and re-glue until I had much smaller segments. I was pretty excited about the look of my finished blank however I suppose I wouldn't learn anything if it had turned perfectly too. Put it on the lathe tonight and...... EPIC FAIL

.
I'm not real sure why it turned out like this. It looks like I drilled straight as the lines seem to be straight however the segments are not equal all the way around the blank. I'm going to have to study this one some more to understand what happened. If you have a suggestion....I would love to hear it. As it stands now...this is not a keeper.
Mark...thank you for the "push" to experiment more. I'll get better at this I hope.
Keep it FUN Tom, as you are going down a deep, but enjoyable "Rabbit-Hole."
The third picture from the left looks well formed, except the right side is already indicating a slight taper in the blank? Not sure if this mattered or not.
For the final pattern/design to have similar squares, your end-blank center point is crucial. Not the sides, the ends of the blanks. I am not sure if you did this and I am out of line, but consider the ends rather than the sides.
Most importantly, save this, write notes, you may be 80% where you want to be, next time 88%, then 94%... I (you) learn much from our failures. When we get to 95% success, we still view it as "Not perfect", but others will look at it and say... "What error, give it to me!"
I usually get through 3-4 trials before I get to a "Low quality acceptable" segmented blank.
Last random thought; If the turned segments were not equal as planned, the hole was not drilled straight, or the segments were not equal on all sides in the glue-up. Other with more segmenting experience will hopefully offer an opinion.
But, every failure will get you closer to what you envision!
Well done!

