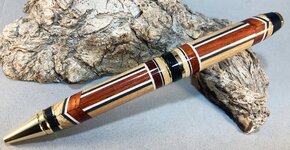
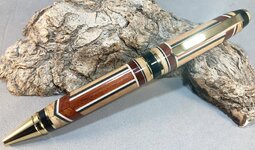
Resuming segmenting after a couple of years of doing other things...

Signed-In Members Don't See This Ad
See more from KMCloonan

KMCloonan

Member
Joined
Jun 13, 2017
Messages
1,691
Location
Round Lake, Illinois
During Covid, with nothing else to do, I practically lived on this site, absorbing a lot of the library topics, trying pen making techniques I had never done before. Those were heady times (except for the Covid part). I did a lot of segmenting in a short period of time and usually was thrilled with the results. Then in 2022 I began immersing myself into casting and hybrid blank making, and pretty much abandoned segmenting for a couple years.

Earlier this year, at the Midwest Penturners Gathering, I was fortunate to receive 2 large flat rate boxes of segmenting materials (veneers, thinly sliced woods, etc.) from Mark James.

I just recently dug into those boxes and started segmenting again but was dismayed that, during Covid, I took zero notes of how I made the various segmented pens I had made. All I have are pictures of the pens I made, and I'm scratching my head wondering "how the heck did I make that?" I am still relearning how to do various segmenting styles. I liken it to being a runner (of which I am not), who stops running for a while - restarting is always challenging, until you are back in shape.

The upside is that I am now taking notes/sketches/pictures as I make segmented pens so I can refer to them in the future.

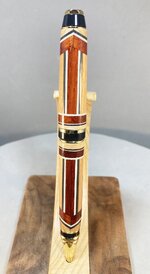
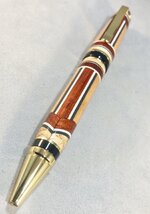
Here's my first pen using Mark James' materials (Padauk, Beech (I think), and oak, with Vulcanized Paperboard dividers).
011.JPG 006.JPG 007.JPG 005.JPG 003.JPG

Mark James, thank you once again for your generosity! It will take me years to work my way through all the materials you gave me, and I look forward to every pen I make with the materials!
 
Signed-In Members Don't See This Ad
That came out very nice and looks like you did not lose your touch. I can relate to what you are saying though. I had made some small boxes and also birdhouses years ago and want to get back to it this winter. But man I am going to have to teach myself all over again. I too did not take real good notes and what I have I do not understand. Go figure. I hope I can do half as good as you.
 
During Covid, with nothing else to do, I practically lived on this site, absorbing a lot of the library topics, trying pen making techniques I had never done before. Those were heady times (except for the Covid part). I did a lot of segmenting in a short period of time and usually was thrilled with the results. Then in 2022 I began immersing myself into casting and hybrid blank making, and pretty much abandoned segmenting for a couple years.

Earlier this year, at the Midwest Penturners Gathering, I was fortunate to receive 2 large flat rate boxes of segmenting materials (veneers, thinly sliced woods, etc.) from Mark James.

I just recently dug into those boxes and started segmenting again but was dismayed that, during Covid, I took zero notes of how I made the various segmented pens I had made. All I have are pictures of the pens I made, and I'm scratching my head wondering "how the heck did I make that?" I am still relearning how to do various segmenting styles. I liken it to being a runner (of which I am not), who stops running for a while - restarting is always challenging, until you are back in shape.

The upside is that I am now taking notes/sketches/pictures as I make segmented pens so I can refer to them in the future.

Here's my first pen using Mark James' materials (Padauk, Beech (I think), and oak, with Vulcanized Paperboard dividers).
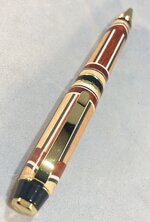
View attachment 379628 View attachment 379626 View attachment 379627 View attachment 379625 View attachment 379624

Mark James, thank you once again for your generosity! It will take me years to work my way through all the materials you gave me, and I look forward to every pen I make with the materials!
Very nice design and well executed.
 
Great looking work. Mind sharing your technique for drilling your blanks to ensure they are dead centered
That's a great question, and one I am still working on.

Typically, you need to make sure that your blank is as square as possible. When gluing multiple layers of materials, this can be a challenge. I use a simple fixture to line up the materials, apply the glue to each layer, then clamp, ensuring that none of the layers slid sideways (if they do, you need to trim them flush later, so they don't protrude.)

Once the blank is dried and squared up if needed, I mount it in my pen chuck. I just check to make sure that all 4 corners of the blank are held tightly by the pen jaws. Sometimes there is still a bit of an angle that you can see (it looks like the blank is not parallel with the lathe ways). I loosen and retighten the blank until it looks level (I just eyeball it).

When it comes to drilling, I usually use a short stubby center drill to start the drill hole - I slide the tail stock forward until the tip of the drill is almost touching the blank, then I lock the tail stock and slowly advance the drill, ensuring it enters the blank as straight as possible. Once I have the starter hole made, I swap out the center drill for whatever drill bit size I need. I try to avoid brad point bits, as those can wander off center, and follow the grain, in which case you can end up with an angled hole. I use pretty slow drilling speed (~250-350rpm). This helps minimize the heat that is generated. I also back out the drill bit often to clear the chips and clean out the drill bit flutes. I always put a sharpie mark on my drill bit that corresponds to the length of the blank - this allows me to creep up on the last few millimeters of drilling, so I don't blow out the back of the blank.

Even with all of the above, I still sometimes end up with an angled hole, especially if the grain in a blank is not aligned with the center axis of the blank (the bit tries to follow the grain). The angled hole is not usually a problem with a plain wood or resin blank, but can be a real problem with a segmented blank.

Here is a great example I posted in Sept.:
 
It is with great joy to see my materials being used in such an artistic way. Happily, my entire shop has been given away and is being used by beginners to experienced craftsman. I couldn't be more pleased. Well done Kevin 👏 👏 👏 👏 .
 
That's a great question, and one I am still working on.
Kevin -Thx for the feedback, much appreciated. i'm working on some segmented blanks with some aluminum spacers. the blanks are far from square, and im able to mount the blanks as square as I can, and then turn them round, followed by drilling. i'm at least starting the bit dead center, it's the different materials, and the bits tendency to follow the path of least resistance i'm fighting with. I like your idea of slower speed drilling, I was about 2x that speed. Given the round blank before drilling, I may try drilling from both ends as long as I can get it aligned in the chuck. Here's a picture pre and post rounding, I do trim off the excess aluminum before turning to reduce the spinning hazard
 

Attachments

  • 20241117_163115 (002).jpg
    20241117_163115 (002).jpg
    259 KB · Views: 8
Back
Top Bottom