penicillin
Member
- Joined
- Feb 27, 2019
- Messages
- 1,036
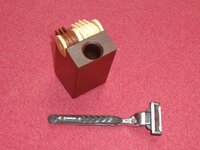
One of our children asked for a razor stand to hold a standard Mach III razor, but with a built-in shave counter. The blades are supposed to last 15 shaves, hence the counter. The requestor didn't care how the counter was designed, as long as it could count to 15. They even suggested binary as a possible design - four counters representing 1, 2, 4, and 8. My design uses four "ones" counters and three "fives" counters, to yield a range from 0-19.
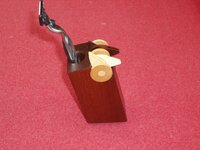
The project is made from ipe and maple. The ipe wood was very dense and challenging to work. I created a "wide-gap" box joint jig and used a flat-top-grind (FTG) blade on the table saw to create the counter tabs. The predrilled counter tabs were separated using a Japanese hand saw, then shaped with a belt/disc sander. The maple discs were turned on the lathe to match the Forstner-drilled slot. The depth of the hole was chosen so that the razor balance point is 1/4 inch below the top of the hole. The hole is positioned as designed, to keep the razor close to the front edge, away from the counter tabs. The base was cut at an 18 degree angle using a table saw sled, to tilt the razor hole for convenience and to ensure that the counter tabs stayed in their forward position ... but not too much tilt. You don't want "tippy." The density of the ipe helps. The side edges and razor hole were softened with a chamfer bit on a router table. The order of glue up and finishing was tricky. The finish is Tried and True Varnish Oil (2 coats), Tried and True Original (1 coat) and a final coat of Renaissance Wax. The finished piece feels heavy, smooth, and warm.
Photos:
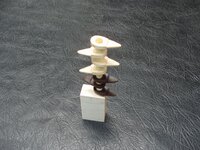
* Finishing stand for counter tabs
* Razor stand
* Razor stand with razor
Not shown:
* Four shallow recesses in the bottom (Forstner bit) to fit 1/2 inch round flat clear bumper pads. The bumper pads serve as feet to keep the piece raised above a wet countertop. The recesses were drilled so that the bumper pads would be confined and less likely to peel off or get "unstuck." The design concept was good, but it was a challenge to clamp the workpiece with a level bottom so I could drill perfect, square, matching 1/32 inch deep holes. The ipe end grain was so hard that the workpiece rotated in the handscrew clamp as I pulled the drill press handle; I had to provide support under the workpiece to deal with the issue. The bumper pads are a perfect match - no wobble or tilt.
* Discarded counter tabs that failed for one reason or another. I made a few extras, just in case, and it was a good idea. :-(


