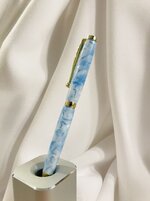
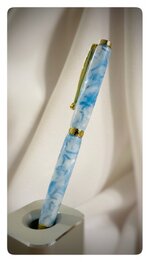
Pen Photography Myths

Signed-In Members Don't See This Ad

Sylvanite

Member
Joined
Jul 18, 2006
Messages
3,120
Location
Hillsborough, North Carolina, USA.
I've seen a lot of good pen photography advice given on this forum. I have learned a lot from others, and passed along several tips myself. Unfortunately, I've also seen a lot of well-intentioned but misapplied, misunderstood, or mistaken advice as well. I'd like to take the opportunity to address some of that here.

Now, there is no single best method, nor best equipment for taking pen photos. I don't mean to imply that my approach is necessarily any better than many others. Many excellent pen photos have been posted on this site that were taken with different equipment using different techniques than I have previously described. There are, however, several asserions that keep cropping up, which I firmly believe will not necessarily yield a better pen picture.

Here is my initial list (I may add more) of Pen Photography Myths:
  1. You need a DSLR,
  2. You need a macro lens, or need to use a camera's "macro mode",
  3. You need to shoot in "raw mode",
  4. You need to use HDR,
  5. You need to use focus stacking,
  6. You need strobe lights, and
  7. You need to use polarizing filters, or cross-polarization.

Each of these techniques or pieces of equipment serves a legitimate purpose in photography somewhere, but none are necessary for taking a good picture to post in in the "Show Off Your Pens" forum. I've addressed some of the items above previously, but plan to go over the others (or return to them) in subsequent posts. I'm sure I'll ruffle the feathers of some who are dedicated to their own method, but hopefully I can help others understand that they can get good pen pictures without needing to buy expensive equipment or software.

Regards,
Eric
 
Signed-In Members Don't See This Ad
#1 on that Earl, as long as you learn to work with the limitations of your equipment you can get good results from most cameras. Ive even got decent results from a quaker oats box pinhole camera.
 
Myth #1: You need a DSLR,

I've often repeated a remark my 8th grade photography instructor made: "what's behind the camera is more important that what's inside it". For a case in point, check out http://www.penturners.org/forum/f24/photography-basics-composition-125808/#post1700791. Some of the photos shown were taken with a prosumer grade DSLR and lens. Others were taken with a $70 point-and-shoot camera. See if you can tell which pictures were taken with which camera. Take a look at http://www.penturners.org/forum/f24/canon-sx-160-sale-128324/#post1728244 as well. My only pen pic that ever made the home page was taken with the point-and-shoot camera.

To be honest, I prefer using the DSLR (Digital Single-Lens Reflex), for two reasons:
  1. I'm more comfortable with it, simply because I use it more. The conventional wisdom is that a photographer will take the best photos with the camera he's most familiar with.
  2. The controls make it easier for me to get the result I want more quickly. The point-and-shoot camera takes a little more effort.
Both cameras, however are capable of taking good pictures.

In fact, the point-and-shoot camera does have some advantages. See
http://www.penturners.org/forum/f24/canon-sx-160-sale-128324/#post1732027 for an example.

I hope that helps,
Eric
 
I'm sure the big cameras obviously have some added quality but all of my pics have been done with my Motorola Nexus 6 phone camera. I sometimes will up the exposure of light a bit to show more details on dark blanks, other than that though I do nothing. I will say though I have two big lights I use to eliminate shadows as much as possible.
 

Attachments

  • CameraZOOM-20171028202328231.jpg
    CameraZOOM-20171028202328231.jpg
    106.9 KB · Views: 446
  • DSC_0296.jpg
    DSC_0296.jpg
    124.5 KB · Views: 449
Myth #2: You need a macro lens, or need to use a camera's "macro mode"

I'll address this myth in two parts:
  1. You need a macro lens, and
  2. You need to put the camera in "macro mode".
I've written about the first part before at http://www.penturners.org/forum/f24/do-i-need-macro-lens-108852/. Also, check out www.penturners.org/forum/f24/photo-better-110903/#post1540136, where I posted two photographs of a pen, differing only in that one was taken with a prime (fixed focal length) macro lens, and one with a (non-macro) zoom lens. Neither image is significantly better than the other.

There are two basic arguments given for using a macro lens:
  1. A macro lens allows you to get closer to the pen, and
  2. Macro lenses are "sharper".
I have no difficulty filling the frame with a pen using a non-macro lens. A macro lens can be useful for extreme close-up photos, but for regular pen pictures, it has no advantage. Technically, a prime macro lens may have greater sharpness than a non-macro zoom lens, but the difference is very small. When a photo is resized to computer screen resolution, the difference between the lenses is not discernable.

Regarding taking photos in "macro mode", do you know what exactly "macro mode" does? The answer varies from camera to camera, but for the most part, "macro mode" is the same as "auto mode", except that the camera restricts the autofocus to nearby objects. That is, it won't autofocus to infinity anymore. That helps the camera acquire focus on close-up objects more quickly, and reduces "focus hunting".

When I'm shooting a pen in the studio, however, I don't really care how quickly the camera can focus. I do care about controlling the depth-of-field. Macro mode gives me something useless at the cost of something important (aperture control).

A macro lens represents an expense that doesn't help pen photography, but macro mode acutally hinders pen photography.

I hope that makes sense,
Eric
 
Eric... Thank you for reintroducing this subject again. There are many new members since it first was posted and it is valuable information for posting our pen pictures. When you first posted this awhile back I did search and found the Canon SX 160 camera. In the meantime I got an Apple Iphone and its my go to camera as it is readily available. I will get out the Canon camera and review your posts again. Thanks for sharing your knowledge and I look forward to post from more members. Darrell
 
Myth #3: You need to shoot in "raw mode"

I've written about camera raw mode before at http://www.penturners.org/forum/f24/what-raw-mode-115268/ (if you want more detail), but in summary the major difference between a JPEG image and a camera raw image, is that raw image usually has greater color depth. For example, my current camera records over 16000 shades of red, green, and blue for each pixel in raw mode. In JPEG images, it saves only 256 shades of each. The raw image gives a much smoother tonal representation of the photo.

So why use JPEG? Well, if you're going to post a picture on the internet, you're going to have to convert the file to a standard format. JPEG is typically the best available choice for uploading photos to the IAP website. If you shoot in raw mode, you'll need to need to convert the image to JPEG format at some point.

So why shoot raw? If you are skilled at photo editing, you might be able to do a better job of manipulating your image in the full color depth and converting it to JPEG format afterwards. If not, then there is no advantage to camera raw mode.

Disclaimer: When using my DSLR, I shoot in raw mode most of the time - including when photographing pens. I do that because I've used Photoshop and Lightroom enough that I feel I can benefit from editing in 16-bit color depth. The point-and-shoot camera I used for comparison, however, does not have a camera raw mode. It only produces JPEG images. That didn't keep me from producing effective pen photographs.

I hope that helps,
Eric
 
I've seen a lot of good pen photography advice given on this forum. I have learned a lot from others, and passed along several tips myself. Unfortunately, I've also seen a lot of well-intentioned but misapplied, misunderstood, or mistaken advice as well. I'd like to take the opportunity to address some of that here.

Now, there is no single best method, nor best equipment for taking pen photos. I don't mean to imply that my approach is necessarily any better than many others. Many excellent pen photos have been posted on this site that were taken with different equipment using different techniques than I have previously described. There are, however, several asserions that keep cropping up, which I firmly believe will not necessarily yield a better pen picture.

Here is my initial list (I may add more) of Pen Photography Myths:
  1. You need a DSLR,
  2. You need a macro lens, or need to use a camera's "macro mode",
  3. You need to shoot in "raw mode",
  4. You need to use HDR,
  5. You need to use focus stacking,
  6. You need strobe lights, and
  7. You need to use polarizing filters, or cross-polarization.

Each of these techniques or pieces of equipment serves a legitimate purpose in photography somewhere, but none are necessary for taking a good picture to post in in the "Show Off Your Pens" forum. I've addressed some of the items above previously, but plan to go over the others (or return to them) in subsequent posts. I'm sure I'll ruffle the feathers of some who are dedicated to their own method, but hopefully I can help others understand that they can get good pen pictures without needing to buy expensive equipment or software.

Regards,
Eric

8. You need a light Box/Photo Booth

Les
 
Eric over the years you have taken the time to share your well informed knowledge about camera use and taking good quality photos and it is appreciated. It probably has helped a few people here and sure wish more people would read them. But todays society is a fast paced world and people all always in a hurry. Today the camera phones are pretty good quality so that is what they use. I have no problem with any of that I am not good at taking photos either but at least I put an effort into it.

What I can not stand and I avoid people posts when they take photos while holding their pen with their hands. I do not want to see their grubby hands and dirty fingernails. I also hate when they take the photo and post it sideways. Another thread I have stopped reading. To me this tells me they are so lazy and the quality of their work is not worth looking at. Sounds harsh but my thoughts. If you took the time to turn the pen and put that effort into it take a few more seconds to stage the pen. Eric has given plenty of info and there is a library here loaded with this info. use it. If the pen is or photo is sideways take the time to turn it so it is showing properly. Why put the burden on us to see YOUR PEN!!!!! Just my thoughts.
 
8. You need a light Box/Photo Booth

Les,

I considered adding that to my list. It certainly is possible to take good pen pictures without a light tent. You don't need one. In order to produce a well-lit photo of curved metal items (such as pen nosecones, centerbands, and finials), though, you will need a large light source.

If you don't use a light tent, then you'll have to resort to something equivalent, such as a softbox and reflectors (as in http://www.penturners.org/forum/f24/polarization-glare-133334/index2.html#post1797645);) or limit yourself to photographing pens outdoors on overcast days. In http://www.penturners.org/forum/f24/using-black-background-130593/, I employed diffusers and mat-board (as reflectors) instead of a tent.

I do, however, regularly use a light tent for my pen photos, and I recommend one as a simple, inexpensive, and effective tool to create "large light". While not absolutely necessary for pen photography, I find a light tent to be very helpful.

Check out http://www.penturners.org/forum/f24/photography-basics-why-use-light-tent-121808/ for more information.

Regards,
Eric
 
Myth #4: You need to use HDR

"HDR" stands for "High Dynamic Range". HDR processing is a technique used in situations where the subject of your photograph has darker shadows and brighter highlights than the camera can capture in a single image. This typically occurs when a photo has both indoor and outdoor elements, such as a room with windows. The interior is dimly lit while the exterior is in full daylight. I've experienced the same issue photographing a cliff face with caves. The cliff wall was sunlit but the caves were in deep shadow. That's a greater difference in lighting (higher dynamic range) than the camera can record in one shot.

The solution to that problem is to take multiple pictures, with varied exposures. Two or more shots, with exposures ranging from the dimmest to the brightest light are taken, and subsequently combined. The dynamic range is compressed so that the detail in both the shadow and highlight areas are visible. Some cameras have an "HDR" mode that does everything for you; for others, you need post-processing software.

Excessive dynamic range, however, is almost unheard of in a studio setting. You just would not compose a photograph with grossly varied lighting. If the primary (key) light yields too much contrast, you add a fill light of some kind. Pen photographs often have the opposite issue - too little dynamic range, resulting in an image that looks dull, or muddy. Compressing the dynamic range with HDR would simply make things worse. In this case, the "levels" editing control is your friend. You can expand the picture's dynamic range by pulling the highlights up, the shadows down, and adjusting the mid-tone to show off the blank.

Simply put, for pen photography, HDR is a solution to a problem that doesn't exist.

I hope that makes sense,
Eric
 
Last edited:
JT and I don't agree on some things, but this is one area that I agree wholeheartedly with him. The idea of a pen in a photograph here is to SEE the PEN.

My thoughts:
1. Get enough light on the pen to see it and the details.

2. Don't put so much surround that it takes away from looking at the pen. This is not hard to do; it is very simple in fact. A good and simple background should draw you into the pen, not make you look at all the background.

3. Take a minute and bring the pen into focus. I am not a photographer but even on my early pens, I had it sharp enough that a few people asked me if I turned the pen a tad proud. I did. It let them see the details and their constructive criticism helped me immensely.

4. In flat work, some people spend 40 to 80 hours making a fine piece of furniture and 5 hours on the finish. It shows. The finish shows off the work. In the same manner, a photo shows the pen.
 
Myth #5: You need to use focus stacking

"Focus Stacking" is a digital image manipulation tool that allows you to combine multiple images, each of which has a different plane of focus, and create a single image from the in-focus parts of each one. It is analogous to HDR (above), but for focus instead of exposure. Focus stacking is primarily used to overcome shallow depth-of-field issues when shooting in low light (when one is forced to use a wide aperture), and for macro photography, where close distances yield short DoF. There are also some times when the photographer chooses to use a wide aperture in order to blur the background, and uses focus stacking to keep the subject sharp.

None of these circumstances, however, are applicable to pen photography. You control the light, and the composition, and aren't shooting extreme close-ups. You can easily achieve the desired depth-of-field by choosing the appropriate aperture. I sometimes see the argument that smaller apertures yield diffraction effects which reduce sharpness, and that a focus-stacked image taken at a moderate f/stop can produce a sharper image. While that may technically be true, the sharpness delta is negligible - especially when viewed at computer screen resolution. To tell the difference, you need to enlarge the image to the point where you can see the individual pixels (which photographers disparagingly call "pixel peeping").

I once used focus stacking for a pen photo, not because I needed to, but simply to try out the process. You can see the result at http://www.penturners.org/forum/f24/fiddling-about-photoshop-109376/. In this case, I had bigger issues than sharpness with the images (when viewed at pixel-peeping zoom) - namely chromatic aberration in the form of "purple fringing". When viewed at normal display resolution, however, even the CA isn't a problem.

In pen photography situations, focus stacking - like HDR - is a solution in search of a problem.

I hope that helps,
Eric
 
I am not the least sensitive to hand held pens ,nothing but admiration for some of the best pictures I have ever seen of pens that I also admire taken that way..
Thank you Eric for your masterful, completely unbiased directions.

I served an Apprenticeship in the 1950,s and a wise man told me during my tech training first of all you learn the rules and later you will make your own way in your own time driven by incentives.

All religeons have proceedures ,all aiming for perfection ,we mere mortals know and sense when good people give direction and advice.

May the spiriit of harmony prevail in this delicate subject that we can all progress.

Kind regards Peter.
 
8. You need a light Box/Photo Booth

Les,

I considered adding that to my list. It certainly is possible to take good pen pictures without a light tent. You don't need one. In order to produce a well-lit photo of curved metal items (such as pen nosecones, centerbands, and finials), though, you will need a large light source.

If you don't use a light tent, then you'll have to resort to something equivalent, such as a softbox and reflectors (as in http://www.penturners.org/forum/f24/polarization-glare-133334/index2.html#post1797645);) or limit yourself to photographing pens outdoors on overcast days. In http://www.penturners.org/forum/f24/using-black-background-130593/, I employed diffusers and mat-board (as reflectors) instead of a tent.

I do, however, regularly use a light tent for my pen photos, and I recommend one as a simple, inexpensive, and effective tool to create "large light". While not absolutely necessary for pen photography, I find a light tent to be very helpful.

Check out http://www.penturners.org/forum/f24/photography-basics-why-use-light-tent-121808/ for more information.

Regards,
Eric

I just use my overhead daylight florescent shop lights and use my camera settings accordingly.

Les
 

Attachments

  • DSC09545 (Custom).JPG
    DSC09545 (Custom).JPG
    87.5 KB · Views: 312
  • DSC09550.jpg
    DSC09550.jpg
    236.3 KB · Views: 305
Last edited:
Les I remarked many years ago your workshop is exceptional being part of your house,also the work including wooden hand made locks,puzzles and incredible features on the wall,then to top it off your immaculate casting and world first uses of ammunitions.

If there was a hall of valour or suitable citation with others in the US and UK you would be my first commendation.

I firmly believe your work is so outstanding members hold off commenting etc struck by the excellence of your contributions. My personal carry pen is a one piece that has one of your creations,a tied fly(made by you) a short trace to a Mallard Duck feather on either side of the blank on a white background.

My understanding your flawless casting involves NO use of special compressors or vacuum systems.

You have shared your simple warming chamber and considering the temperature ranges where you live down to minus 30 degrees while we feel here where I live it is unbearable down to minus 7 celcius. I never heard once a complaint from you or ever known you not to be able to carry on making due to the weather in Canada.At my age pens are still a burning passion, I have the privilige of collecting burl offcuts from my mate who has 36,000 dollars wholesale of pen blanks on their way to the US etc. I will put up a pic later today.

I raise my hat to you,you have established a steady income (no fanfare),travel to and show and sell to the communities that rush the things you make.

Finally how incredulous are you pics of things that you make and share always using your workshop light simply on a small table. You prove to me and all members the KISS principle in all you do keeping it simple and repeatable.

As a breakthrough applying laquer to items you have demonstrated my idea of perfection in finishing sharing this via the library.

Very few people have influenced me more in my search for the Shangri La in penmaking, ie immaculate turning,simple presentation and the best in all you do.

Eric your photography knowledge and application to pens is outstanding another hall of famer.

For myself as a professional photographer for many years and an amateur for as long as the 1950,s I established a five minute technique for my pen pics that is an open box two or three lights that gives me IMHO a good representation of the pens etc that I make. I was determined to make the pics a small part of the process right from day one. Learn the principles and then form your own method.

Kind regards Peter.
 
Last edited:
Myth #6: You need strobe lights

I hesitated to put strobe lights on my list of myths, because strobe lights work equally well as any other light source for pen photography. The phrase "equally well" is key here, because almost any type of light can make a good (or bad) pen photo. Unless you can see the light in a reflection, I doubt you can tell, just by looking at the picture, whether the light source was LED, fluorescent, incandescent, sunlight, or strobe.

The real myth is "you need to use _____ light", where you can fill in the blank with any light source you want. As long as you use appropriate light modifier(s), the correct color balance, and the right exposure, you can get a well lit pen photograph.

Strobe lights are incredibly useful for freezing fast-moving objects, and for portraits (so your model doesn't squint or sweat under bright, hot lights), but don't offer a particular advantage for pen photos. In fact, it is easier to use continuous lights because you can see the effect of placing your lights without having to take a test shot.

I sometimes see people claim that "sufficient light" is essential to pen photography, and argue that strobes are brighter (and therefore better). Edstreet debunked that claim as well as I could at http://www.penturners.org/forum/f24/no-low-light-photography-tonis-green-rose-114853/#post1580637, where he posted a photograph lit with a single 2-cell flashlight.

Now there's nothing wrong with strobe light. I've used studio strobes for pen photography at times, and I frequently use speedlights for product photography. If you already have strobes, or just want to try them out, fine. Don't believe, however, that you need to go out and buy expensive speedlights or monolights in order to get good pen pictures.

I hope that helps,
Eric
 
Myth #7: You need to use polarizing filters, or cross-polarization

Polarization is a controversial subject, because light doesn't always behave in intuitive ways, and the common analogies used for polarization (such as the picket-fence analogy and the jump-rope analogy) are just that - analogies. They succeed in some ways and fail in others. If you over-apply any factual statement about polarization, you can easily wind up hopelessly mistaken.

There is but one law of reflection in physics:
angle of incidence = angle of reflection
but photographers often differentiate between:
  • direct reflection, and
  • diffuse reflection.
Direct reflection occurs when a surface is smooth enough to reflect incident light all in the same direction (per the formula above). Diffuse reflection occurs when the surface is irregular, and incident light is reflected off in a wide variety of angles. Imagine you're in a black room containing a single light bulb and you're holding a small mirror. As you rotate the mirror around, it will appear black unless you happen to catch the right angle that reflects the bulb. That is an example of direct reflection. Try the same experiment with a piece of white paper, however, and you'll get the opposite result. It will look evenly white no matter what angle you hold it. That's diffuse reflection. Some surfaces produce nearly all direct or diffuse reflection, but most exhibit a combination of the two.

What does that have to do with polarization? Well, polarization is primarily a tool to reduce glare, and glare is a subset of direct reflection. That is, some glare is polarized, some is not. Diffuse reflection is (generally speaking) not polarized. Therefore, if you want to remove glare from a pen photograph, and the glare happens to be polarized, then you can reduce it with a polarizing filter. If the glare happens to not be polarized, then a polarizing filter will not affect it. Whether or not glare is polarized depends on how conductive the surface is, and the angle of reflection. If you wish to know more, see https://en.wikipedia.org/wiki/Brewster's_angle.

The important lesson is that a single polarizing filter may or may not be effective in reducing glare. A better way to eliminate glare is simply to move your light to an angle that doesn't produce glare in the first place. See http://www.penturners.org/forum/f24/polarization-glare-133334/#post1796881 and www.penturners.org/forum/f24/polarization-glare-133334/index2.html#post1796924 for examples.

Cross-polarization is a photographic technique most often used in art reproduction where no amount of glare is tolerable, but textured glossy surfaces (such as oil paint) produce direct reflections no matter where you place your lights. In cross-polarization, you put a polarizing filter (usually a piece of polarizing film) over your light in addition to the polarizing filter on your camera (if you have multiple lights, you need to align all the filters). The light striking the subject is polarized and the direct reflection retains the polarization state. It can be blocked by the filter on the camera, thus removing the glare. The diffuse reflection does not preserve the polarization state of the incident light (i.e. it depolarizes the light) and therefore is not affected by the on-camera filter. Simply put, cross-polarization removes direct reflection without affecting diffuse reflection.

So, why doesn't cross-polarization work for pen photography? Remember the mirror experiment above. Some surfaces - especially shiny metal ones like pen nosecones, centerbands, clips, and finials - exhibit very little to no diffuse reflection - only direct reflection. If you eliminate direct reflection, all these pen components will turn out dark. See http://www.penturners.org/forum/f24/polarization-glare-133334/index2.html#post1797176 for an example.

Cross polarization is a technique that requires additional expense, a fair understanding of light to set up effectively, and - for any pen with metal parts - simply doesn't work.

I hope that makes sense,
Eric
 
Last edited:
THanks Eric since every light from your statement produces a shadow all of your valid points come home to us. Extravagance in the use of multiple lights can create havoc.

Also I use LED lighting and had a specialist firm diagnosed from a result using my lights who gave me the filter factor and number to place in front of my lights to correct them.

The losses using polarising filters can be great requiring stronger lights not always easy to solve.

Thank you indeed, you together with Ed Street on this forum are my go to Gurus on this subject. Evidence Of Ed,s enabling is on the front page right now.

Kind regards Peter.
 
So it pretty much comes down to what one considers a "good" picture, isn't it?
Or is it a case of "good enough" to post in in the SOYP forum?

Higher tech level equipment isn't necessary for anything really, it just makes the process easier... as long as one knows how to use the tools but also can appreciate the (sometimes) minute differences.
 
Myth #8: You need to use a _____ color background

Pen turners frequently have trouble getting their pen photo exposure right. That is, the pen comes out too dark or too light, making it difficult to see details in the barrel. Now, today's cameras are usually quite good at auto-exposure, but some subjects tend to trip them up. Pen pictures commonly fall into this category.

When that happens somebody often suggests photographing the pen on a black background, or a white background, or a gray background. The explanation given for that advice involves how a camera's built-in light meter measures the image and selects exposure settings. The idea is to change the scene to suit the camera's meter.

That approach, however, is completely backwards. Don't change your composition to match your camera -- change your camera settings to match your composition. Use whatever background you want - black, white, gray, or any other color - and set the exposure yourself. Don't rely on the camera's auto-exposure, and don't try to fool it with exposure compensation. Use manual-exposure mode and set the right values for ISO, aperture, and shutter speed. See http://www.penturners.org/forum/f24/pen-photography-putting-concept-into-practice-128555/, especially the sections titled Depth of Field, ISO Setting, and Exposure for guidance on how to choose appropriate values; http://www.penturners.org/forum/f24/photography-basics-depth-field-116545/, http://www.penturners.org/forum/f24/photography-basics-iso-setting-116576/, and http://www.penturners.org/forum/f24/photography-basics-exposure-115586/ for further information; or search YouTube for "exposure triangle" for dozens of video explanations of exposure.

It's ok to try auto-exposure first, see what the camera tried, and go from there. If the photo came out too dark, lighten it by using a higher ISO setting, a larger aperture (lower f/stop), or slower shutter speed. If it was too bright, darken it by using a lower ISO setting, a smaller aperture (higher f/stop), or faster shutter speed. When you find the combination you like, write the values down and use them again the next time. As long as your camera and lights are in the same place, the exposure will be correct - regardless of background color.

I hope that helps,
Eric
 
Last edited:
Myth #9: You need to photograph a pen from the side

From time to time, I still see people recommend photographing a pen from the side in order to get it all in focus. They say that if the entire pen is the same distance from the camera, then you don't have to worry about shallow depth-of-field.

As in the background color myth above, this approach is backwards. Don't change your composition to match your camera settings. Change your camera settings to match your composition. Lay out your pen however you want, and then choose an aperture that will yield sufficient depth-of-field.

For more information, see http://www.penturners.org/forum/f24/photography-basics-depth-field-116545/, http://www.penturners.org/forum/f24/photography-basics-composition-125808/, and http://www.penturners.org/forum/f24/pen-photography-putting-concept-into-practice-128555/.
 
When using an iPhone remember where the lens is. It's not in the middle of the camera like you are used to. Point the lens at the subject, not the center of the screen to avoid distortion. I have a D3 that I love to shoot for sports etc, but I take all of my pen pics with an iPhone.
 
I have decided to use the best lighting in my house when I take pictures of my pens, and teenage girls use the same at their homes - the bathroom. I drape white material off of the hand towel loop on the wall above the countertop and the excess material is on the countertop. I take the picture with my iPhone. I then use an app called Snapseed. I really like how they come out after editing. The first pic is without any editing. The second is with editing. IMG_8044.JPGFullSizeRender.jpg


Sent from my iPhone using Penturners.org mobile app
 
Back
Top Bottom