Mike D
Member
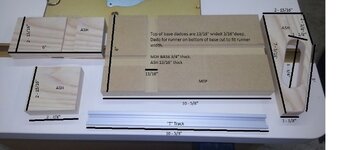
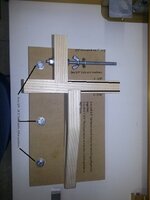
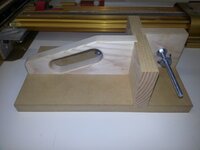
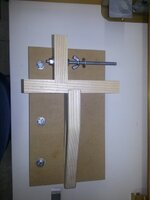
This is my version of a squaring jig. It's made from MDF for the base, scrap pieces of ASH for the handle and support pieces, 1/4" threaded rod, "T" track and common hardware. If you folks are interested I can add a material list with measurements in the library. It's quite easily built and it works very well. Thanks for viewing and all comments, questions are welcome.
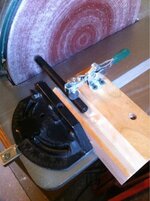
") I drilled a 7mm hole through the block and glued a 7mm tube inside. The 7mm rod from the PSI rhomboiding jig goes through the tube. Blanks mount on the 7mm rod. I can use all of my sleeves on the rod since that's what the rod was made for. Works great. I find that the length of the hole in the block really adds stability to the rod that I wasn't able to get with the PSI tool. The downside is that I can't fit very long (Zen) tubes between the block and the sanding disc. I'll have to work something out there.
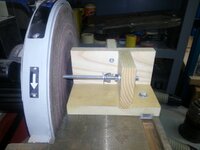
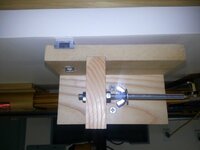
I drilled a 7mm hole through the block and glued a 7mm tube inside. The 7mm rod from the PSI rhomboiding jig goes through the tube. Blanks mount on the 7mm rod. I can use all of my sleeves on the rod since that's what the rod was made for. Works great. I find that the length of the hole in the block really adds stability to the rod that I wasn't able to get with the PSI tool. The downside is that I can't fit very long (Zen) tubes between the block and the sanding disc. I'll have to work something out there.