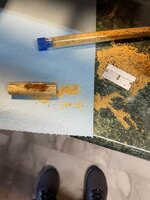
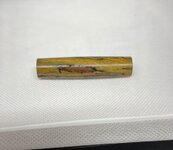
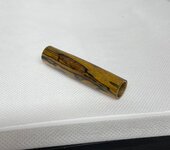
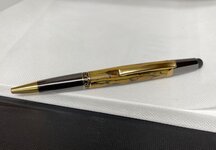
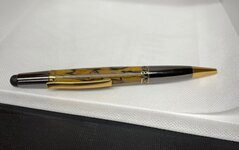
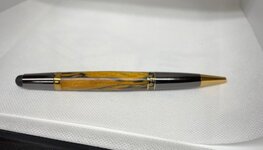
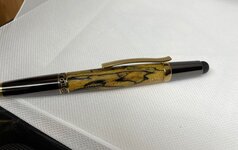
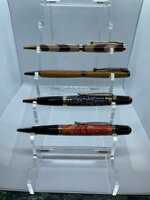
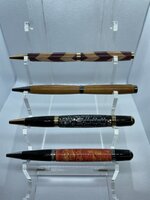
So what's the best way to get a super gloss shine with Pens Plus? Starting from the time you finish turning it. And how long do I have to let it sit?
I take an approach that has a few phases. I've tried with extreme heat and high pressure/friction, which usually results in streaks in the finish. You need heat to evaporate the alcohol, but it doesn't necessarily require huge pressure to get it...with enough speed, and moderate pressure, you can still achieve the necessary heat without the streaking problem. I follow a specific procedure for finishing with pens plus:
1. Sand to a high grit, you want the smoothest surface you can get. I've sanded up to 2000 grit before. I haven't noted any oil penetration problems, and having the smoothest surface possible is ideal for getting a glassy finish with Pens Plus. Some people will wet-sand with Dr's Walnut Oil (the same oil that is in Pens Plus), which ensures that you'll get the oil into the wood since you will have the oil there from low through high grits. I don't wet sand with the oil, I have found that ends up getting too much oil into the wood, which saturates the wood and it expands a bit, which affects my very nice fit between the pen parts and the diameter of the blank. Technically you could slightly under-turn the blank relative to the bushings, so that expansion would bring you back to the right size when wet oil sanding. Another potential issue with wet sanding with oil, is that if the wood has any kind of open grain, larger grain pores, the sanding slurry will fill that, and the slurry will often be a different color, which is another thing I don't care too much for myself. Some people insist on filling in the grain, for a perfectly smooth surface. Its a matter of preference here, for sure!
2. Once you have sanded, if you've wet sanded with the Drs walnut oil, you need to make sure you give that oil time to fully penetrate and start to polymerize. Some of the heat generated during wet sanding will start the polymerization process, but you want to give it time to really set in.
3. Apply a first coat of Pens Plus with the lathe off. Manually apply, and rub it into the wood. When its settled into the wood, turn the lathe on to a high RPM (somewhere between 2000-3500 is usually where I set it). Using a length paper towel, folded over a couple times, add a small dab of pens plus to one end. Using that end, apply to the turning blank with moderate pressure, moving slowly back and forth over the blank, until you start to feel the heat from friction. Don't press too hard, that will cause streaking in my experience. When you feel that heat from friction, start moving the paper towel back and forth over the blank faster, with the same moderate pressure. Lighten up your pressure as you move the towel faster and faster, and swipe it off the end of the blank when you are done to remove the paper towel from the blank.
4. Give the blank about 30-40 seconds to dry, then add another small dab of pens plus to that same spot on the paper towel, and apply another coat using the same general technique described in step 3. Repeat this process for however many primary coats you want. I usually apply around 5, give or take a coat. After each coat dries for 30-40 seconds, you might want to turn the lathe off, and look for dull spots. You will usually find these until you have a number of coats on...this is the wood soaking up the finish. This is less of a problem on harder woods, more of a problem on softer woods (i.e. maple), and more of a problem if you turn any kind of "sidegrain" blank (i.e. blanks that have endgrain and sidegrain along the length of the blank, like a bowl blank...most pen blanks are "spindles", where the end grain is only at the ends, and the length of the blank only has sidegrain... I've turned a few olivewood blanks that were "sidegrain", and the endgrain parts, or knots etc. definitely soak up more finish, so the finish will take on an uneven look until the wood decides to stop soaking up the finish.) If you find a blank soaks up considerable amounts of finish, I've found that letting each coat dry longer, allowing the oils to polymerize more in the wood, helps restrict how much this occurs. It lengthens the finishing process, but the results tend to be better in the end. High friction with higher heat and more evaporation should help here as well, but there can be potential consequences there that, for a truly glassy finish, I try to avoid. YMMV, this is an area you will want to experiment with.
4 (notes): I use the same spot on the paper towel, unless the towel is just starting to shred, to try and benefit from some of the smoothing out of the paper that occurs with subsequent coats (a tip from a guy named, I think, Mike, who's process for applying pens plus I was using for a while). If you find that things get too sticky, use a different part of the paper towel with a new dab of pens plus. If you start to notice streaks around the blank, you may be applying too much pressure, or may be lingering too long with each coat, allowing the finish to start grabbing fibers, or perhaps just as the finish dries continuing to drag paper towel through it may cause streaks to occur. Adjust your process as necessary to avoid streaks here. If you find that the streaks kind of get "baked in" to the finish, you can turn the lathe off, use a new piece of paper towel, apply a moderate dab of pens plus to it, and manually rub it into the blank. You want to rub it around enough to blend with the existing coat (which will make the finish dull again, don't worry about that as it will shine up once you friction polish it again.) Work out the streaks, smooth out the finish with the lathe off, then turn the lathe on again and repeat step 3. You will eventually get the hang of applying this finish, and you'll hone your technique to give you a clean, smooth finish with each coat.
5. I then apply one final coat. For whatever reason, and I'm honestly not sure why (and to some degree or another it seems to be temperature related...with warmer temps, this may not be a necessary step, with colder temps as I now have with winter upon us, it definitely seems to be a necessary step), applying a final coat with lighter pressure is necessary for me to get that final truly glossy finish. I apply another dab of finish to a clean, unused part of the paper towel. With lighter pressure, apply the final coat of finish the same way you applied the previous. Slow at first, then faster, remove the paper towel from the blank with the final swipe.
You will want to leave the blank on the lathe and not touch it for a while. At this point, that final coat is not fully evaporated and there wasn't as much heat. Letting this final coat evaporate more slowly seems to give a smoother, clearer finish than if you use high pressure and friction, at least this is how it has been in my experience (and I know everyone's experiences are generally different.) If you touch the blank before this final coat has sufficiently dried, then you are very likely to smudge it or dull it overall. You need to let it sit, untouched by hands or towels or cloths of any kind for long enough for all the alcohol to evaporate and the coating to generally dry. When I do take the blank off the lathe after this, I don't touch it with my hands. I take a piece of soft paper towel, creased down the middle so the blank can settle there without rolling...holding this close to the blank so it just falls lightly into the paper towel once I pull back the tailstock. I'll then bring that indoors where its a nice warm temp (in my case, around 70 degrees, vs. my garage right now which is usually around 50 or so), and let it sit for a day. This day gives the finish time to fully dry and become resilient to handling, without losing that really nice smooth glassy surface. More recently I've taken to standing my blanks on end (again, without touching them with my hands, a couple of toothpicks only on the ends of the blank can assist here), as I've found that the parts that touch the paper towel may dull as the towel soaks up finish.
Finally, once things are dry...I will use a fine grit sandpaper to sand down the ends to remove any unwanted finish there. When the finish is properly dried, the microcrystalline wax and shellac should give you a very shiny, fingerprint-resistant, resilient finish. It may not be as iron-clad, could-survice-a-nuclear-apocalypse kind of durability that CA is supposed to give, but it will preserve more of that natural "its real wood" appearance and feel. And its still quite durable in my experience, too. (Further, its totally non-toxic once the DNA has evaporated, and so far I've had no problems like I do with CA, which for me causes severe respiratory distress issues, long-term nasal congestion problems, etc. etc.)
This is what has worked for me. I tried other techniques, including a well-practiced and proven one by a guy named Mike (I believe...I think the thread with his procedure is even on these very forums), who uses a wet sanding process with the Drs Walnut Oil, followed by a very specific high friction process that interleaves wet polishing with pens plus (using that same spot where you dab the oil on the paper towel over and over), with burnishing using a dry spot of the paper towel (using the same dry spot each time). I have struggled to get a perfectly smooth, glossy finish with that process. I always end up with streaks, or even numerous little dull/rough patches all over. I've tried different amounts of pressure, different lathe speeds, and in my case, I can't quite get Mike's process to work for me. It may be my humidity, or my temperatures (pens plus seems to be easier to work with when the ambient temps are warmer, but that is highly anecdotal). Anyway, I experimented, and ended up settling on the above process to ensure I get a very glossy finish when I'm done. Its slower, for sure...a higher friction approach that generates even more heat, combined with the burnishing, should technically give you a faster finish, you wouldn't need to wait a day...but, I've never achieved the same level of gloss with any such approach as with the one outlined above. Glassy gloss seems to require slower evaporation of the alcohol and slower drying.


