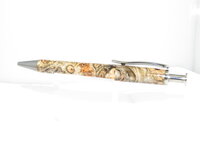
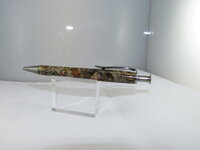
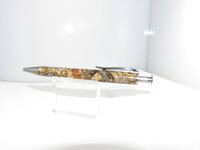
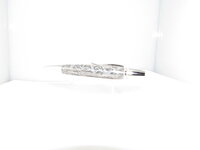
Need help! Oh, boy, do I ever!

Signed-In Members Don't See This Ad

yorkie

Member
Joined
Mar 2, 2009
Messages
1,116
Location
Charlotte, North Carolina
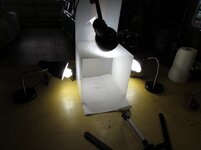
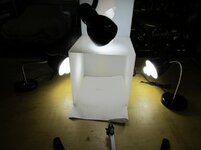
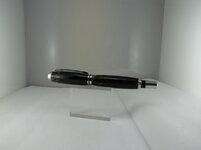
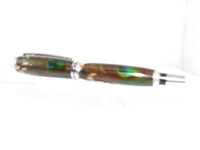
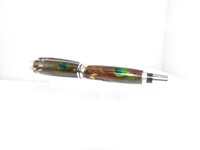
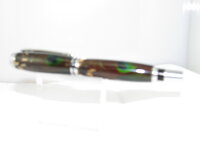
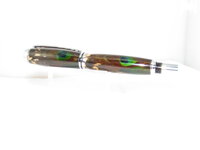
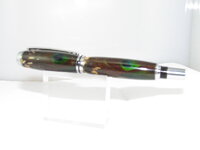
Here is a series of photos showing the setup I made using the materials and bulbs recommended in previous forums. The scene is actually daylight in my workshop, though the picture makes it look dark.

The camera I bought is a Canon SX30IS and is a really good camera with lots of features.

Please take a look and offer any advice you feel would help.

Thanks.
 

Attachments

  • IMG_0213.jpg
    IMG_0213.jpg
    29.8 KB · Views: 372
  • IMG_0214.jpg
    IMG_0214.jpg
    29.2 KB · Views: 285
  • IMG_0216.jpg
    IMG_0216.jpg
    18.4 KB · Views: 363
  • IMG_0222.jpg
    IMG_0222.jpg
    74.1 KB · Views: 346
  • IMG_0227.jpg
    IMG_0227.jpg
    76.7 KB · Views: 348
  • IMG_0233.jpg
    IMG_0233.jpg
    134.2 KB · Views: 324
  • IMG_0235.jpg
    IMG_0235.jpg
    83.5 KB · Views: 290
  • IMG_0234.jpg
    IMG_0234.jpg
    158.7 KB · Views: 313
  • IMG_0238.jpg
    IMG_0238.jpg
    92.1 KB · Views: 384
  • IMG_0253.jpg
    IMG_0253.jpg
    255.2 KB · Views: 307
  • IMG_0256.jpg
    IMG_0256.jpg
    145.6 KB · Views: 285
  • IMG_0260.jpg
    IMG_0260.jpg
    72.1 KB · Views: 299
Signed-In Members Don't See This Ad
my first thought is use a different color background AND you may need to do a "White balance" on your camera when shooting your pens.
 
Hi Stephen,

I see several problems with the various pics, including being out of focus, over exposed and composition issues. Could be a bit much for anyone to help with all of them in this thread. First, read this tutorial, especially Section I (http://www.nealaddy.org/node/16). It helped me a lot, and applying the techniques will solve several of your issues.

Here's a quickie on what works for me. I use pretty much the same lighting setup you have (3 daylight 100W bulbs in reflectors) except my top light is almost directly overhead of my subject. The camera lens is no more than 9-10" from my subject, mounted on a small tripod. The camera is set in macro mode, the flash is disabled, and I set it for a 2 second delay.

Don't expect your camera alone to deliver the perfect photograph...that's where software comes in handy...the tutorial will help with this also. I use GIMP because its a free download, and it works prety well. What was most helpful here was always having a white card in the scene with my pen, then using the "Levels" feature in the software to color balance.

Hope that helps. Good luck.
 
Last edited:
You may need to start by turning down your "ev" setting, your over exposing your shots. (to much light)
 
Actually your white balance looks pretty good. Your shots are over exposed though. Try setting your EV to -1, maybe -1 1/3 or more. It would be better to be slightly underexposed and adjust the exposre in software. Once you blow out the highlights (too white) that detail is gone and cannot be recovered by any software. If a little underexposed, the detail is there and can easily be brought out with software.

I use Photoshop Elements 10. It is relatively inexpensive if you shop around and does a great job with the pictures. You can lighten, darken, sharpen (a little) and clean up dust spots. I know there are other programs out there, many are less expensive and some are free and they do a good job. I am familiar with Photoshop and elect to use it.

Other than that I think your pics are good. The lighting looks pretty good. Seems to be even. Don't worry about highlight on the pens. You need a little highlight to add shape and form. If you get your exposure corrected your highllight should tone down and really add to the pictures.
 
Hey Stephen,

With this setup, you should eventually produce studio quality photos.

Is your camera on a tripod? I took a course years ago, and the instructor said you can improve your photography by 50% by using a tripod. With a tripod, you'd get the composition exactly the way you want it, and it stays that way.

It looks like the auto fucus is 'hunting'? Most of your shots are out of focus like the camera can't decide what to lock the focus on. On the tripod, I'd switch the camera to manual focus.

If your camera viewer has a whole mess of little red dots that lock on the autofocus, you might want to set it so just the center red dot sets the focus?

When using a studio set up, it's best to set your camera to manual.

In your camera, set your white balance to AWB or automatic. It's hard to say what kind of light is coming from those lamps. You can tweak the white balance later with almost any software. Set the ISO to the lowest setting -- probably 100? Or 50 if the camera permits.

I liketo use a 'big number' (therefor tiny) aperture setting (16, 18, 20 -- up in that range) -- this opens up the depth of field and ensures the entire pen will be in focus. You adjust the brightness of the photo, tweaking aperture and exposure.

A cable or IR remote shutter release helps too, removing camera shake when you press the button....

The back of your photo box is a bit 'busy'... Any reason you haven't rigged a curved white (or any other color) background to remove any distracting shapes or lines? Like this one...

ms-3-strobist.jpg

(from the Strobist website)

Here's a very cool little site that lets you experiment with ISO, white balance, exposure, and aperture settings to see the effects in brightness, depth of field, etc.

http://camerasim.com/camera-simulator.html

You're nearly there...

Very cools pens, BTW....

Steve


Here is a series of photos showing the setup I made using the materials and bulbs recommended in previous forums. The scene is actually daylight in my workshop, though the picture makes it look dark.

The camera I bought is a Canon SX30IS and is a really good camera with lots of features.

Please take a look and offer any advice you feel would help.

Thanks.
 
Last edited:
Hey Stephen,


I liketo use a 'big number' (therefor tiny) aperture setting (16, 18, 20 -- up in that range) -- this opens up the depth of field and ensures the entire pen will be in focus.

There is actually a sweet spot in the aperture settings that is probably about 2/3 of the way between your largest opening (smallest number) and smallest opening (largest number). For example if the lens on the camera goes from say 3.5 to 22 you probably want to shoot somewhere around f/11-f/16.

To do this you need to take the camera off of program or automatic and put it on Aperture priority (or manual). Aperture priority will allow you to set the f/stop (aperture) at whatever you want and will then adjust the shutter speed to the lighting conditions....but remember you want to underexpose by at least a stop based on what you have shown
 
Hey Stephen,

With this setup, you should eventually produce studio quality photos.

Is your camera on a tripod? I took a course years ago, and the instructor said you can improve your photography by 50% by using a tripod. With a tripod, you'd get the composition exactly the way you want it, and it stays that way.

It looks like the auto fucus is 'hunting'? Most of your shots are out of focus like the camera can't decide what to lock the focus on. On the tripod, I'd switch the camera to manual focus.

If your camera viewer has a whole mess of little red dots that lock on the autofocus, you might want to set it so just the center red dot sets the focus?

When using a studio set up, it's best to set your camera to manual.

In your camera, set your white balance to AWB or automatic. It's hard to say what kind of light is coming from those lamps. You can tweak the white balance later with almost any software. Set the ISO to the lowest setting -- probably 100? Or 50 if the camera permits.

I liketo use a 'big number' (therefor tiny) aperture setting (16, 18, 20 -- up in that range) -- this opens up the depth of field and ensures the entire pen will be in focus. You adjust the brightness of the photo, tweaking aperture and exposure.

A cable or IR remote shutter release helps too, removing camera shake when you press the button....

The back of your photo box is a bit 'busy'... Any reason you haven't rigged a curved white (or any other color) background to remove any distracting shapes or lines? Like this one...

ms-3-strobist.jpg

(from the Strobist website)

Here's a very cool little site that lets you experiment with ISO, white balance, exposure, and aperture settings to see the effects in brightness, depth of field, etc.

http://camerasim.com/camera-simulator.html

You're nearly there...

Very cools pens, BTW....

Steve


Here is a series of photos showing the setup I made using the materials and bulbs recommended in previous forums. The scene is actually daylight in my workshop, though the picture makes it look dark.

The camera I bought is a Canon SX30IS and is a really good camera with lots of features.

Please take a look and offer any advice you feel would help.

Thanks.
Steve that is an awesome website.

Lin.
 
i will admit right off that i didn't read every post so sorry if i repeat anything, but the two biggest features i notice is it doesn't look like the light is getting through your fabric, and it looks like in a few pictures your also using your flash. make sure it is off if that is the case. other than that. tripod and timer, and keep at it. i can show you my set up if your interested
 
i will admit right off that i didn't read every post so sorry if i repeat anything, but the two biggest features i notice is it doesn't look like the light is getting through your fabric, and it looks like in a few pictures your also using your flash. make sure it is off if that is the case. other than that. tripod and timer, and keep at it. i can show you my set up if your interested

Would love to see your setup. I have found I cannot get a good picture without the flash; too dark and cannot see detail.

Adjust your EV accordingly.
 
Hi Stephen,

I see several problems with the various pics, including being out of focus, over exposed and composition issues. Could be a bit much for anyone to help with all of them in this thread. First, read this tutorial, especially Section I (http://www.nealaddy.org/node/16). It helped me a lot, and applying the techniques will solve several of your issues.

Here's a quickie on what works for me. I use pretty much the same lighting setup you have (3 daylight 100W bulbs in reflectors) except my top light is almost directly overhead of my subject. The camera lens is no more than 9-10" from my subject, mounted on a small tripod. The camera is set in macro mode, the flash is disabled, and I set it for a 2 second delay.

Don't expect your camera alone to deliver the perfect photograph...that's where software comes in handy...the tutorial will help with this also. I use GIMP because its a free download, and it works prety well. What was most helpful here was always having a white card in the scene with my pen, then using the "Levels" feature in the software to color balance.

Hope that helps. Good luck.

Sites down been hacked it says
 
Most things have already been covered here, but one thing that I do is turn off that retarded auto focus. If you have one of the prosumer SLR cameras they pack all kinds of programs on it with bells and whistles. Turn that auto focus off and do a manual on it. This way YOU control what's in focus...not some program in the software.
 
I have found many helpful steps to take from the AlzoDigital web site. Look in their light tent section and there are some great shots of setup and exposure/white balance solutions.

Like the other photo included in the thread, the background should be hung so that is it creaseless and seamless.

Keep messing with it, I think you are heading in the right direction.

Sent from my iPad using Forum Runner
 
Rock solid tripod and use the 'timer' to further reduce 'shake'....that will help with the focus issue.
Use the f/8 aperture to increase the depth-of-field....keep the entire pen in focus.
A 15% grey card will help, but most of the time you'll be able to adjust the shutter setting(via the EV +/- button) and see what the outcome will be in the viewfinder. And then a simple 'bump' in the processing program of your choice will take care of the rest.


Take lots of photo's....digital film is really super cheap:biggrin:


Scott (or maybe this:>>LINK<< ) B
 
Lots of good advice here. I'll take a shot from another angle.

I do many computer renderings, and I'll borrow a trick from that for you. Right now, you have 3 equally powerful lights. Yes, you get a very even quality of light. However, that tends to give you a bit of a sterile image.

As an experiment, try doing a couple of things. First, move your lights around to see how the quality of light changes. Move one of the side lights behind the pen and one way in front (but still shielded). If you don't really like that, try moving one light further back to reduce the impact. Finally, if you don't liek that, replace one of the 100w with a 75w.

Now, the point of doing all of this is to introduce movement in your image. If you were to photograph a cube, you don't want all 3 sides to have equal light. You want one slightly less so that the corner pops. That helps the eye to read depth and encourages your eye to move around the composition. Applying that logic to a pen, you want to create depth and movement on and around your pen. Varying the quality and intensity of light across the image will help do that.

I'm not suggesting putting a bunch of shadows and whatnot, but rather subtle variations.

Another exercise would be to go on etsy (just because of the high volume of photos) and find what you think is the best version of product photos. Then try to duplicate it. You will start to notice where there is use of color, when they use texture, softness of light, etc. Now that you have taken some shots, you will see more than you might have before you tried these (which are not terrible).
 
Your camera has a minimum focus distance at any zoom. Find out what your minimum focus is and stay back further than that number. 0.6 meters is a pretty common one, but in macro mode you may be able to get much closer.

Make sure the flash is not firing, and mixing with other temperatures of light. experiment with your metering modes as well. The camera sees a tone and tries to adjust to make that neutral... so if you meter off white, your picture will be super dark. If you meter off black, the picture will be blown out bright white.

If you have manual settings, you can get a gray item, 15% photographic gray, or a color card and set everything without a pen in place... Then your exposure, white balance and exposure compensation will be set and will not vary from pen to pen.
 
I tried to fix one of your photos, only had a few minutes and a very small file so the enlargment will be blurry. Just adjusted white balance and exposure, cropped it, and took out the stand. You can see a bit of it on the bottom. Your main problem is obviously focus issues, if your camera lets you pick a focus point then pick the center and use it to focus on the pen, otherwise your camera may pick up the brighter areas to focus on. Or try manual as suggested earlier.
 

Attachments

  • pen (1 of 1).jpg
    pen (1 of 1).jpg
    14.5 KB · Views: 126
Back
Top Bottom