Looking for tips on making fish bone segments

Signed-In Members Don't See This Ad

Earl_J13

Member
Joined
Sep 5, 2016
Messages
31
Location
WA
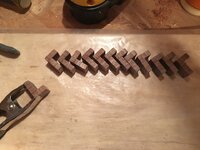
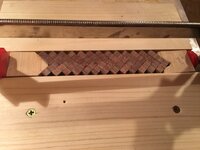
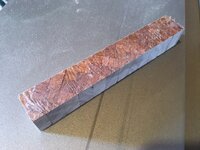
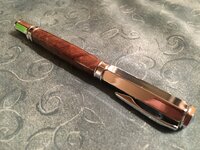
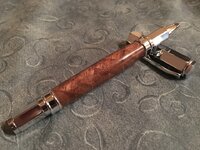
I attempted my first fish bone style blank using walnut. The process I came up with was tedious and the result was decent but there were gaps inside that showed up after turning. I ended up using a wood filler which is noticeable. Im mostly happy with the pen but I'd like to perfect it. Anyone have tips or a process they'd like to share?
Ill show the way I did it with a few photos below

IMG_0724.jpg

IMG_0735.jpg

IMG_0748.jpg

IMG_0750.jpg

IMG_0752.jpg
 
Signed-In Members Don't See This Ad
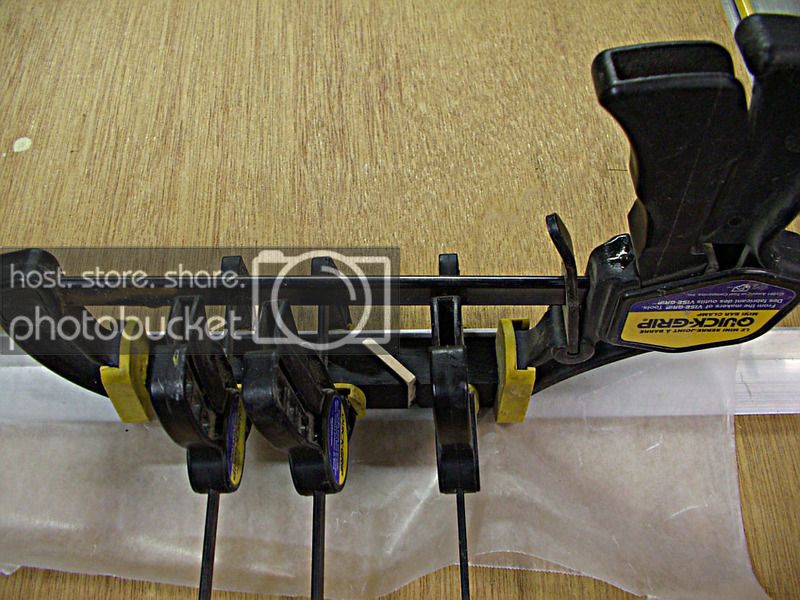
There is basically one tip for something like that and that is precision with milling of the wood and cutting. Also when clamping segments use a piece of aluminum angle to keep all pieces straight and true.
 
The trick with the aluminum angle to keep the CA from sticking to it is .... wax it! A thin layer of candle wax should keep that pesky CA off your aluminum and on the wood where it belongs.


The tip with the "being precise with your cutting" is certainly 100% valid, but so is being precise with your placement to make sure it's all squared up at 90 degrees. I can see in the second pic that the placement was a little off 1/3 of the way from the right side ... the pieces are just a tiny bit askew, and that's your gap right there.


If you want to attempt this again, keep in mind that differently colored woods may "bleed" color into each other during the sanding and/or finishing process. Also, woods of differing hardness may play havoc on how evenly your barrel wants to sand, as well as it's balance on and off the lathe.
 
I picked up some aluminum angle from a local hardware and lumberyard ... had some leftover cedar from a fencing project that is still in the works, and wanted to try out segmenting for the first time ...

I realize that going straight to a project like this is akin to jumping off the deep end, and I'll admit freely that of the four blanks and 18 tubes of superglue that I used for this project, only ONE blank survived the drilling and turning to completion. That having been said, I needed a second blank for the cap, and my best option at the time was to turn that from some locally grown Mesquite (either Northern Texas Mesquite or Honey Mesquite ... I'm not sure).

The result is pictured below, and is now owned by Brian G, my 2016 PITH partner from October. I'ld have shown it here earlier, but I didn't want to ruin the surprise for him. :)

155830


As in my previous post, waxing the aluminum angle with some candle wax was key, in getting the segments squared up at 90 degrees and not sticking to the aluminum. I also used a lot of tiny little spring clamps to secure the segments as the CA cured.

I used only Western Redwood Cedar for the lower barrel ... the lighter looking wood came from one half of the board, and I interleaved the lighter and darker segments for the resulting pattern.

I used my band saw to roughly square off the ends of the blanks, and trued them up on my sander before I took them to the lathe for drilling. The first blank I tried to trill with a brad point bit ..... it shattered. The second, I pre-drilled with an acrylic bullet point bit that was undersized, and then came back with the correct size in a standard twist bit .... the entry hole became ragged and it was ruined. The third, I drilled with the correct size standard twist bit, and it came out acceptably well (pictured above). The fourth, I drilled with the same bit... which is the wrong size for the cap :eek: ... and the only correctly sized bit I have for the cap is a brad point bit!

Oh well, at least I know what I need if I want to tackle a project like this again! :)
 
Last edited by a moderator:
Oi ... thanks so much for that, lorbay ... now I know what my next insanely difficult project will be!

You are not helping my addiction one bit, lol!
 
Your first picture gives me a new idea; bear with me:

Take a long billet of milled wood (jointed square and true) about 1-1/8" thick.
Rip it twice on the tablesaw with the blade about 3/8" or 1/2" high to produce an outside corner moulding trim piece--IOW, the rip fall piece is roughly 1/4" or 3/8" square.

You end up with an L-shaped billet when viewed from the long edge.
Now chop it into the appropriate thickness (3/16" or so), glue it up and give it a go.
BTW, I'd use Tite-Bond wood glue rather than CA.

Thoughts??
 
Gary,

What simple yet totally feasible way to do this.

That would work. You could also glue up square pieces of different woods and wrap one in plastic wrap to prevent the glue from sticking to it. The when you cut the small pieces you would have a multi colored pattern.
 
Back
Top Bottom