Improving my pics

Signed-In Members Don't See This Ad

soligen

Member
Joined
May 11, 2010
Messages
1,091
Location
Sterling Heights, Michigan
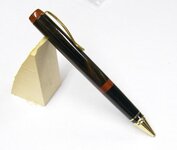
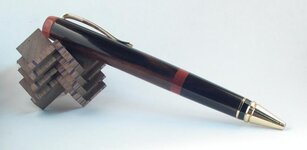
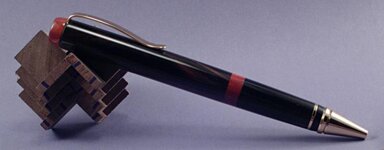
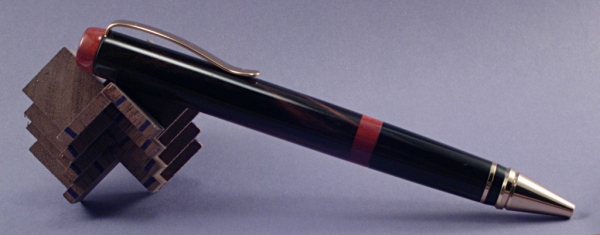
I decided to try to improve my pictures without spending any money on new gear or a light box. This is what I came up with. I took this on my work bench with a piece of printer paper for a background under a 4' florescent light. I did a custom white balance and 1/15 at f2.8. What do you think? I have some ghosty looking areas I'd like to get rid of - along the top and bottom. The second pic is what I was doing previously.

Not sure I like the new one better

PS - obviously I need to get a better prop :wink:
 

Attachments

  • DSCN1042.jpg
    DSCN1042.jpg
    23 KB · Views: 274
  • IMG_0106.jpg
    IMG_0106.jpg
    36.7 KB · Views: 238
Signed-In Members Don't See This Ad
You can use a piece of tracing paper, or a couple of dollars will buy you some translucent (somewhat see-thru) nylon material in the girly section at Wal-Mart. Put that between the pen and the light and it will spread out the highlight more evenly over the pen. Ideally the material will be as large as will fit, and be as close as possible to the pen without being in the photo.

That will cut down on the contrast between the highlights and the dark areas of the pen and should help things out a bunch. Your color balance looks fine, but I would suggest you work on getting more depth of field with a higher aperture ( Are you sure it's F 2.8, cause you seem to have more depth of field than I would expect from such a large aperture...)
 
Last edited:
Wish I could make a one piece cigar. They pen looks awesome. As for the photos, they look better than mine and I have a light box and three lamps. I just can't get the hang of picture taking.
 
You want to use a bigger f-stop. Right now you focus is good on the front of the pen but by the back side it is getting fuzzy. If you are keeping the pen parallel to the back of the camera then f5.6 or f8 should be fine.

Since you are using plain white background you could go up to f22 and add a little "angle" to the pen to increase dynamicism to make it "more interesting".

GK
ps Gorgeous pen!!
 
( Are you sure it's F 2.8, cause you seem to have more depth of field than I would expect from such a large aperture...)

Yes, knowing that I jockeyed around with the camera to get the pen parralel with the lens, so little depth of field is needed. Looks cockeyed, pointed down and twisted on the tripod lol. But minimized depth of field needed
 
Wish I could make a one piece cigar. They pen looks awesome. As for the photos, they look better than mine and I have a light box and three lamps. I just can't get the hang of picture taking.

Its actually a two piece modded to the longwood style. The joint is the bottom of the red band.

I'm sure you can do this too. Go to the advanced pen making forum and follow along with Butch's challenge series. This is my challenge 3 pen (although I did challenge 2 twice, so maybe 4 for me :)), but nothing stopping you from going back and starting at challenge 1. I only had made 5 or 6 pens before starting the challenges, and learned boat loads doing it
 
You want to use a bigger f-stop. Right now you focus is good on the front of the pen but by the back side it is getting fuzzy. If you are keeping the pen parallel to the back of the camera then f5.6 or f8 should be fine.

Since you are using plain white background you could go up to f22 and add a little "angle" to the pen to increase dynamicism to make it "more interesting".

GK
ps Gorgeous pen!!

Ok i'll five that a go and post a new pic
 
I think if you angle the pen toward the front will automatically give you the sense of depth. Does the camera have an automatic mode where it does all the calculations for you?? If so start there and see what they look like. That is all I use because I can not be bothered with all that figuring. Todays cameras are pretty well set up and unless you are doing photo shoots for magazines I think people get a little carried away. If you are using a prop to hold the pen then do not shoot directly overhead and down. You want to give the pen some depth feel.

cigarchrome.jpg
 
Last edited:
I went full manual becasue this camera is older, and isnt so smart. My wife's new camera is much smarter.

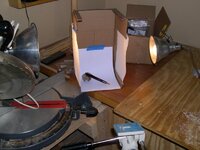
Here is the latest. F10.4 at 1/2 - definately better focus. And a make shift light box - it doesn't get much more make shift than this. That is a cut up box from a PSI order, and teh diffusers are paper towels - Bounty, of course.

THe reflections still seem a bit obnoxious along the bottom and top

The prop is the starter courses for a 360 herringbone - the project is on hold becasue the rest of the wood I want to use is not yet dry enough for my liking.
 

Attachments

  • DSCN1045.jpg
    DSCN1045.jpg
    22.1 KB · Views: 157
  • DSCN1047.jpg
    DSCN1047.jpg
    57.2 KB · Views: 150
That is better. If you add a touch of sharpening in your photo software that will help with the fuzzies along the top and bottom edges.

You want Some reflection, otherwise your finish looks flat. The reflection is what gives that "Line of Shine". But you are picking up the multiple lines caused by the card board of your box. The light at the bottom is blocked by the bottom of the cutout. You could probably improve it just by using 3 or 4 paper towels hanging in a U shape, suspending the ends from above the lights on the left and right and draping the center of them under the pen. Then put your background on top of them like you are putting it on top of the box bottom now. Now you have no cardboard on the bottom or sides blocking the light. You might also want to have a paper towel across the top so the pen doesn't reflect the (relative) dark of your shop ceiling.

JohnT, if you look at your (gorgeous) pen there appears to be a thin white halo all around the top of it. That comes from too much sharpening. Turn it down just a hair and it will be perfect. One of these days I have to make me one of those!
 
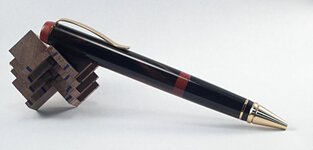
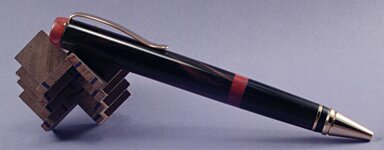
Here is the latest try.

I cut out as much card-board as I dared, painted the inside white, adn used waxed paper for difusers instead of the bounty. I turned off the in-camera image sharpening and set the capture to raw (probably overkill). I downloaded GIMP and used the Unsharp Mask to sharpen in - i toned iot down a bit from the default.

What do you guys think? I still dont like the reflection long the bottom. Any way to get rid of this without going to a dark background?
 

Attachments

  • DSCN1054.jpg
    DSCN1054.jpg
    23.2 KB · Views: 143
That is MUCH better! Really, that bottom reflection is pretty subtle. But if you want to get rid of it you could switch your background from white to light/medium-gray. That will cut down on that reflection while still leaving the contrast you need to show off the pen the best.
 
If you want more light, don't hesitate to use mirrors. Also, the silver "car windshield shades" make great reflectors, since most are crinkled and will natuarally diffuse the light. We've got a few of those downstairs in my wife's studio. Photography is a hobby of hers...
 
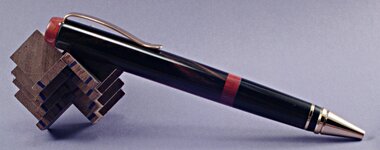
One more try - on a grey background, and I turned off the overhead forescents so I didnt have mixed types of light. It was about one stop under exposed, which I lighteded in GIMP just before a mild sharpening.

Best yet I think - still havent spent anything :)

The on ething that still puzzles me is that lower reflection. It is much lessened with the grey, but still there. The thing is that I dont see this on other peoples pictures. It just seems like I'm missing something.
 

Attachments

  • DSCN1058.jpg
    DSCN1058.jpg
    23.7 KB · Views: 133
You know, I just noticed that the jpg on my computer looks much better than the one you can see. Is the site post-processed my pic? What you see is very noticably fuzzier than the file I uploaded.
 
Dennis, ALL of your pictures look better than my photography attempts.

But to my eye, the pen doesn't seem super crisp/clear...

We like to do a lot of our photos on black plexi...here's one my husband took:
walnut maple HB360jpg.jpg

this one was shot at f/10; although the problem with the plexi is showing all the dust
 
Last edited:
A little better but still not as good as yours Darci. BTW, sweet pen. But I should be mad at you for showing it to me (lol) becasue now I'll want to try it, and it looks EVEN MORE time consuming than what I already have in mind
 
Last edited:
I picked that one specifically too show you, because of your prop. Call it "incentive" to keep gluing.

:biggrin:

Hubby LOVES making the HB360s. me? I'm not that patient. Although I do want to start working on some segmenting.

I don't know what to tell you about the problem uploading... :eek:
 
Have your lights moved since the loose shot earlier? I prefer to light from above and behind primarily when the pen is laying down like that, so I would add a piece of diffusion on top of the box and put a light up above that. You'll find that if you back the lights away from the diffusion it will lessen the hot spots, and also by having a primary light above, the reflection below will be less noticeable than it will with most of the light coming from the sides...
 
I do have difusion and a light above, but it is farther away than the side lights as I had to clamp it to a floor joist above.

The side lights are not behind the pen. I can try movin the side lights away and more behind the pen, I think that is what you mean.
 
When I upload my pics I size them to 750 for this site (425 for a different one) and I export to "medium quality" (8 of 12) jpg. With those settings the pictures look good on the sites with no perceptible loss of quality.
 
fwiw
I have found that experimenting with the metering mode can sometimes have a dramatic impact on the final result.

But .... now I'm wondering about my "Dynamicism" :confused::confused::confused::eek::biggrin:
 
fwiw
I have found that experimenting with the metering mode can sometimes have a dramatic impact on the final result.

But .... now I'm wondering about my "Dynamicism" :confused::confused::confused::eek::biggrin:

In photography you want the photo to have impact, to pull your eye into the picture. This can be helped by the "rule of thirds", by having a stream or road leading into the picture, etc.

Look at the first two pictures in this thread. One is laying flat going directly across the photo left to right dead center in the photo. In the other the pen is at a 45-degree angle. The second one is more "dynamic".

Now compare that second shot to JT's photo of his metal-braid pen where the pen is at a shallower angle and leads not just top to bottom but also angles from front to back. That is even more dynamic. It draws the viewer's eye and mind into the picture more than the flat pen.

That is what I'm talking about when I say dynamicism.
 
It really is almost 90% about lighting. As long as you get enough light on a pen with a nice white background to reflect light and minimize shadows.... Any decent camera on auto will produce pretty darned sharp photos with little or no fiddling on your part. Enough light is the real trick. To get an idea, cary your pen out in the yard sometime midday when the sun is blaring. Set the pen up, snap a photo, and look at how nice looks compared to the same pen and same camera settings inside. It's cause the sun is a) bright and b) producing light from MANY directions. That said, I have a simple wood box, opened front painted white inside with a piece of poster board curved as a back/base and 2 five dollar work lamps clamped on the edge of the box. All the white bounces the light all over, killing any harsh shadows, lots of light, small area.... easy cheesy something something.....

:)

HTH

P.S. -Good composition is a whole other thing. This is just a quick rough idea how to get nice clear bright photos.
 
Back
Top Bottom