I went Vertical!

Signed-In Members Don't See This Ad

teamtexas

Member
Joined
Apr 24, 2013
Messages
147
Location
Gatesville, Texas
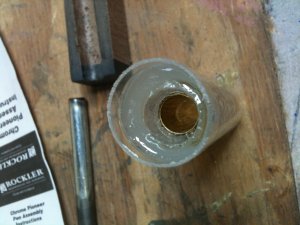
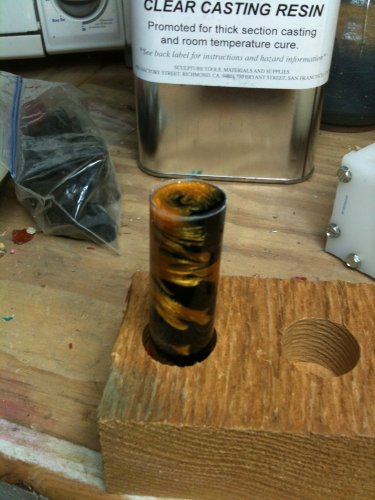
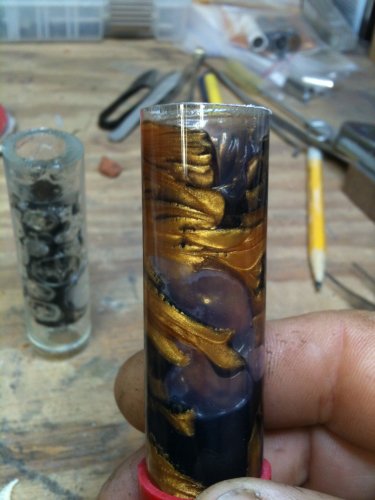
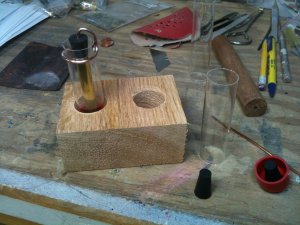
I decided to get some clear tubes and try my hand at vertical casting. I picked up some 3/4" x 12" tubes along with some silicone caps. I cut the caps back so they didn't hide the casting, then drilled a hole through the bottom and screwed in a silicone rubber stopper to support the tube on the bottom.
1_vert_casting.JPG

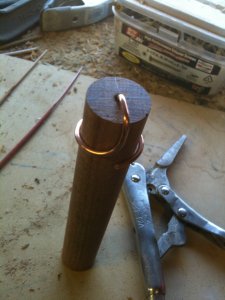
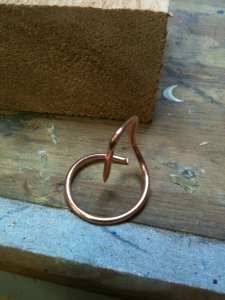
For the upper support I used a dowel about the correct size and bent a piece of #12 solid copper wire. I sharpened one end to insert it into the plug. I also drilled a pilot hole in the plug to make this easier.
1_vert_bent_wire.JPG

1_vert_wire_bending.JPG

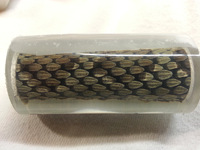
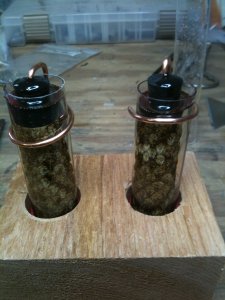
I drilled a 1" hole into some scrap blocks to provide a means to stand the tubes up after casting. Here are a set of snake skins that I tried out on bolt action blanks. The area for pouring in the resin at the top of the tube is small but not too hard to do. I was very happy with the outcome (until the skins started to make bubbles and air pockets, I didn't let the CA off gas long enough).
1_vert_skins.JPG

This type of casting really saves on the resin. It took about 3/4 an ounce to pour each of the skins.
Dan
 
Signed-In Members Don't See This Ad
Indeed, I reckon one of the biggest advantages of vertical tube casting, is the resin saving capability, and that is the reason why the "resin saver molds" that some of our members make and sell are so popular...!

Bad luck about those bubbles...!

Cheers
George
 
Will you be willing to share your source for the tubes and stoppers

Sure! I picked up the stoppers from our IAP member PTownSubbie. The tubes and silicone caps came from Uline Plastic Tubes, Plastic Tube in Stock - ULINE Plastic Tubing

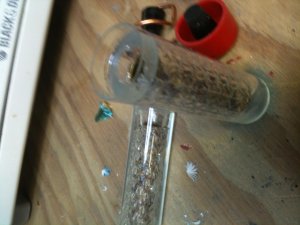
As for the bubbles, here are some pics of the snake skins with the stoppers removed (by the way they came out very easy).
1_snake_blank_unmolded.JPG

1_snake_bubbles1.JPG

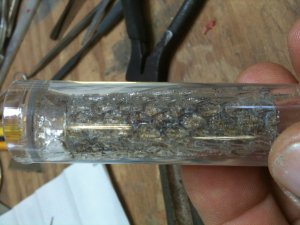
This close up shows the bubbles. It looks like they are all the way around the skins. It makes it look sparkely.
1_snake_bubbles.JPG

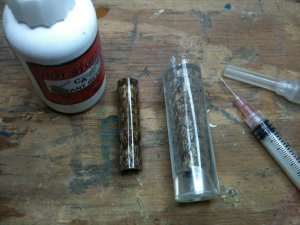
I hate it when I ruin a tube, so I decided to try to inject some thin CA into the air pocket from the end of the tube with a 3cc syringe. It was a mess, but I think it saved the blank.
1_snake_blank_repair.JPG

Dan
 
Thats pretty much how i started out, although I probably had many more failures than you. lol
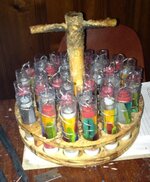
I know some cast very successfully without pressure but here's a solution to those of us that need it. A nice little rack to hold all of those tubes and fits in the air tank so nothing falls over. This is how Ive done it for a few years now, thanks to CaptG. He was the first to vertical cast around here and did all the leg work to iron out the supplies needed. Thanks Gary for helping us all share your idea.
 

Attachments

  • image.jpg
    image.jpg
    50.7 KB · Views: 354
Last edited:
JohnU, Do you every have resin work its way into the tubes from the pressure? Or does it just cause the plugs to seat tighter and stay dry?

Dan
 
JohnU, Do you every have resin work its way into the tubes from the pressure? Or does it just cause the plugs to seat tighter and stay dry?

Dan

I've had a few but its not common. Maybe 3 or 4 a year. I have four plug sizes I use depending on the brass tubes so I can usually get a decent fit. In the past, I've drilled a small hole through the resin and tapped it out of the tube with a metal rod. Although I've knocked the brass tube out of a couple blanks this way also. Lol
 
Indeed, I reckon one of the biggest advantages of vertical tube casting, is the resin saving capability, and that is the reason why the "resin saver molds" that some of our members make and sell are so popular...!

Bad luck about those bubbles...!

Cheers
George

Another really nice thing with the clear tubes is you can see everything so you can detect problems all the way around the tube. No where for a bubble to hide.
 
That's a cool idea. I use PVC pipe for my vertical molds - is there a reason you went with clear tubing?

Everyone that I know doing this is doing clear casting which tends to be done with pressure. (there are a few that don't)

I don't think you can use PVC molds with PR under pressure. I would think it would negate the shrinking of the PR and make removing it from the PVC impossible.

The clear tubes can't even be removed from the PR without making the interior of the blank unseeable in a photographic way. So they tend to leave the mold/tubes on and just trim the ends.
 
That's a cool idea. I use PVC pipe for my vertical molds - is there a reason you went with clear tubing?
I don't think you can use PVC molds with PR under pressure. I would think it would negate the shrinking of the PR and make removing it from the PVC impossible.
You can use PR under pressure with no problem. However, after about 4 casts, it does get really hard to remove blanks from PVC. But a 10' section of PVC is about $3, so it comes out to about 15¢ for a 3/4 X6" pvc tube. Plus you don't need the end caps. Blue tape works great. Normally I don't use pressure with PR, but I have done it without issue. Even alumilite will come out of PVC after being under pressure, but it takes more time than it's worth.

Now, there is the issue of seeing the bubbles, but my experience shows that the bubbles will float to the top. But my experience is with regular resin blanks, not tube cast blanks, so I don't know for sure about the bubbles. However, pouring resin blanks, you wait till the resin is starting to thicken before pouring. With clear, there would be no need to wait for the resin to thicken. So I'd think you could use a little vibration to encourage the bubble to get to the top.


Edit: and by time, I mean it takes alumilite at least a week before it will come out of a pvc tube (maybe more than a week). I didn't believe it until I heard about this on this site. I had a piece of black alumilite that was still in the PVC. I figured when I needed it, I'd have to turn it off the PVC. I had it for several months in the pvc. then I read this, and I tried it, and the blank pushed right out without any problem.
 
Last edited:
ok. I use PVC with no pressure and have not had any issues with air bubbles in blanks. I have found some in commercial blanks though. I also have used my PVC for a lot more than 4 or 5 pours. I do have to knock the old cured resin off every once in a while.

I may try this method - I was thinking of getting some more silicone and making a mold to be able to cast the tube in place.
 
I too use PVC with Silmar 41 with no issues under pressure and usually have no issues with getting the blank out. When using Alumilite, I need to persuade the blanks out if I didn't use any release agent...
 
I also have used my PVC for a lot more than 4 or 5 pours. I do have to knock the old cured resin off every once in a while.

I too use PVC with Silmar 41 with no issues under pressure and usually have no issues with getting the blank out. When using Alumilite, I need to persuade the blanks out if I didn't use any release agent...

I know I can use the pvc for more than 4 pours, but the more I use it, the harder it is to get out. I've broken several blanks when I tried to "Persuade" them too aggressively. I now use a pipe clamp and a dowel when they are really stubborn. My experience has been the 1st blank many times just falls out of the pvc. Most times I can push out the blank on the 2nd pour. Starting the 3rd, they need a little persuasion. After I have to use the pipe clamp & dowel, I toss the pvc. PVC is so cheap, it's just not worth the hassel to me to spend time getting them out. Plus, even breaking 1 in 25 is a waste. When one blank will pay for a 10' section of PVC.

And healeydays, how long do you wait till you get alumilite out of PVC? I normally only use silicone molds for alumilite, but sometimes I get request for larger blanks. I just tell the buyer to turn off the pvc. But I've never really tried hard to get a fresh blank out of PVC.
 
I tried next day to a month later on Alumilite. The PR shrinks, the Alumilite doesn't. I use the Alumilite in the moldsavers now and not the PVC for the most part...

Depending on what I'm making I do tube in (never vertical) or solid blanks. So, I use both methods.
 
Last edited:
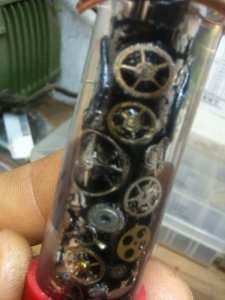
Another bubble fail :(

Well you can't chalk this up to the skin holding air. This is a painted blank that had dryed for several days with pen parts CA glued on. That had dried for more than 24 hours before casting with clear.
1_clock_parts.JPG


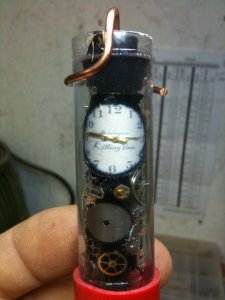
The shop was nice and cool (about 70 degree) when I cast this. The bubbles look like they are covering the complete tube. When I cast it, and for about 10 min. after there were no bubbles at all. I think the heat from the resin is causing the captive air in the tube to condensate on the out side of the tube. What do you think about that??

I also learned not to use sharpie on the edges of an applied decal....it bleeds! :mad: I guess I was really killing time!
1_clock_parts_2.JPG


Dan
 
Last edited:
did you bake the paint?

You'll know if the air could have come from the tube when you pull the stoppers. If there is resin in the tube, then air came out. No resin in the tube, then it sealed fully.

as was asked before, did you use pressure?
 
Well you can't chalk this up to the skin holding air. This is a painted blank that had dryed for several days with pen parts CA glued on. That had dried for more than 24 hours before casting with clear.

The shop was nice and cool (about 70 degree) when I cast this. The bubbles look like they are covering the complete tube. When I cast it, and for about 10 min. after there were no bubbles at all. I think the heat from the resin is causing the captive air in the tube to condensate on the out side of the tube. What do you think about that??

I also learned not to use sharpie on the edges of an applied decal....it bleeds! :mad: I guess I was really killing time!

Dan

I had some do that and I suspect that when the resin shrank it pulled away from the pen tube instead of the mold.
Maybe?
I've given up on vertical for the time being.
 
Well you can't chalk this up to the skin holding air. This is a painted blank that had dryed for several days with pen parts CA glued on. That had dried for more than 24 hours before casting with clear.
1_clock_parts.JPG


The shop was nice and cool (about 70 degree) when I cast this. The bubbles look like they are covering the complete tube. When I cast it, and for about 10 min. after there were no bubbles at all. I think the heat from the resin is causing the captive air in the tube to condensate on the out side of the tube. What do you think about that??

I also learned not to use sharpie on the edges of an applied decal....it bleeds! :mad: I guess I was really killing time!
1_clock_parts_2.JPG


Dan

Im gonna take a shot at this: Were the blanks completely clear all the way around? If so, I too have experienced this problem and have found that heat was my problem. There was too much heat as a result of A.)too much catalyst per ounce, B.)too long of a hot water bath,(coupled with the catalyst, creating too much heat, or C.)any other variable that would bring "heat" in the equation.

The reason i say this is because yesterday while casting my snakeskin blanks and had the same result. My conclusion, my first set of blanks were poured(7 blanks @ 7oz) and I used the same mixing cup with some residual resin still in the cup(which has been catalyzed).
once the second batch of resin was done with the hot water bath, added catalyst, mixed and poured, i continue to always have one blank that does this.

So in all of my ramblings,If anyone can make sense of this, I conclude that if you will back off of whatever application is being used to create a rise in temperature, that should in fact help! If for any reason this makes no sense, i would be more than happy to discuss over a phone call. :)
 
When I do my Dichroics and have exposed paint, I always bake the painted tubes at about 150 for at least an hour. This removes any doubt that they are completely cured. If I don't bake them, even when waiting weeks to cast, something with the paint reacts with the resin.

This isn't necessarily the case here, but it is a possibility.

Otherwise, as Seamus said, reduce heat (big reason I switched resins) , and consider pressure.
 
Im gonna take a shot at this: Were the blanks completely clear all the way around? If so, I too have experienced this problem and have found that heat was my problem. There was too much heat as a result of A.)too much catalyst per ounce, B.)too long of a hot water bath,(coupled with the catalyst, creating too much heat, or C.)any other variable that would bring "heat" in the equation.

The reason i say this is because yesterday while casting my snakeskin blanks and had the same result. My conclusion, my first set of blanks were poured(7 blanks @ 7oz) and I used the same mixing cup with some residual resin still in the cup(which has been catalyzed).
once the second batch of resin was done with the hot water bath, added catalyst, mixed and poured, i continue to always have one blank that does this.

So in all of my ramblings,If anyone can make sense of this, I conclude that if you will back off of whatever application is being used to create a rise in temperature, that should in fact help! If for any reason this makes no sense, i would be more than happy to discuss over a phone call. :)
__________________
Were the blanks completely clear all the way around? Yes, they were clear all the way around, and the snake skins were the same way. One big void around the complete item on the tube.

So you're saying too much heat. The snake skin resin was mixed using 3 drops of catalyst per ounce. As I started to cast the watch part pen I happened to catch the directions on the back of the resin and it said I should be using 6-8 drops per ounce. So I used 6 drops for the watch pen parts. Same results for both catings. There was a temperature difference in the shop though. While casting the skins it was about 100 degree in the shop and watch parts were done while it was 70 degee. So the combo of ambient temp plus resin may have still created too much heat. :bulgy-eyes:
One in seven fail? Thats better odds then what I've seen so far. Are you casting in a temperture controlled enviroment?

I was thinking of venting the tubes by inserting a small tube into the plugs. But if it was due to the temp in the tube, I would think that the folks casting in the resin saver blanks would also have this problem.

Maybe I should try to slow the curing process down by putting the castings into a fridge?:confused:

Have you tried mold release on the casting tubes? It does seem like the PR is shrinking away from the brass tube and staying tight to the casting tubes.

Dan
 
Trying an experiment tonight. I just cast a blank without a tube in it to see if the same thing happens to a solid casting. The shop temp was 98 degree and I used 6 drops per ounce of PR. If it's a tempertuare problem this combo should make the PR fail.
Dan
 
When I cast my snakeskin blank, the ancient temp in my garage was around 96° but my reason is kept inside the house at 74°. I pour no more than 8 oz of resin at one time and I put it in my ultrasonic cleaner with the heat turned on(keep in mind it has been preheated) for one cycle of 480 seconds. Then I ONLY use 3 drops of mekp period.mix thoroughly for approximately 30-40 seconds and then pour. Put under pressure and let sit for 24 hours. The pressure pot sits in my garage where the temps are the same(96-100°). Here is a pic of the result

ForumRunner_20130820_201845.png
 
Trying an experiment tonight. I just cast a blank without a tube in it to see if the same thing happens to a solid casting. The shop temp was 98 degree and I used 6 drops per ounce of PR. If it's a tempertuare problem this combo should make the PR fail.
Dan

please take this constructively: I too have tried this same experiment. What i think you will find is that because you are casting without a tube,your results are going to be that there are no bubbles at all. The first problem you created was by using 6 drops per ounce. When doing "tube-on" casting, (especially in texas)you need to use only 3 drops.
 
Last edited:
Before and After the experiment.

Well Seamus I have a feeling a pressure pot is in my near future. Here is a before picture just about 2 min after the resin is poured.
1_solid_casting.JPG


And this is a photo this morning. This is a definite fail. With no tube in the casting it still made large air pockets as it cured.
1_solid_fail.JPG

You can clearly see the spots that have a void in the second picture were filled solid in the 1st.

Dan
 
Dan, the problem you are having IMO, is clearly the result of the resin shrinking due to the amount of heat created in the curing process. In the case of the colored blanks though, you can put that in the toaster oven at 150 for 30 min(but be sure you have checked the temp with a thermometer, some ovens temps vary) and this should at least shrink your outer plastic tube to the blank a little better. But i do not recommend this method with anything that is "tube-on" casted, at least not without prior testing to see the results(you dont want to ruin an expensive piece not knowing the outcome in your casting environment)
 
The plastic tubes look pretty flimsy in the photo. Can you do this type of vertical casting with pressure? How does the resin not squeeze out the top? Maybe I am over thinking it.

I have found a few hours in a hot summer garage for a few hours to cure works wonders. Can you cure these at 80 degrees in a toaster oven?

Cool method. I am going to need to try.

Isn't the pressure on the top identical to the pressure on the sides?
Yes the pressure is the same. You only get squeeze when there is more outside pressure than inside pressure. In this case everything is subject to the same pressure. Plus liquids don't compress nearly as much as a gas does under pressure.
 
Back
Top Bottom