How to finish a pen with metal inlays.

Signed-In Members Don't See This Ad

chartle

Member
Joined
Mar 13, 2015
Messages
1,287
Location
Pgh, PA
Ok I'm almost done with my first celtic knot segmented pen using thin .030 aluminum and wondering if I'm on the right path.

How would you finish it? If it was all wood I would sand to 400 or 500 and then apply my finish. I just feel that to get a good shine on the metal I should be sanding to at least 2000.

I sanded to 1,000 and then started to apply a CA finish with a few coats of BLO and then 3 or so coats of thin and a few medium. I had to leave that way but wondering if I should have gone to the finer grits. My issue is that I have always heard that if you sand wood too fine it closes up the pores and the finish doesn't stick.

The wood is figured crotch walnut and its a slim line if that matters.
 
Signed-In Members Don't See This Ad
I would do a "multiple" CA finish to keep all the segments together especially if your pen will see a lot of use.

Well I splinted it with craft sticks while I drilled it and left them on as I roughed it to round.

Then I put a couple of coats of thin on the overlay before final shaping. I also was very diligent in making sure the inside of the blank and the outside of the tube was fully coated with epoxy. I also let it set overnight between segmenting and drilling and between glueing in the tube and turning.

Oh and I went overboard with the amount of epoxy I used to glue in the segments.
 
Just keep in mind that when sanding aluminum and wood, the aluminum dust can blacken the wood, especially the lighter color wood.

I try to minimize it bu using a very sharp skew and then using sander sealer to fill in the voids that gather the black dust. I then use a CA finish to help stabilize the whole thing.
 
Aluminum

Ok I'm almost done with my first celtic knot segmented pen using thin .030 aluminum and wondering if I'm on the right path.

How would you finish it? If it was all wood I would sand to 400 or 500 and then apply my finish. I just feel that to get a good shine on the metal I should be sanding to at least 2000.

I sanded to 1,000 and then started to apply a CA finish with a few coats of BLO and then 3 or so coats of thin and a few medium. I had to leave that way but wondering if I should have gone to the finer grits. My issue is that I have always heard that if you sand wood too fine it closes up the pores and the finish doesn't stick.

The wood is figured crotch walnut and its a slim line if that matters.
I have never tried to cut aluminum with a skew, How does it work ?

On pool cues I use a live cutter on the tool post and sand with 220 grit with only a few passes with the sand paper and then do a finish.

You start sanding to much and you have a issue of un even surface because the metal is harder then wood and you also transfer the black tarnish into the wood next to the aluminum.

You do know that aluminum will sooner or later pop the finish !

In other words the wood will shrink over time and the aluminum will not..
 
1. I have never tried to cut aluminum with a skew, How does it work ?

On pool cues I use a live cutter on the tool post and sand with 220 grit with only a few passes with the sand paper and then do a finish.

2. You start sanding to much and you have a issue of un even surface because the metal is harder then wood

3. and you also transfer the black tarnish into the wood next to the aluminum.

4. You do know that aluminum will sooner or later pop the finish !

In other words the wood will shrink over time and the aluminum will not..

1. Probably better than the highly figures walnut.

2. I kind of switched to more of a very fine scraping technique which kept everything even.

3. Not really a problem with this walnut. filled in the tiny gaps I had.

4. Well this is kind of a test, I may not even make a pen out of it. Also there is very little wood or aluminum to move.

When I get home i'll finish the piece and post some picks.
 
Aluminum

1. I have never tried to cut aluminum with a skew, How does it work ?

On pool cues I use a live cutter on the tool post and sand with 220 grit with only a few passes with the sand paper and then do a finish.

2. You start sanding to much and you have a issue of un even surface because the metal is harder then wood

3. and you also transfer the black tarnish into the wood next to the aluminum.

4. You do know that aluminum will sooner or later pop the finish !

In other words the wood will shrink over time and the aluminum will not..

1. Probably better than the highly figures walnut.

2. I kind of switched to more of a very fine scraping technique which kept everything even.

3. Not really a problem with this walnut. filled in the tiny gaps I had.

4. Well this is kind of a test, I may not even make a pen out of it. Also there is very little wood or aluminum to move.

When I get home i'll finish the piece and post some picks.

I cant find the photos of a cue I made, but one of the silver rings laid over.

Like cutting steal with a cut off saw has that razor sharp burr.

Any way I found even using a live cutter its hard to get a clean looking cut on metal rings in pool cues and then sooner or later the rings will pop.

I had a custom cue maker send me a cue he made and the aluminum rings popped in shipping.

I stopped using metals in my inlays because of that.
I know these are pens and not cues but my best guess is you will be running cross the same issues.

My worst nightmare is aluminum next to birds eye maple ......
Good luck I look forward to seeing how this turns out for you.
 
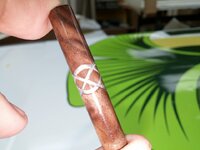
Here it is

This was more of a proof or concept.

I was mostly trying out my new thin segmenting jig and saw. Wanted to see how it would work for a slimline size pen.
 

Attachments

  • 0108161146.jpg
    0108161146.jpg
    138.5 KB · Views: 346
Hello Cliff

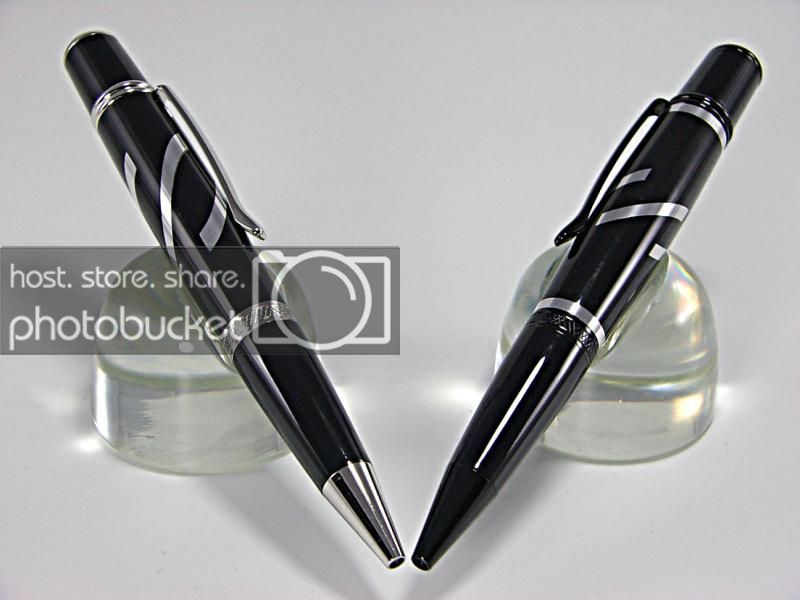
If you would allow me to make a suggestion. Try to keep like materials together. Wood with wood. Hard materials with other hard materials. There are many different veneers you can use for the knot or you can use acrylics and metals. What this will also help is in the finishing aspect. You can top coat with CA on the woods and just polish the metals and acrylics. Here is an example of aluminum and black acrylic. Good luck.


Back
Top Bottom