BradG
Member
Hi Chaps
Today I've been playing with polishing the inside of acrylic. This process works for many types of plastics, so by all means give it a go on what you're using.
I've heard many people cuss about having to polish the inside of transparent pens using sandpaper as it can be quite awkward to get all the nooks and crannies within. Flame polishing generally isnt possible due to the narrow inside diameters we're dealing with.
This method uses the vapour produced by a cheap chemical called Dichloromethane, or DCM for short
The beginning
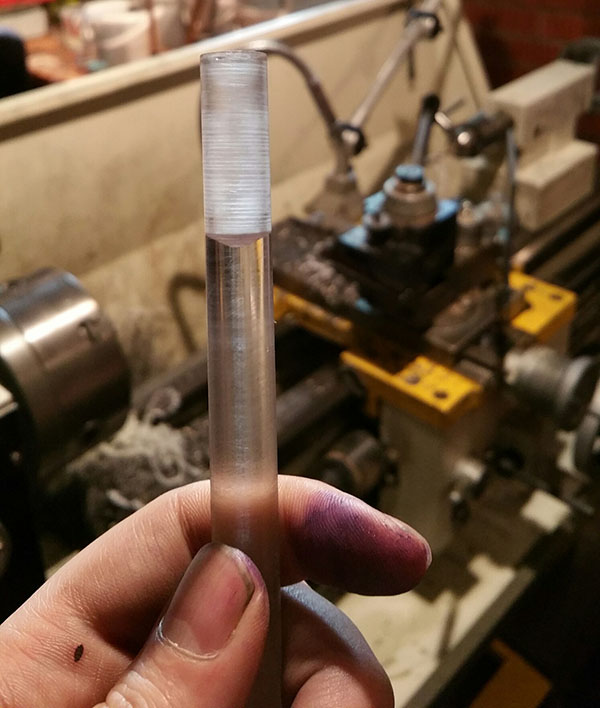
I wanted this to be as rough as poossible to test just how effective this method would be. so, I used a blunt 9mm drillbit and forcefully bored it through a piece of acrylic rod, which has left lots of tooling marks within as you can see.
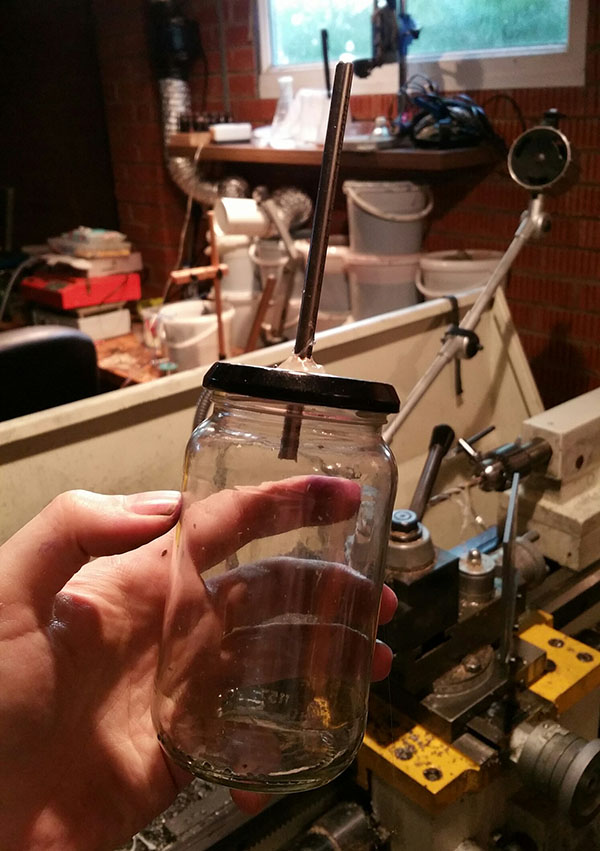
The next step was to build the high tech apparatus. A jam jar with a piece of stainless tube hot glued through the lid.
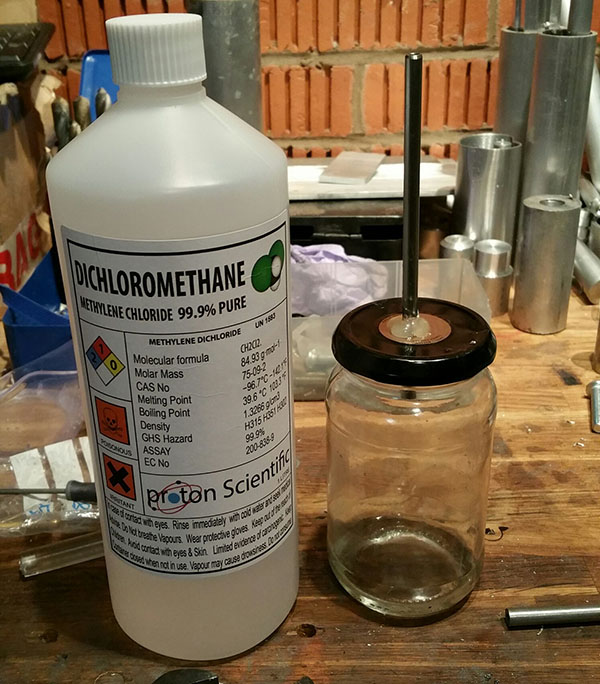
I added around a tablespoon of DCM to the jar and screwed the lid on tight.
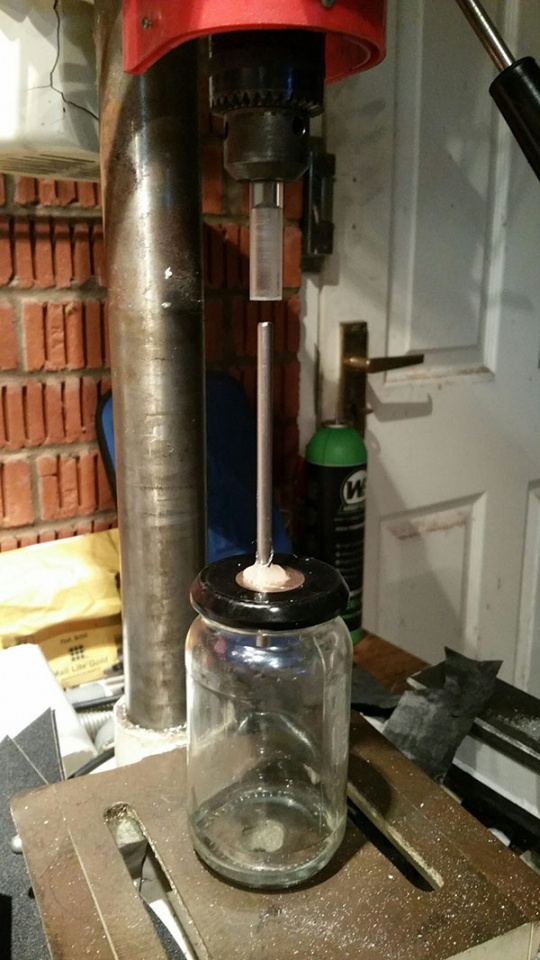
It's important that the stainless steel tube does not touch the walls of the inside of the pen piece, otherwise it will smudge. To ensure this, I mounted the piece of acrylic into the chuck of my drill press, and placed the jar on the bed. I will mention that at no point is the drill press turned on.. we're purely using it's quill action only.
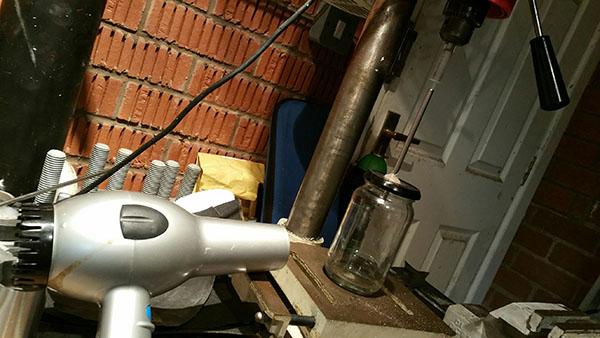
simply placing a hairdryer next to the jar is all it takes to heat the liquid enough for it to begin emitting vapours. this is a little slow with regards to the amount of vapours it puts out, but nevertheless it does work. A better approach i found was to wave a blowtorch around the base of the jar (use caution not to shatter the glass by having the blowtorch blasting on it) to create small bubbles on the DCM. you could of course also use a hotplate.
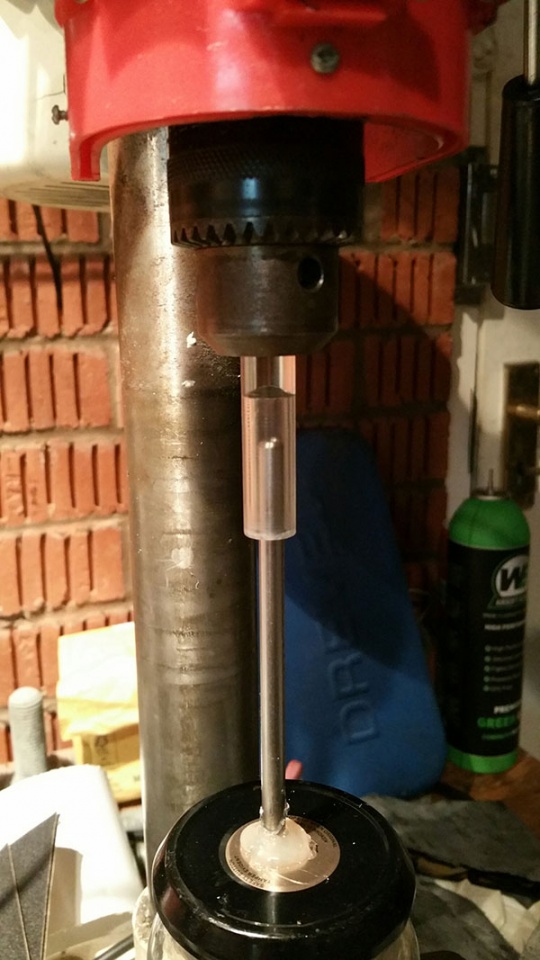
Once the vapours are being produced, simply pull the handle of the drill press to lower the quill, which in turn inserts the stainless tube all the way into the pen piece. slowly raise it back out again, and repeat until its clear. the whole process is likely to take about 60 seconds. overdoing it and the surface will become wavy.. a bit like looking through water, but nevertheless still clear.
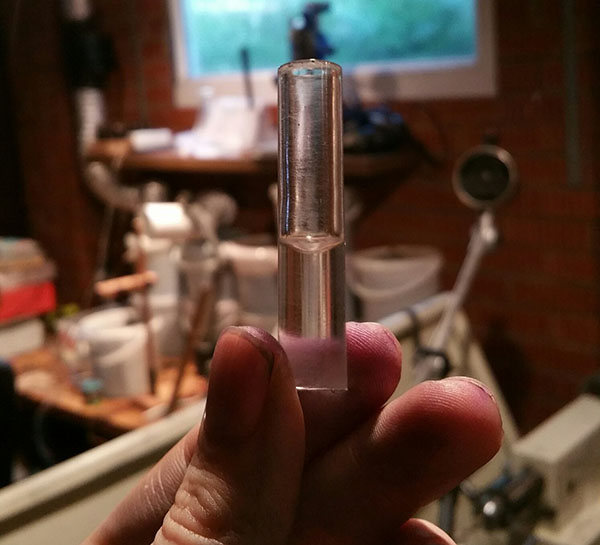
And here's the end result. those drill gouges have vanished and the piece is nice and clear.
Summary
This process is great. the chemical is cheap. the litre bottle cost me £10 including delivery ($13). the other stuff I had laying around, despite stealing SWMBO's hairdryer and a jam jar. I should mention this works by melting the surface of the plastic.. so by touching it with anything you will leave a sticky fingerprint on it and ruin the surface.. then you sure will be sanding it back to normal, but not the end of the world. I would recommend mechanically polishing the outside because its easy to do anyway.
The better the surface is before you do this process, the better the result will be. the key is to do this as little as possible, so obviously having a better surface finish, by for example reaming the piece after drilling, would significantly reduce the amount of time required to chemically polish it internally, thus yielding a much better result.
So, hopefully that's another string to your bow
This should be done in a well ventilated space. in the garage with the door open is adequate.. or as I do, I have a movable extractor fan on a tripod. Inhaling this stuff, apart from generally not being healthy, will make you dizzy, and give you headaches... so don't skip the ventilation part.
Today I've been playing with polishing the inside of acrylic. This process works for many types of plastics, so by all means give it a go on what you're using.
I've heard many people cuss about having to polish the inside of transparent pens using sandpaper as it can be quite awkward to get all the nooks and crannies within. Flame polishing generally isnt possible due to the narrow inside diameters we're dealing with.
This method uses the vapour produced by a cheap chemical called Dichloromethane, or DCM for short
The beginning
I wanted this to be as rough as poossible to test just how effective this method would be. so, I used a blunt 9mm drillbit and forcefully bored it through a piece of acrylic rod, which has left lots of tooling marks within as you can see.
The next step was to build the high tech apparatus. A jam jar with a piece of stainless tube hot glued through the lid.
I added around a tablespoon of DCM to the jar and screwed the lid on tight.
It's important that the stainless steel tube does not touch the walls of the inside of the pen piece, otherwise it will smudge. To ensure this, I mounted the piece of acrylic into the chuck of my drill press, and placed the jar on the bed. I will mention that at no point is the drill press turned on.. we're purely using it's quill action only.
simply placing a hairdryer next to the jar is all it takes to heat the liquid enough for it to begin emitting vapours. this is a little slow with regards to the amount of vapours it puts out, but nevertheless it does work. A better approach i found was to wave a blowtorch around the base of the jar (use caution not to shatter the glass by having the blowtorch blasting on it) to create small bubbles on the DCM. you could of course also use a hotplate.
Once the vapours are being produced, simply pull the handle of the drill press to lower the quill, which in turn inserts the stainless tube all the way into the pen piece. slowly raise it back out again, and repeat until its clear. the whole process is likely to take about 60 seconds. overdoing it and the surface will become wavy.. a bit like looking through water, but nevertheless still clear.
And here's the end result. those drill gouges have vanished and the piece is nice and clear.
Summary
This process is great. the chemical is cheap. the litre bottle cost me £10 including delivery ($13). the other stuff I had laying around, despite stealing SWMBO's hairdryer and a jam jar. I should mention this works by melting the surface of the plastic.. so by touching it with anything you will leave a sticky fingerprint on it and ruin the surface.. then you sure will be sanding it back to normal, but not the end of the world. I would recommend mechanically polishing the outside because its easy to do anyway.
The better the surface is before you do this process, the better the result will be. the key is to do this as little as possible, so obviously having a better surface finish, by for example reaming the piece after drilling, would significantly reduce the amount of time required to chemically polish it internally, thus yielding a much better result.
So, hopefully that's another string to your bow
This should be done in a well ventilated space. in the garage with the door open is adequate.. or as I do, I have a movable extractor fan on a tripod. Inhaling this stuff, apart from generally not being healthy, will make you dizzy, and give you headaches... so don't skip the ventilation part.
Attachments
Last edited:


