Has anyone here done homemade Micarta?

Signed-In Members Don't See This Ad

Scooley01

Member
Joined
Nov 28, 2010
Messages
204
Location
College Station, Texas
I read a little about it, and I'm very interested! I love some of the patterns that can be produced...and it seems relatively simple. Here's a site I found where it's made for knife handles:

LM105
LM105Pt2
http://www.fendleyknives.com/LM105Pt3.htm

That said, a knife handle is very different than a pen, and I don't know if it would turn easily enough...but it looks great! Anyone have experience here?
 
Signed-In Members Don't See This Ad
I've been messing with something similar, still working out some kinks.

I have made basic blocks like that but havent achieved a good effect that I would like. It gets difficult to twist, tie, clamp, ect ect in a one man operation...
 
Yeah that does seem to be a big drawback, where their technique they have two of them working on it.

I tried to do something similar before I had ever even heard of micarta, using a cotton t-shirt cut into squares and using CA to glue the layers together...When I finally got a piece that stayed together, it was actually pretty neat...unfortunately it was incredibly difficult to do because the glue was curing so quickly in the fabric that it was smoking, and vaporizing some of the CA on the next layer, which irritates your eyes even through my googles! The epoxy seems like a better solution to the problem.

One solution to making it a one man operation might be to just wrap the tube instead of doing all the layers separately. Cut one long strip of material, soak it in epoxy, and pull tight and roll the tube up as you go. It'd be a different pattern than stacked layers, but it might be more manageable for one person.
 
I read a little about it, and I'm very interested! I love some of the patterns that can be produced...and it seems relatively simple. Here's a site I found where it's made for knife handles:

LM105
LM105Pt2
http://www.fendleyknives.com/LM105Pt3.htm

That said, a knife handle is very different than a pen, and I don't know if it would turn easily enough...but it looks great! Anyone have experience here?

Sure looks interesting! Those links are great! Just been to the home page and looked at there knives too! Stunning!!
 
I made a piece last year using Ivory Linen paper. I was going to use it for a handle on a straight razor, but never got around to it. Still have the piece, and plan on making some more come spring/summer. However, I'm thinking of using one of the PR's rather than fiberglass resin. Either that, or I'll have to turn outside:eek:. It's very tough stuff. but I'm not so sure about putting fiberglass on a lathe. Not sure I want to breath that stuff in, even with a respirator.

It's not hard to make. My first try didn't succeed, but I did it during winter in an place without climate control. My second try was done under better conditions, and the results while somewhat limited, were pretty good.
 
Danger Will Robinson!
Don't use cotton wit CA adhesive for any Reason!
Applying cyanoacrylate to materials made of cotton or wool, such as cotton balls,swabs and certain yarns and fabrics. Results in a powerful, rapid Exothermic reaction the heat released may cause serious burns, ignite the cotton product, or release irritating white smoke. The Material Safety Data Sheets (MSDS) for cyanoacrylate instruct users not to wear cotton or wool clothing, especially cotton gloves, when applying or handling cyanoacrylates.

I tried to do something similar before I had ever even heard of micarta, using a cotton t-shirt cut into squares and using CA to glue the layers together...When I finally got a piece that stayed together, it was actually pretty neat...unfortunately it was incredibly difficult to do because the glue was curing so quickly in the fabric that it was smoking, and vaporizing some of the CA on the next layer, which irritates your eyes even through my googles! The epoxy seems like a better solution to the problem.
:clown:
 
I sure like to see a picture of final casting of linen paper casting. Did you use a cover stock#80 or #24 weight?
By chance are you a Graphic printer using printing press?
This has been my trade for last 39 years.
 
I made a piece last year using Ivory Linen paper. I was going to use it for a handle on a straight razor, but never got around to it. Still have the piece, and plan on making some more come spring/summer. However, I'm thinking of using one of the PR's rather than fiberglass resin. Either that, or I'll have to turn outside:eek:. It's very tough stuff. but I'm not so sure about putting fiberglass on a lathe. Not sure I want to breath that stuff in, even with a respirator.
First, let me say that no one should be turning any of these blanks without a good dust control system.

That being said, it should be noted that there is no fiberglass in 'fiberglass resin'. What they call fiberglass resin is merely a polyester resin that is used to bond fiberglass cloth when building a boat (and other things). It is not terribly different than the PR that we use for casting.
 
I have made many fauxcarta blanks using both PR and fiberglass resin. It's a pretty simply process and a fun changeup to the other stuff that we make. Whether I use PR or fiberglass resin depends on a few factors. Locally, fiberglass resin is cheaper, so that's my go-to product usually. However, while PR is clear, fiberglass resin has a golden color, so sometimes it is necessary to use PR, such as when making white, pastel, or red/white/blue blanks.
 
I sure like to see a picture of final casting of linen paper casting. Did you use a cover stock#80 or #24 weight?
By chance are you a Graphic printer using printing press?
This has been my trade for last 39 years.
I'll see what I can do for the pic (I've got quite a few that I have to take catching up on).

The paper was just some stuff I picked up on clearance at Kinko's (probably ten or so years ago), for resume's.
 
I whipped up a big batch of 15 minute epoxy and soaked a long strip of fabric in it, and rolled it onto a tube, and wrapped it in wax paper. Just a proof of concept, I didn't do it well enough to make it a pen...I'll just turn it and polish it to see how it comes out.
 
Here's the unturned piece...looks terrible, I know. I had no idea how to work with epoxy-soaked cloth in the slightest...I am VERY glad I used gloves though. It was hard and dry on the outside within an hour...we'll see tomorrow if the inside is as dry/set as the outside.

IMG_0236.jpg
 
This has been an interesting and fun experience so far! Here's pics of my test barrel...stay tuned for an explanation of all the junk/dust/crud in the blank!


IMG_02371.jpg

IMG_02381.jpg


So we had a pretty big storm in my area of Texas last night...and my shop happens to be out my back door on a patio that's has one solid wall, one vented wall, and two half height lattice walls. Not much protection from the wind! It was pretty gusty while I was rolling the fabric onto the tube, and wouldn't you know it, a ton of dust from the shop got caught in the epoxy!

So they don't look amazing...but I can see the potential! The stuff was very easy to turn, although I did grab my carbide gouge just in case. Once it was round, the shavings came off in ribbons. There are a few "voids" in the blank...not air voids, but areas where it seems to be all resin and no fabric. It doesn't look terrible, but I'll probably try to use a clear epoxy next time instead of amber because of that.

Oh- and one final thought: This stuff stinks to high heaven! Not sure what exactly is in epoxy, and I've never smelled anything like this when doing smaller batches for gluing tubes, but it smells strongly of urine! Yuck! Respirator all the way!
 
Some thoughts:

1) I'm not 100% sure that the white speckling is actually dust anymore. Feeling the blank, they are little divots or holes...were these bubbles in the epoxy? How do I prevent that from happening? Or is there some finishing technique I can use to minimize their appearance? I feel like strong clamping would drive the air bubbles out, but that's difficult to do on a round barrel...

2) Does cured epoxy stick to new epoxy fine, or would it look different? I was thinking of wrapping it in stages to keep it manageable before the epoxy starts to cure because it started so quickly while I was working with it.
 
This has been an interesting and fun experience so far! Here's pics of my test barrel...stay tuned for an explanation of all the junk/dust/crud in the blank!


So we had a pretty big storm in my area of Texas last night...and my shop happens to be out my back door on a patio that's has one solid wall, one vented wall, and two half height lattice walls. Not much protection from the wind! It was pretty gusty while I was rolling the fabric onto the tube, and wouldn't you know it, a ton of dust from the shop got caught in the epoxy!

So they don't look amazing...but I can see the potential! The stuff was very easy to turn, although I did grab my carbide gouge just in case. Once it was round, the shavings came off in ribbons. There are a few "voids" in the blank...not air voids, but areas where it seems to be all resin and no fabric. It doesn't look terrible, but I'll probably try to use a clear epoxy next time instead of amber because of that.

Oh- and one final thought: This stuff stinks to high heaven! Not sure what exactly is in epoxy, and I've never smelled anything like this when doing smaller batches for gluing tubes, but it smells strongly of urine! Yuck! Respirator all the way!
Did you put it in a vice, or press it between two boards?
 
No...because it was round and I didn't want to squish the shape. I did wrap it tightly in parchment paper and twisted the ends...I had hoped that would put a bit of pressure on it.
 
No...because it was round and I didn't want to squish the shape. I did wrap it tightly in parchment paper and twisted the ends...I had hoped that would put a bit of pressure on it.
That's probably why you got air bubbles. Ever tutorial I've seen say's to do it, and it's the same principal as casting.

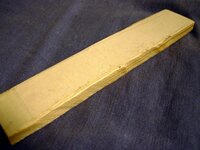
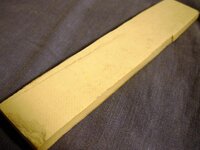
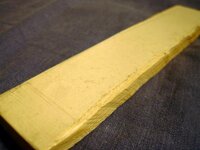
Here are the requested pics of the piece I did.
 

Attachments

  • DSCN1169.jpg
    DSCN1169.jpg
    69.8 KB · Views: 365
  • DSCN1170.jpg
    DSCN1170.jpg
    59.3 KB · Views: 1,054
  • DSCN1171.jpg
    DSCN1171.jpg
    50 KB · Views: 1,055
I'm all in.

I am attempting my first micarta. I rolled some PR soaked denim and pressed them between 2 pieces of wood. I put them in baggies first, so that I could bring them into the basement and try to cure them. I will probably wait until Thursday to take them out and turn them although they may end up in the toaster oven for a little bit tomorrow after work.
I will post a couple of photos with the good, the bad or the ugly.
 
I have not heard of this before, but I have a little over half a gallon of silmar getting ready to expire and an upholstery shop worth of fabric.

(I know I can keep using the silmar after the expiration, but any excuse will do for an experiment, right?)
 
I'm all in.

I am attempting my first micarta. I rolled some PR soaked denim and pressed them between 2 pieces of wood. I put them in baggies first, so that I could bring them into the basement and try to cure them. I will probably wait until Thursday to take them out and turn them although they may end up in the toaster oven for a little bit tomorrow after work.
I will post a couple of photos with the good, the bad or the ugly.

The blanks were curing very slow so they are in the toaster oven right now.
I have the temp. at 150-170f. Planning on 2 hours minimum. I would have been waiting until next Thursday to do anything with these. The cup of leftover resin in the garage was still liquid. It looked like I had not added any catylist, which is not the case.
Pictures of - The good, the bad, the ugly tomorrow.

I did mine last year during the winter time, and it hardened even outside in the snow. I actually put it out there because it got so hot it was melting the plastic mixing cup. It might be possible that your resin is getting old. Then again, I took the advice of the tutorial I posted, and used a little extra hardener.
 
I did mine last year during the winter time, and it hardened even outside in the snow. I actually put it out there because it got so hot it was melting the plastic mixing cup. It might be possible that your resin is getting old. Then again, I took the advice of the tutorial I posted, and used a little extra hardener.

Did you use fiberglass resin or Simlar PR?
Fiberglass resin. IRRC it was bondo brand.
 
Toaster oven seemed to work. I think I'm in business.
To late to turn tonight but they are cured and ready...unless they
blow up. We'll see. Pictures tomorrow FOR SURE!!!
 
Special thanks to Steven "scooley01" for starting this thread. I hope you don't feel like I hijacked the thread. I read your post on Sunday morning and now on Thursday I have followed through on these blanks.

Here are a couple photos.

Denim Photos - Blanks

Denim1.jpg


Toasted

DenimOven1.jpg

DenimOven2.jpg


A picture is worth a thousand words.
The blank I turned and #3 I added some translucent blue dye, just a little when I rolled the material. The #1, I just cast in clear but I have not turned yet although it appears pretty much the same color by the looks from the cut.
The blue disc is the leftover from the cup that was still liquid 24 hours after mixing. It sat in the shop at 30f overnight. I put it in the oven at the end of the 2 hours that I heated the blanks, 150-175f and it is fully cured. It was probably in the oven for 30 minutes.

The blank #2, I just rough turned the blank and sanded and put a little CA/BLO finish on it. I plan to use CA on the ends after squaring, and then go into a multiple CA sand regimen to impregnate the CA. Right now with just a rough finish, I can feel the denim. It's tough but just has the denim feel to it.
The CA fumes really kicked on this material.
 
Last edited:
Signed-In Members Don't See This Ad
That being said, it should be noted that there is no fiberglass in 'fiberglass resin'. What they call fiberglass resin is merely a polyester resin that is used to bond fiberglass cloth when building a boat (and other things). It is not terribly different than the PR that we use for casting.

In the pictures linked they're using West Systems Epoxy, which is somewhat different than PR. But you are correct- no actual fiberglass is involved.

If you do use Epoxy, give it a good week to cure before sanding. Once *fully* cured it's pretty inert.
 
Back
Top Bottom