Gluing photographs to tubes

Signed-In Members Don't See This Ad

Cwalker935

Member
Joined
May 18, 2014
Messages
3,516
Location
Richmond, Va
I am struggling to find a repeatable method for gluing photographs to tubes and casting those tubes in clear polyester resin. I have tried ca glue and various contact adhesives with little success. I get separation at the seam or the tube loses adhesion to the photo and resin after casting. Can someone please point me in the right direction or to the right glue?
 
Signed-In Members Don't See This Ad
Print the photo on a 2x4 Avery mailing label using an ink jet printer. Let the ink dry for a dayt. Peel and stick the label to the tube making sure the label is well stuck to tube, especially the seam. I do not try to make a butt seam but allow a little overlap. Allow the label adhesive to dry for a day. Coat the label with thin CA and allow the CA to dry for a day or longer. Cast. I have a trick to hide the seam.:biggrin: Shall I share what I do?
Do a good turn daily!
Don.

Not a photograph but the idea is the same...doesn't matter what is printed on the label.
 

Attachments

  • Figure 3.jpg
    Figure 3.jpg
    48.7 KB · Views: 379
Not sure what sort of detail Jim needs. Using Douglas and Sturgess clear casting resin, no pressure, not familiar with vibration. I've also tried spraying the photo with a protective resin after gluing and before casting. A heavy costing seems to cause bubbling a light coat does not help.
 
Print the photo on a 2x4 Avery mailing label using an ink jet printer. Let the ink dry for a dayt. Peel and stick the label to the tube making sure the label is well stuck to tube, especially the seam. I do not try to make a butt seam but allow a little overlap. Allow the label adhesive to dry for a day. Coat the label with thin CA and allow the CA to dry for a day or longer. Cast. I have a trick to hide the seam.:biggrin: Shall I share what I do?
Do a good turn daily!
Don.

Not a photograph but the idea is the same...doesn't matter what is printed on the label.

Don... You're a prince! I bet you wish you had a nickel every time you posted that paragraph! But - an oldie is a goodie!
 
Notice the pen in my previous post in this thread. See the black border? It is on all four sides. The size of the image including the black border allows for an overlap at the seam. I do not even try to make the "wallpaper" seam. Some do, I think. Anyway, after cutting the image from the label I use a Sharpie marker and mark the overlapping edge black. When overlapping be sure to keep black overlapped onto black. The edge colored black will keep the seam quite invisible. Otherwise, the white edge of the overlap will be very visible. Allow the sharpie ink to dry before applying the label to the tube and doing the CA coating.

I also use white powder coated tubes. White will keep the brass tube's color from distorting the colors in the label. I sometimes paint the tubes white using Painter's Touch white primer. I've had no problems with this paint.

Here is a link to a power point presentation I did for a symposium demo a couple of years ago. http://content.penturners.org/library/pen_blanks/casting_pen_blanks.pdf
I use polyester resin. I have used the resin sold by Douglas and Sturges and like it but I have been using Silmar 41 for several years now.

Good luck and I will answer any other question.
Do a good turn daily!
Don
 
I use vibration. I use the Harbor Freight ultrasonic cleaner. I also cure the blanks in a toaster oven...about 1 hour at 150. Do not trust the markings not he oven's temp dial. Use a thermometer and find where your dial gives 150 degrees. My 150 degrees was actually giving over 200 degrees. Also, be aware that PR has a flash point just under 100 degrees. Do not leave the oven unattended. I've never had a problem but some have, if I recall correctly.
Do a good turn daily!
Don
More detail please...PR, pressure, vibration?
 
Notice the pen in my previous post in this thread. See the black border? It is on all four sides. The size of the image including the black border allows for an overlap at the seam. I do not even try to make the "wallpaper" seam. Some do, I think. Anyway, after cutting the image from the label I use a Sharpie marker and mark the overlapping edge black. When overlapping be sure to keep black overlapped onto black. The edge colored black will keep the seam quite invisible. Otherwise, the white edge of the overlap will be very visible. Allow the sharpie ink to dry before applying the label to the tube and doing the CA coating."

As above, I also do Dons idea. However, it depends on the color of the background at the seam. I got 4 colored markers that I use the most of- blue, black, red, and green. I drag the long side, thats back from the tip, quickly along the seam edge so it doesn"t bleed through. You may have to experiment to get the touch to prevent the bleed or the edge will be too dark. After casting I use the clip over the seam. Works for me.

Bob
 
Some people (me included) use decal paper. Spray it with a sealer and let dry before appling. This keeps the image from coming off in the water.. I then cast or CA over the decal.
 
Success

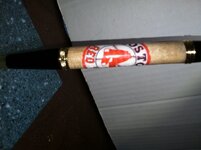
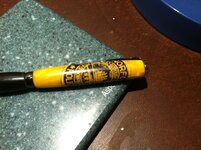
Thanks for all of the advice. I used Don Ward's approach and made these two pens. I had to work with a scan of an old polaroid so the picture resolution is not that great but it still turned out pretty well. I do not have an ultrasonic cleaner or a dental vibrator so I have some small bubbles on one of the seams that I was able to hide behind the clip. I see a new device in my future. The pen on the left is a Gatsby and the pen on the right is a Gatsby Grande. The Grande actually uses a smaller tube but the barrel wall is thicker. The thicker acrylic seems to give some magnification to the photo.image.jpg
 
As Don suggested, I used my photo editing app to add a black border to the photo and sized the photo to where the black border would overlap at the seam. The edge of the cut photograph was white after cutting it to size so I used a black sharpie to color the cut edge. The black border and black colored edge all blend together at the overlap once you adhere the photo to the tube and the seam virtually disappears.
 
Some people (me included) use decal paper. Spray it with a sealer and let dry before appling. This keeps the image from coming off in the water.. I then cast or CA over the decal.

NOT trying to change the thread, as I think this is related. I've had mixed results using MANY different types of sealers. Almost EVERY sealer I've used seems to have some drawbacks.

I'm currently using "Castin Craft Gloss Resin Sealant". I seem to have MORE repeatable POSITIVE outcomes with this product than many others I've used.

WHAT Y'ALL SEALING WITH? For those using CA, please "exact out" the proceedure. When I seal with CA, I tend to get a lot of "color bleed" from colored items.

Thanks
 
When I make decals or use paper with ink on them I've had really good luck with Testor's decal sealer. Really it's just a high gloss spray lacquer. I have the best luck when I do 2-3 light coats and let it dry for an hour in between and then overnight on the last coat before I either cast it in the case of photos or decal right on the tube or if it's decal on wood or acrylic blank finish with ca over the top of it. When I do the ca finish over the lacquer I usually do 10 coats of thin applied on a paper towel. I tend to not use accelerator on these because it makes the CA get very hot and it can bubble the decal or lacquer. Hope that gives folks some ideas :) Rich
 
Last edited:
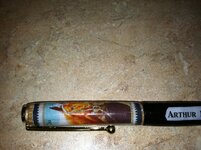
I use Krylon Acrylic clear over my decals. By the time I print them in the house and take them to the shop they are dry enough to spray. I used the Testers but there is more volume in the Krylon. Here a few examples:
 

Attachments

  • 044.jpg
    044.jpg
    185.2 KB · Views: 138
  • 067.jpg
    067.jpg
    270.9 KB · Views: 133
  • 074.jpg
    074.jpg
    304.7 KB · Views: 149
Back
Top Bottom