First time Scallops

Signed-In Members Don't See This Ad

Pjohnson

Member
Joined
Feb 16, 2012
Messages
278
Location
Plympton, MA
I am attempting a scallop segment for the first time and have a process question for those with more experience.

Some background on my segment:
- Main bank is mahogany
- Aluminum separating the scallop (using window flashing)
- White poly resin for the scallop

I have the first two 45 degree angles cut and aluminum epoxied in place.

So now my validation question: Would you epoxy the white PR onto the aluminum and trim down before cutting the second set of 45's? That seems logical to me. Just wanted to validate that I am approaching the build correctly.

Many thanks.

PJ
 
Signed-In Members Don't See This Ad
I always sand all four 45's at the same time. Then I do one side(1) and the opposite side (3) and sand them flush to the other two sides (2) and (4). Then I do side (2) and sand it flush to (1) and (3) and the same with (4). When you're finished, you should have a square blank that has two pieces of aluminum bisecting the top.
 
JMHO PJ, but I'd think about another material for the white PR...maybe a holly or birch veneer? PR is just so hard to cut both to that thick(thin)ness and when turning. What about a pick guard?
The "Glue" question...there is no right answer. CA, epoxy...doesn't matter. The enemy is three fold; heat, contact area and surface prep. Having done several dozen of a different variation of segmenting, those will be your big variables...like you needed anything else, right?! Good luck and hope it works well!!
 
Last edited:
JMHO PJ, but I'd think about another material for the white PR...maybe a holly or birch veneer? PR is just so hard to cut both to that thick(thin)ness and when turning. What about a pick guard?

A commercial acrylic blank (not PR or Alumilite) would be plenty tough enough. The Gisi men use acrylics in a lot of their pens, or at least they used to.
 
update

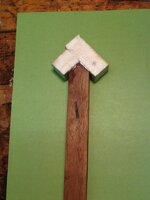
so the sides 1 & 3 are complete.
I will let them set over night. Then tomorrow - clean them up square and cut the 45's on sides 2 & 4 and the next glue ups.

It seems counter intuitive to me to be adding the metal and white on all four sides. My mind wont be able to comprehend it until I see it turned.

More to come ... PJ
 

Attachments

  • image.jpg
    image.jpg
    93.7 KB · Views: 406
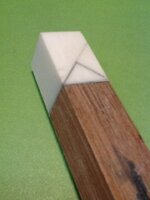
today's update - sides 2 & 4 are done -- aluminum and whit scallop.
Now to let it set and fully cure ....
 

Attachments

  • image.jpg
    image.jpg
    85.3 KB · Views: 320
You actually don't need (or want?) that big of piece on 2 and 4. When it's all finished, the top of the blank should be at the peak of #1 and the line should perfectly bisect the top of the blank. You just need to cut it off so it's even.
 
JMHO PJ, but I'd think about another material for the white PR...maybe a holly or birch veneer? PR is just so hard to cut both to that thick(thin)ness and when turning. What about a pick guard?

A commercial acrylic blank (not PR or Alumilite) would be plenty tough enough. The Gisi men use acrylics in a lot of their pens, or at least they used to.

Direct me Chris...As a learning point, what are the other options?
 
You actually don't need (or want?) that big of piece on 2 and 4. When it's all finished, the top of the blank should be at the peak of #1 and the line should perfectly bisect the top of the blank. You just need to cut it off so it's even.

Thank you - I was planning on letting the glue set a day or so before trimming it down.
 
Update ...

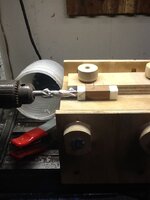
After measure 17 times ... The blank went on the lathe for drilling.

So far, so good ... next step glue in the tube, sharpen the turning chisels and lot's of hopes and prayers.
 

Attachments

  • image.jpg
    image.jpg
    86 KB · Views: 312
Back
Top Bottom