egnald
Member
Greetings fellow IAP members,
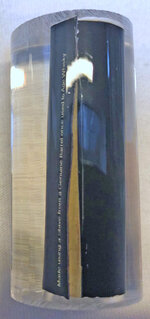
Today I did my first Label Cast using John Underhill's Vertical Casting System. I prepared 4 Cigar Cap-end tubes using a generic whisky barrel designed label printed on matt labels from Exotic Blanks. I cast them with Alumilite Clear Slow and had them under 55 PSI for 4 hours. It produced 3 out of 4 usable blanks. (Pictures Follow). I intend on making the Cigar Tip-ends with Oak Whisky Barrel blanks.
Lessons learned:
1) Be more careful about the edges of the label when coloring them with the Sharpie before sticking them to the tube. I will probably wipe the tube down with denatured alcohol to make sure there is no oil of any kind on it that might hamper adhesion. Then I will lightly burnish the seam with something to insure that it is sealed down well. (The seam came loose on the failed blank -- fortunately this is also the one that was the most off-center too).
2) Press the silicone stopper more firmly onto the nail in the Delrin bottom plug to prevent a skin of resin from creeping between the plug and the stopper if at all possible. (I had to cut away at some of them in order to pull the bottom stopper out. The hole left behind by the nail helped me get a pick under the excess resin so I could get it pulled off).
3) Be more meticulous about bending the wire on the top around to center the tube as best as I can. (As you can see in the pictures, I didn't do a very good job of centering, but I think there is plenty of resin surrounding the tube so it will make a good pen).
4) Pour the resin more carefully and only pour about half the way up on the top silicone stopper to prevent a skin of resin from forming on top of the plug. (I had to cut away at some of them in order to pull the top stopper out).
I must say, the thrill of pulling these out of the pressure pot was quite intense. John's casting system worked great even considering my inexperience with it. I'm looking forward to making the next one -- and to turning one of the blanks tomorrow.
Dave
PS Due to reflections and such, the pictures do not do justice to the clarity of the resin. The label backgrounds are jet black and not the dark grey-ish that they look like in the pictures. The detail in the label is also much greater than what the pictures show. (The little side note that can be seen in the picture by the seam says "Made using a Stave from a Genuine Barrel once used to Age Whisky").


Last edited:
