Double dyes

Signed-In Members Don't See This Ad

Logawill

Member
Joined
Dec 10, 2008
Messages
4
Location
ActonVale, Qc. Canada
Can any one help me on how to double dye.

I have tried the following method: dye with a given color (orange) and wait 2 days to come back with a second color (yellow), what comes out of it is a sick yellow color, sort of a uniform in between color. ''it doesn't work''.

What I'm trying to get at is an orange color base with dashes of yellow here and there.

(I have done my experiences with a pressure pot that has a vacuum unit build into it system, I can go positive or negative pressure as needed).


Looking forward for your advise

Logawill
 
Signed-In Members Don't See This Ad
What I'm trying to get at is an orange color base with dashes of yellow here and there.
How about lightly sanding the orange base prior to dyeing with the yellow.

What is the wood species you are using?
Double dyeing works great in curly maple. I haven't tried it in other woods.
attachment.php

attachment.php


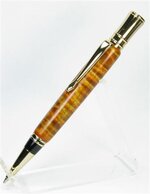
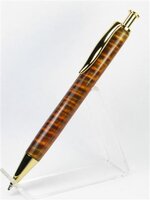
Here's a couple of examples of Green over Orange to obtain a Brown Tiger Stripe.
 

Attachments

  • 401 (Small).jpg
    401 (Small).jpg
    21 KB · Views: 1,510
  • 403 (Small).jpg
    403 (Small).jpg
    17.2 KB · Views: 1,549
Great pictures Mack,

Here's what I 'm doing at this point :the pen blanks are pressure treated (+/- 60psi for a given period of time) to its base color (in this case orange) through out the blanks and than time is given to dry out (more likely 2 days) . The blanks are back in the pressure pot to be treated with its secondary color (yellow in this case).

All the time I'm working with a 3/4'' square blanks.
I trying to find out how the pros are achieving those double dyes on square blanks.

I have a local
customer that wants some square blanks: double dyed ''orange'' with streak of ''yellow'' in. I'm not turning the pens for this guy.

Has for your question, in this case it will be done with bird's eye maple.

Regards

Logawill
 
Great pictures Mack,

Here's what I 'm doing at this point :the pen blanks are pressure treated (+/- 60psi for a given period of time) to its base color (in this case orange) through out the blanks and than time is given to dry out (more likely 2 days) . The blanks are back in the pressure pot to be treated with its secondary color (yellow in this case).

All the time I'm working with a 3/4'' square blanks.
I trying to find out how the pros are achieving those double dyes on square blanks.

I have a local customer that wants some square blanks: double dyed ''orange'' with streak of ''yellow'' in. I'm not turning the pens for this guy.

Has for your question, in this case it will be done with bird's eye maple.

Regards

Logawill

Bonjour France; I have never worked with pressure pots etc. but I have an opinion that essentially what you are attempting to do won't work. Once you have injected the orange under pressure, there is no room left for the yellow other than to displace some of the orange. That's why you are getting the crummy colour you refer to.


I never use BE maple for pens, unless it would be heavily covered in eyes. The face grain shows the eyes but they don't show up on the cross grain to my satisfaction.
 
Can you explain why you use pressure and/or vacuum? Perhaps we can offer
better advice if we understand your process. (I haven't heard of using
pressure or vacuum for dyes)
 
I go with positive pressure for a period of time, than a short period without pressure to relax the wood cell, than I go vacuum up to 23'' for a period of time equal to the time given under pressure.

This is done with either 3/4'' or 7/8'' x 5-1/4'' pen blanks (northern hardwood's species) and what comes out of those treatments are blanks that are dyed trough out.

I been making this one color pressure treated wood blanks for years and my customers are very please with it. I now having demand for double dyes as stated in a previous message and I do not have the answer to that one as yet...

Looking forward to your comments...
 
I go with positive pressure for a period of time, than a short period without pressure to relax the wood cell, than I go vacuum up to 23'' for a period of time equal to the time given under pressure.

This is done with either 3/4'' or 7/8'' x 5-1/4'' pen blanks (northern hardwood's species) and what comes out of those treatments are blanks that are dyed trough out.

I been making this one color pressure treated wood blanks for years and my customers are very please with it.
I now having demand for double dyes as stated in a previous message and I do not have the answer to that one as yet...
With all due respect France; You paid no attention to my previous post. You can't fill up the cells with one colour and then attempt to fill them with another colour and expect them to be separate colours. At least that's the way I see the dilemna you are in.
 
I really have no idea if this will work but what if you did a shortened process and didn't leave the blank under pressure and vacuum as long as normal. Turn the blank and sand it. If you get the time correct, maybe the harder area of the blank will not have the first color impregnated into it. Now use your second color with an attempt to saturate the harder portions of the blank.

I don't know if that made sense or not or even if it will work but I think the concept is plausible. You will just have to play with timing of the process. The different densities of the wood will absorb the dye at different rates. Now you just need to figure out how to exploit this.
 
the double dye blanks in the larder are all plastic injected (stabalized). My understanding is that one color is partially injected, and then the blanks are processed again. Because the first injection of plastic sets and does not mix with the second, the colors stay separate.

With soluble dyes, you are going to have to deal with the dyes mixing in the wood - Suggest you look at the sequence for toning wood finishes - start light (such as Yellow) and add a second color with a light touch so you can have some areas that resist dye injection --
 
Hi I'm fairly new to all of this but I have been playing with color variations to see what works and what doesn't. I have let my blanks soak for 2-3 days in one color no vaccum. Then cured with heat in toaster oven. Then put second color in vaccum chamber and let it run for 1-2 days then cured. The results have been great using red/ green and green/blue and red/ blue. I will post some pics soon.
 

Attachments

  • IMG_20150611_193238_106.jpg
    IMG_20150611_193238_106.jpg
    91.4 KB · Views: 243
Last edited:
Back
Top Bottom