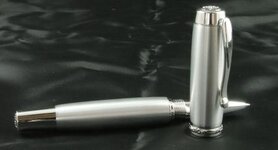
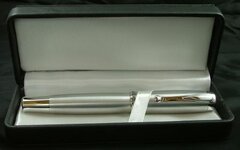
Close-up's suck...

Signed-In Members Don't See This Ad

killer-beez

Member
Joined
Mar 7, 2008
Messages
204
Location
Covington, Georgia, USA.
I suck at photography!!! I need a fool proof camera that can take a close-up. I now have the Fugi S5000 and use Macro on any setting that looks good through the LCD. The problem is I have to take a hundred pictures to get one. I would like to cut that number down to something manageable. Attached are a couple of pix. Suggestions?

Here is what the settings were:
focal length: 9.4mm
f-number: F/8
exposure time: 1/4 sec
ISO 200
with photo tent
defused light
on tripod
 

Attachments

  • DSCF3733a.JPG
    DSCF3733a.JPG
    12.2 KB · Views: 324
  • DSCF3746a.JPG
    DSCF3746a.JPG
    7.8 KB · Views: 236
  • DSCF3747a.JPG
    DSCF3747a.JPG
    12.9 KB · Views: 243
Last edited:
Signed-In Members Don't See This Ad
Are those taken on tripod or handheld? It could just be me, but they look a tad blurry possibly from camera shake. Other wise look pretty good.

Play around with the lighting,
 
Suggestions?

Light. Lots of light. Diffuse is best, and try to keep the color temperature consistent, but get more light on there. Looks like your shutter speed on the last one is 1/15sec and f/4.5 at ISO 200. Assuming you're using auto settings, more light will speed up the shutter, (reduces the blur from shake) tighten the aperture, (increasing depth of focus, to help keep the entire subject in sharp focus) and reduce the ISO. (which produces a sharper image, though 200 should be fine for most shots) A good rule of thumb that I've had some luck with is to set the dial to manual mode, ISO100, f/8, and shutter at 1/125sec, (I've never used the Fuji, check your manual for how to adjust ISO, aperture and shutter) and add light until there's enough to make the shots look right, then move the lights around for the effect you want.

What I've done in the past was a couple of the 100W equivalent daylight compact flourescents in clamp-type reflectors shining from the sides through sheets of white tissue paper, with the camera flash to fill in from the front.
 
Gray Card

Go to your local photo store and buy a GARY CARD... cheep... or check the web (Google) for how to create one...
Put your camera on manual, focus on the gray card only and get manual camera settings...
Then shoot your photos with thos settings (NOT AUTO)...AUTO EXPOSURE will NOT give good results unless you are shooting outdoors...
If your using a through the lens (TTL) meter then you'll think photos will be over exposed, that's ok...
Here are a couple of sites that can get you started understanding the process of white balance for shooting photos...
It'll produce great photos every shot...but you will need a tripod depending on the lighting...

http://www.digitalartsphotography.com/instructions.htm
http://www.geekinspired.com/photography/digital-photography-tips-white-balance-with-a-gray-card/

Here is a link to building a phto tent useing PVC and white sheets...
Most any light source will work if you use the gray card... I made a cheap one and went to Home Depot to get 4 lights with the right temperature range...

http://www.pbase.com/wlhuber/light_box_light_tent
http://digital-photography-school.com/how-to-make-a-inexpensive-light-tent

Hope this helps...
Ed
 
Works for me!

Light. Lots of light. Diffuse is best, and try to keep the color temperature consistent, but get more light on there. Looks like your shutter speed on the last one is 1/15sec and f/4.5 at ISO 200. Assuming you're using auto settings, more light will speed up the shutter, (reduces the blur from shake) tighten the aperture, (increasing depth of focus, to help keep the entire subject in sharp focus) and reduce the ISO. (which produces a sharper image, though 200 should be fine for most shots) A good rule of thumb that I've had some luck with is to set the dial to manual mode, ISO100, f/8, and shutter at 1/125sec, (I've never used the Fuji, check your manual for how to adjust ISO, aperture and shutter) and add light until there's enough to make the shots look right, then move the lights around for the effect you want.

What I've done in the past was a couple of the 100W equivalent daylight compact flourescents in clamp-type reflectors shining from the sides through sheets of white tissue paper, with the camera flash to fill in from the front.

A comment on flash fill. Last monday I stopped onto my wood supplier, Bell forest products. I was there to pick up some flatwork stock. While there I alwys check thier scrap box, ($2.50/lb) there was a 4/4x3"x3" block of ebony in it. The thought hit me that any ebony at that price is a great bargin I grabed it. When I got home and examined it I found a carack running through the middle. I took six pix. Three were in my photo tent with just two 100W rated daylite curly tubes on the sides. I couldn't see the cracks at all. so I I took three more shots with the flash on. I have to say that coaxing details like a hairline crack out of a black suvject is a test for any camera. This is what I got with the flash on.

ebony blk 1_edited-1 (410 x 290).jpg

ebony blk 2_edited-1 (382 x 278).jpg
WS (Bob)
 
Your Fuji camera shoots raw files so don't worry about a gray card. Just make sure you shoot in raw and not just in jpeg. Raw files make it very easy to adjust color temperature, tweak exposure and all kinds on other neat things. This is all done in the software that came with your camera or a third party software like Photoshop. It's best to get things right in the camera but when that doesn't happen a raw file can save the shot.
 
Back
Top Bottom