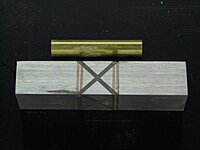
Celtic Knots with Metallic & Wood Layers?

Signed-In Members Don't See This Ad

jrista

Member
Joined
Aug 12, 2021
Messages
2,554
Location
Colorado
I have a set of kits, called Celticus, from WoodPenPro IIRC. I bought them some time ago, and misplaced them, and found them recently. I have some in the full size as well as the junior size. I figured a Celtic Knot style blank would be ideal for celtic-styled pens. I will be doing some experimentation with just wood to start, but, for these kits, I would really like to include some brass layers in the knots as well. There are plenty of resources out there on making a celtic knot with just wood. I am curious if anyone has tried with metal layers as well, though, and if there are any resources that might help in constructing such a blank.

Thanks!
 
Signed-In Members Don't See This Ad
Short on details, but 8-loop Celtic Knot includes one done with aluminum flashing and dyed veneer.

I used thick CA to make the knot material. I've also used T88 epoxy, but the time for it to cure is longer than I have patience for.

Happy to answer specific questions.
 
Short on details, but 8-loop Celtic Knot includes one done with aluminum flashing and dyed veneer.

I used thick CA to make the knot material. I've also used T88 epoxy, but the time for it to cure is longer than I have patience for.

Happy to answer specific questions.

Thanks! That looks amazing. So it sounds like you created the layered material first, then sliced that up and constructed the knot from that finished material... That actually sounds fairly strait forward. It looks like you have 5 layers? A core, two metal layers, surrounded by more layers. Do you think that it is important to have all 5 layers? Would there be problems trying to start with say just three...a veneer core surrounded by two layers of metal? I do have a set of veneer, so I could create some material with all 5 layers if that was important.

One tip with T88. It cures SIGNIFICANTLY faster at 150 degrees, than at 70. Where it can take 12-24 hours at room temperatures, it cures in an hour or less at higher temps. When I need to cure T88 fast, I set my toaster oven (that I only use for woodworking things) to the lowest temp setting which is 150 degrees, put the blank inside (often on a piece of wax paper), and let it go for about an hour. When it comes out, the epoxy is not only fully hardened, but it will also give you the strongest bond possible. (When you read the T88 detailed instructions, it explains that at higher temps the resin has a higher flow rate, which dramatically increases the cross-linking that can occur, resulting in a vastly superior bond vs. say curing at room temp...which for me, is actually usually 68 degrees.)
 
Now I have to say and many people know here by now I am a huge fan of T88 epoxy adhesive. use it with acrylics and metals. I will disagree about the temp stuff but know you did reading and all. I always let cure at room temps and never try to force gluing of any kind and thus the reason I do not use accelerator for CA . But do as you wish. As far as adding metals is like any other material just that the adhesive needs to be strong. I am not a fan of CA to use with metals and acrylic. I had failures as I will show here with my scallops. Used aluminum and holly and ebony. Fell apart with a touch of fingers after 2 days drying so never again. yes you need to roughen the surfaces to give the material some tooth to grab. First photo is failure and next is a aluminum knot in black acrylic. here is one I have not turned yet and made this many years ago. It is aluminum and brass trim rings. I did not use T88 on this blank I used JB Weld. I looked at data and that had the strongest shear strength for metal to metal.

IMGP1036.JPG
IMGP0144.JPG
 

Attachments

  • IMGP0990_zpsa2f6dc81.jpg
    IMGP0990_zpsa2f6dc81.jpg
    58.6 KB · Views: 11
John, I'd encourage you to experiment a bit, maybe once or twice, with heated T88 curing. I only say this, because I think you have encountered blank blowout with some segmented blanks in the past? I've glued up probably a dozen blanks recently, at 150 degrees...and it really amazes me how much better the bond is. It is incredibly strong! Anyway...if you have the chance, and just as an experiment, it would be interesting to hear what you think from your own experience with heated T88 curing. You might be surprised, and it may indeed help with things like segmented blank blowout. ;)
 
Now I have to say and many people know here by now I am a huge fan of T88 epoxy adhesive. use it with acrylics and metals. I will disagree about the temp stuff but know you did reading and all. I always let cure at room temps and never try to force gluing of any kind and thus the reason I do not use accelerator for CA . But do as you wish. As far as adding metals is like any other material just that the adhesive needs to be strong. I am not a fan of CA to use with metals and acrylic. I had failures as I will show here with my scallops. Used aluminum and holly and ebony. Fell apart with a touch of fingers after 2 days drying so never again. yes you need to roughen the surfaces to give the material some tooth to grab. First photo is failure and next is a aluminum knot in black acrylic. here is one I have not turned yet and made this many years ago. It is aluminum and brass trim rings. I did not use T88 on this blank I used JB Weld. I looked at data and that had the strongest shear strength for metal to metal.

View attachment 382120

Have you ever combined layers of wood and metal into a celtic knot? I'm finally getting back into blank crafting, and while I'm starting with just wood, I am curious how possible it is to combine wood and metal in a celtic knot. Brian's pen is excellent, and his technique is intriguing. I'm all ears for additional techniques though.

FWIW, I never use CA to glue up anything blank related. I learned the hard way as well, its brittle and just doesn't seem to hold. Even with simple flat layers, I've had segments separate early on in turning when using CA. For, oh, probably since late 2021, I've used only epoxy. I use both JB Weld and T88, and have both handy... It is interesting that JB Weld has better shear strength. The T88 can cure harder than JB, even at room temp...whereas JB will still feel very slightly "soft" (or maybe the better term is flexible?) I wonder if that flex is what gives it its shear strength...

Thanks for the tip though! I'll keep it in mind. In fact, now I need to do some tests, and see if T88 @ 150 is stronger than JB Weld. I've tried to heat JB, and it does not handle 150 degrees, but since that's as low as my toaster oven can go, I haven't done much to see where its limits are. JB is a very different kind of epoxy than T88 as well, and while I've had it in temps up to the mid 90s (workshop on hot summer days), it may just not function the same at higher temps as T88.
 
John, I'd encourage you to experiment a bit, maybe once or twice, with heated T88 curing. I only say this, because I think you have encountered blank blowout with some segmented blanks in the past? I've glued up probably a dozen blanks recently, at 150 degrees...and it really amazes me how much better the bond is. It is incredibly strong! Anyway...if you have the chance, and just as an experiment, it would be interesting to hear what you think from your own experience with heated T88 curing. You might be surprised, and it may indeed help with things like segmented blank blowout. ;)
Sorry will not do it. I am just fine with how I glue my blanks. I never done wood and metal. Have done acrylic and acrylic. Wood and wood, wood and acrylic. As I mentioned the one wood and metal I tried I used CA and that was a failure. Some day I will get back into make pens of different styles and will try it. There is no reason wood and metals can not be used. use a better adhesive that is all.

The big thing when doing woods and metals you have to watch for cross contamination alot more.
 
Last edited:
Like John, I've never had a problem with T88 on any type of material. John turned me on to it and I won't use anything else. I'm not in that big of a hurry to get anything glued up. 24 hours with T88 works great for my intended purposes. And really, how often will a pen get to 150 degrees? Maybe leave it on a dashboard during the summer...maybe.
 
Thanks! That looks amazing. So it sounds like you created the layered material first, then sliced that up and constructed the knot from that finished material... That actually sounds fairly strait forward. It looks like you have 5 layers? A core, two metal layers, surrounded by more layers. Do you think that it is important to have all 5 layers? Would there be problems trying to start with say just three...a veneer core surrounded by two layers of metal? I do have a set of veneer, so I could create some material with all 5 layers if that was important.
Five layers was mostly to see if I could and to make it "look right." An even number of layers would be distracting. Three would work. The middle core would be thicker.

As I recall, the flashing I used was 1/128" and the veneer was a little over 2/128" making the total 5-layer thickness 8/128" (1/16") plus whatever miniscule thickness is added by the adhesive...enough to make the insert thicker than the 1/16" kerf of the circular saw blade I use in the table saw.

I make the insert to be a hair or two thicker than the kerf, and then use a spacer (post-it, tape, gnat eyelash) to expand the kerf so the insert fits the kerf without force or falling out. The adhesive gives a little lubrication for fitting, and I'm not shy about using more adhesive than is necessary. I'd rather use too much than too little.

I can take some photos of already made insert material if you'd like. I made more than I used several years ago and haven't done any knots in a few years.

I can also poke around IAP for some of the posts I made about the process.

As for type of adhesive, I had the same problem with T88 that jt had with CA. Mine survived the creation and drilling, but not the turning. I didn't have a turning blowout; it just simply fell apart. I suspect there was enough heat generated during drilling and then turning that the interface was compromised.

I take a "go with what you make work and it lasts" approach. I used thick Titebond CA or Gorilla Glue CA. Other thick brands probably will work. I'd choose an oderless if/when I can because I used a lot of it. I also wore a VOC-rated respirator.
 
Last edited:
Like John, I've never had a problem with T88 on any type of material. John turned me on to it and I won't use anything else. I'm not in that big of a hurry to get anything glued up. 24 hours with T88 works great for my intended purposes. And really, how often will a pen get to 150 degrees? Maybe leave it on a dashboard during the summer...maybe.

I don't think the 150 degrees is about any post-cure temp. Its the curing temp. At room temp, 75 degrees according to their docs, it takes a day to fully cure, 6-8 hours to initially set. At 150 degrees, it takes 30 minutes to initially set, and is fully cured in about 2 hours. I've left the blank in my toaster oven at 150 for an hour, and by then it seems to be fully cured. Shear strength is a bit lower when cured at 150 vs. 75 degrees. The crosslinking, however increases at the higher temp. I've not had any failures at the higher temp, and if you want to get going quickly its handy.
 
I found this from Chat at Turner's Warehouse:


He used some of that prelaminated material with aluminum layers on either side. That's one way to get some metal in there.
 
Five layers was mostly to see if I could and to make it "look right." An even number of layers would be distracting. Three would work. The middle core would be thicker.

As I recall, the flashing I used was 1/128" and the veneer was a little over 2/128" making the total 5-layer thickness 8/128" (1/16") plus whatever miniscule thickness is added by the adhesive...enough to make the insert thicker than the 1/16" kerf of the circular saw blade I use in the table saw.

I make the insert to be a hair or two thicker than the kerf, and then use a spacer (post-it, tape, gnat eyelash) to expand the kerf so the insert fits the kerf without force or falling out. The adhesive gives a little lubrication for fitting, and I'm not shy about using more adhesive than is necessary. I'd rather use too much than too little.

I can take some photos of already made insert material if you'd like. I made more than I used several years ago and haven't done any knots in a few years.

I can also poke around IAP for some of the posts I made about the process.

As for type of adhesive, I had the same problem with T88 that jt had with CA. Mine survived the creation and drilling, but not the turning. I didn't have a turning blowout; it just simply fell apart. I suspect there was enough heat generated during drilling and then turning that the interface was compromised.

I take a "go with what you make work and it lasts" approach. I used thick Titebond CA or Gorilla Glue CA. Other thick brands probably will work. I'd choose an oderless if/when I can because I used a lot of it. I also wore a VOC-rated respirator.

Thank you for the writeup. Appreciate it!

I'm not sure I fully understand the bit about the spacer for the kerf? If the insert is already thicker than the kerf, I am not quite sure I understand how the spacer (paper or whatever) is used to expand the kerf... I do have a table saw, but, it is the tool I have the LEAST skill with so far, so I suspect I am just missing something about how you made the cuts.

I guess, I'll find out which glue works best once I start turning some of these. ;) I'll try a variety of glues and see what holds. T88 does seem to be a bit...rubbery (not necessarily soft per-se) when I let it cure at room temp, but when I cure it at 150, its rock hard and the bond seems as solid as anything. So I'll try T88 at 68, 75 and 150, and see if the temp matters to how well it holds.
 
When Brian says he uses something to expand the kerf such as paper or thin plastic or whatever he is placing it between his stop where the blanks goes against and the blank so he makes 2 cuts in the same kerf. One is without the paper and the second is with paper to expand the kerf opening.

As far as that video, Chad usually does a great job with his videos but there is so much in there that can be improved to make the knots my symmetrical all around. Look in library and there are several tutorials and they all basically will tell the different steps. There are also a ton of threads here talking about all the little hints and tid bits such as using a angle to glue up the blank, not cutting all the way thru the blank to keep alignment spot on, rotating the number sides to give different looks of the knot and so on. If you look at his knot in the photo I would not be happy with that. All those little triangles should be the same size in relation to where they are within the blank His top and bottom triangles are not the same size. Then when gluing and using the eye method you will be off. One other thing he said that material is powdercoated. I would not like that, How thick it that powdercoating?

If you are serious about doing those do the reading. Yes that material he is using is handy but it also locks you into the thickness of the knot. This can be a problem when trying to match the kerf to the blade you are using and that is important. Good luck.

I'm doing all the research. You know me. :p

The video I found mostly because I was looking for how to combine metal with other layers in a celtic knot. The use of laminate material was my main takeaway.

I actually commented on Chad's video about misalignment due to a missmatched kerf. I don't want any missmatch, for sure. I also want to get the right overlaps of the loops, and I am not sure just four all the way through cuts will actually do that properly? Anyway, I'm watching videos, already read some things from the IAP library. I won't be starting until I have a good enough handle on it.

Regarding the powdercoat layer. I have some of that laminate material (forgot about it until coming across that video.) The powdercoat is vanishingly thin, so you can't see it from the side. I figure I would probably try to sand it off, but maybe it doesn't matter.
 
Back
Top Bottom