Carbon Fiber - Mesa

Signed-In Members Don't See This Ad

remington590

Member
Joined
Jul 1, 2013
Messages
7
Location
Deer Park, Tx
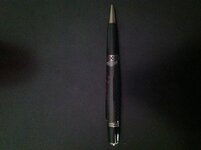
Hi, I'm new to the forum but have been turning pens for about 5-6 years now. I'm very frustrated and need some help, hopefully someone can tell me what I'm doing wrong. Last week I ordered a gun metal Mesa kit along with the carbon fiber artistiblank from woodturningz, I couldn't wait to turn it so as soon as the package arrived I set it up on the lathe and began turning. My problems began when I moved to the sanding steps and noticed what looked like an air void on the end, there was no way I could sand it out since it was under the resin. So frustrated, I called woodturningz and they agreed to send me another one (which is why I like woodturningz because of their great customer service). So yesterday I received the new blank and this morning I began turning on it only to find the same problem and then to make it worse I said oh well, pressed the clip and cap on and the void became bigger! Obviously I'm doing something wrong because I've seen many people/pictures with the carbon fiber and they're flawless! This is the first artistiblank pen I've attempted can someone please help me?? I have included a picture of the first attempt hopefully the picture quality is good enough to see.
 

Attachments

  • image.jpg
    image.jpg
    44.2 KB · Views: 466
Signed-In Members Don't See This Ad
It looks to me like uneven pressure from the bushings is causing the resin to delaminate. This can be caused by blank ends that are not pefectly square, debris on the edge of the bushing (e.g. ca buildup) and / or excessive tailstock pressure.

You want the tailstock pressure to be absorbed by the brass tube, not the resin. If you have any of the above problems (or others) that causes the tailstock pressure (through the bushings) to be applied to the resin rather than the brass you risk delamination or cracking of the resin.

I'm just guessing. Your problem could be something else.

Ed
 
Ok, so maybe I should try milling the ends before cutting to ensure the bushings push on the tube and not the resin. That makes sense thanks Ed.
 
Ok, so maybe I should try milling the ends before cutting to ensure the bushings push on the tube and not the resin. That makes sense thanks Ed.

Oh my.:) May I ask what sort of pens have you been turning???? Don't you always mill the ends on all your pens before you start to turn??? Just curious as to your past procedure. Not sure how these blanks are coming to you, if they were milled already or not. I know whenever I make blanks for someone I will mill the ends. The bushings need to sit against the brass tube for sure. If they look milled then possibly just a fine sanding is all that is needed.

Also remember the golden rule, turn the ends down first. Keep working the ends down before the center. You want to keep ahead of the center portion as you spin the blank. This takes pressure off the ends.
 
LOL yea I normally always mill the ends but I guess I just assumed since the blank was drilled and tube was glued that I didnt really need to pay attention to that! Thanks John for the golden rule I can honestly say I didn't know that. Also due to my inexperience with this kind of blank, what speeds should I run my lathe, and I right now all I have is the easy wood tools rougher gouge should I look into getting and using a different gouge for this kind of project? Thanks!
 
I turn as fast as the lathe goes. I also will always and I mean always highly recomend people learn to use a skew. There is no tool on the market that will do a finer job than a truely sharp skew. Now this is my opinion. I have turned a few pens in my day.:)

That is the golden rule for sure.
 
That is a pretty big air gap.

I have had that happen under CA finishes, just not to that extent.

I have been able to resolve it by sitting the end in a puddle of the thinnest CA I can get. It wicks up into the gap. I really don't know if that will work for you.

If that didn't work and I really wanted to salvage the blank, I would cut/chip off the part where it is separated. It will get bigger. Once I got most of it off, I would soak it with thin CA and it should wick up under there. I would then build up the chipped off part with thick CA.

Yes this would be time intensive but you can salvage that blank. You simply have to determine how much effort and time you are willing to put into the project.
 
Back
Top Bottom