Segmenting Best way to cut a diagonal along length of blank?

Signed-In Members Don't See This Ad
This may work for you. It is a jig I made to cut a diagonal on a round safely with a bandsaw I think the pics are self explanatory. The double sided tape holds the blank from rolling while being cut. This jig will also work on a square blank. Adjust the angle of the strips to suit your angle. I hope this works for what you are wanting to accomplish.
 

Attachments

  • 55DA2186-4127-49E4-8FE0-480DE26D8551.jpg
    55DA2186-4127-49E4-8FE0-480DE26D8551.jpg
    228.2 KB · Views: 240
  • 3799F11B-FA19-4DFE-B747-029DFF770092.jpg
    3799F11B-FA19-4DFE-B747-029DFF770092.jpg
    237.4 KB · Views: 216
  • 6372AA01-1F65-42C5-958A-3CAB6B41328D.jpg
    6372AA01-1F65-42C5-958A-3CAB6B41328D.jpg
    200.1 KB · Views: 219
  • E5F7601D-AB58-480C-AE40-1B0F4917A2A6.jpg
    E5F7601D-AB58-480C-AE40-1B0F4917A2A6.jpg
    257.7 KB · Views: 232
I assume you want to cut a 45 the length of a pen blank(5" or so) in a 3/4" or 1" blank. You can not do it. It will not equal a 45 because you do not have enough material. You can cut the blank in half (corner to corner) What tools do you have?? Can do it on either bandsaw or tablesaw. The kerf on tablesaw is greater so more material lost if that means anything but it would be a cleaner cut. Need a sled Many different ways to make sleds. Use miter slots, use miter gauge, or use fence, Not sure how easy this is to explain but cut a kerf in the sled (whatever method you choose.) Place doublesided tape over the slit. Now lay the blank corner to corner on the center of the kerf. If I am understanding what you want to do.

In my photo this is a jig for cutting 45 degrees in a pen blank. It can be easily used for doing what I think you want to do. As I said lay doublesided tape over kerf and lay the blank corner to corner on center of kerf. Make sure there is tape under the entire blank to keep it secured. Not much room for clamps so I would hold the blank down with a push stick. This can be adapted for a bandsaw as well. Or just freehand it on a scrollsaw or bandsaw. Again if I am not understanding then this is all moot
 

Attachments

  • IMGP0970.jpg
    IMGP0970.jpg
    227.5 KB · Views: 236
Last edited:
I assume you want to cut a 45 the length of a pen blank(5" or so) in a 3/4" or 1" blank. You can not do it. It will not equal a 45 because you do not have enough material. You can cut the blank in half (corner to corner) What tools do you have?? Can do it on either bandsaw or tablesaw. The kerf on tablesaw is greater so more material lost if that means anything but it would be a cleaner cut. Need a sled Many different ways to make sleds. Use miter slots, use miter gauge, or use fence, Not sure how easy this is to explain but cut a kerf in the sled (whatever method you choose.) Place doublesided tape over the slit. Now lay the blank corner to corner on the center of the kerf. If I am understanding what you want to do.

In my photo this is a jig for cutting 45 degrees in a pen blank. It can be easily used for doing what I think you want to do. As I said lay doublesided tape over kerf and lay the blank corner to corner on center of kerf. Make sure there is tape under the entire blank to keep it secured. Not much room for clamps so I would hold the blank down with a push stick. This can be adapted for a bandsaw as well. Or just freehand it on a scrollsaw or bandsaw. Again if I am not understanding then this is all moot

Nice jig John!
I think we both are not sure as to what George is trying to accomplish without some pics. A 45 degree cut lengthwise a square blank becomes a straight cut when turned round.
 
From what I am reading, you basically want a miter cut the length of the blank. This would be better on a bandsaw as it has a thinner kerf. It can be done with a thin kerf circular saw blade too, except the circular blades do have a thicker kerf.

There have been several posts here over the years with a jig for running the length of the blank.

You need a sled to slide with the kerf; then put two boards on each side of the kerf. These two boards need to be edged with the 45° angle; The two boards together will look like a "V" with the kerf (blade) running the length between the middle of the V.

Add the blank into the "V" (use clamps) and slide the sled into the blade.
 
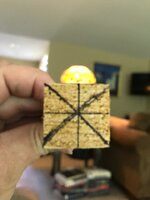
Sorry for the ambiguity in the post. I have attached a drawing of the cuts I believe I need to make in order to create the pattern I'm looking for. I think I have been given some good hints ... I'm thinking I need to create a special sled for the corner-to-corner cuts.

IMG_0081.jpg


Sent from my iPhone using Penturners.org mobile app
 
Cut 2 contrasting blanks, each blank is cut into 4 equal squares. Glue 2 of the dark on opposite corners, lights in the other. This will give you 2 blanks. Then you will slice each blank into pieces to glue as you restack with a rotation between layers. If you want what I call "cement" lines, add in a contrasting piece of veneer at each glue joint. Confused?
 
Are you planning on inserting a filler after the kerf is taken out because if not you will not be able to do this. You would be better served making a stave cutting sled and cutting at the angle needed for as many pieces as needed.

This just happens to be a compound mitered stave project. You would not need the compound cut.

Your definition of brick pattern would be better served if you have a photo reference because that is not how to do the brick pattern that I am thinking.
 

Attachments

  • IMGP0495.jpg
    IMGP0495.jpg
    217.8 KB · Views: 167
  • IMGP0496.jpg
    IMGP0496.jpg
    219.4 KB · Views: 159
Last edited:
Let's say you want a brick of four color woods plus a black line between each color.
Further, let's say said blank must be 5/8" when turned.

Cut 4 billets to a finished square dimension of 1/4".
Glue black construction paper to one face of each billet, then glue all 4 billets together such that the composed blank is bare wood to black paper.

After this glue-up dries, slice into 1/4", 5/16", or whatever height brick you want.
Now, glue these back together, rotating each row as you go.
Viola! Brickwork!

If you want 3, 5, 6 or 8 bricks per row, you'll want to make wedges (pizza slices) rather than square billets and you'll make one row at a time, then stack and glue.

Take a look at this instructive post on LJ's by my friend Darryl Masterson:

Prototypes #2: Building Prototypes - Group 1 - by darryl @ LumberJocks.com ~ woodworking community

Hope this helps you.
 
There are several ways to make "Standard Brick Pattern Blanks." I actually think the OP is working with one of the more difficult methods. It will certainly work with his method, but I agree that there are easier ways. But, find a method that you are comfortable with, and refine it.

I did two classes at the last MPG on making these, I will be happy to share the handout (via, PM and e-mail - the file and photos are difficult on IAP treads). And there are probably zillions of UTubes, and Barry Gross' book has an excellent section; although he has a few different methods than I, his may be more accurate.

Have FUN!

EDIT: Gary was faster than I; got distracted looking for photos. What Gary noted is the same as what I was suggesting.
 
Last edited:
Sorry for the ambiguity in the post. I have attached a drawing of the cuts I believe I need to make in order to create the pattern I'm looking for. I think I have been given some good hints ... I'm thinking I need to create a special sled for the corner-to-corner cuts.

View attachment 176789


Sent from my iPhone using Penturners.org mobile app

That is basically what I did about 10 years ago. I did it once (sliced everything perfect) but I just happened to get it right the first time! It was more DIFFICULT the 2nd, 3rd, and 4th try. However that stripe proportions (in the link below) was not forgiving; all had to be perfect.

http://www.penturners.org/photos/images/940/1_Baron_PenStripes.jpg

Can't wait to see the result of your work.
 
Last edited:
Your definition of brick pattern would be better served if you have a photo reference because that is not how to do the brick pattern that I am thinking.

He is doing it correctly for a standard brick pattern.

http://www.penturners.org/forum/f167/segmented-brick-pattern-pen-blanks-75073/index4.html


No need to cut diagonals. 4 quarters and keep turning when stacking. Again unless I am not understanding him. Or as I mentioned in my post make staves and use as many colors as you want as long as the amount of staves equal the angles needed. If that is done the way he drew that up that is a first for me to see. I would love to see the working parts before you put it together.

http://content.penturners.org/library/pen_blanks/slanted_brick_blank.pdf
 
Last edited:
Back
Top Bottom