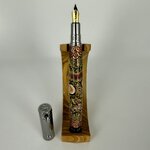
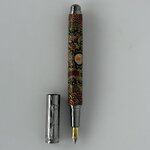
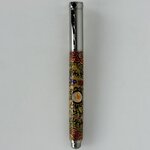
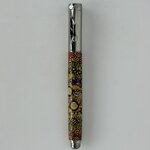
Aboriginal Hand painted & Timber Pyrography Fountain Pen

Signed-In Members Don't See This Ad
See more from tgsean

tgsean

Member
Joined
Jan 6, 2014
Messages
551
Location
Australia
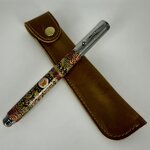
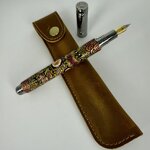
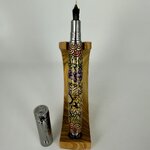
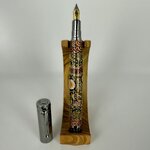
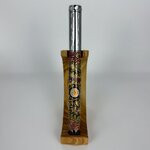
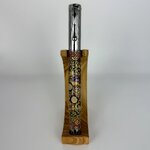
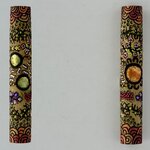
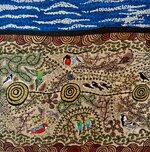
Happy New Year dear friends. Hope you have a blessed year 2025. I have tried something new again. In my last post I had shown you hand painted Aboriginal art pens in resin. The Aboriginal Artist I collaborate with Tina Carmody-Elliott also does wood burning art work combining her painting skills and art work. I am attaching an art work I purchased from her. So I thought rather that resin why not try Aboriginal Art work on timber and also incorporate Wood Pyrography. So what I do is turn the blank, in this case Tasmanian Black Heart Sassafras which was rather plain as a good template for her work. Then sanded and finished to 12,000 grit. Tina then did her painting and combined it with Wood burning. Then I completed the pen with 20 Coats of Thin CA. Made some mistakes but this was the first one, I hope to get better at these. One of the things I've discovered is that anything that is stuck to the timber as part of the art, will not make it through the finish process, at least not in this case. Please examine the water holes on the blanks which are not finished, you will see how the painted water holes which was stuck on to the timber did not make the final cut, it came off in spite of sanding over 10 coats of thin CA. So there are some issues that I need to resolve for the next one. But as an experiment this is what I did, and how it turned out. If any one else has done this sort of work let me know I am super keen to get it better. Also what not to do would be very helpful. Thanks

Cheers,
Sean
 

Attachments

  • Com AA Pyrography Fountain Pen 10.jpg
    Com AA Pyrography Fountain Pen 10.jpg
    179.1 KB · Views: 87
  • Com AA Pyrography Fountain Pen 9.jpg
    Com AA Pyrography Fountain Pen 9.jpg
    229.8 KB · Views: 86
  • Com AA Pyrography Fountain Pen 8.jpg
    Com AA Pyrography Fountain Pen 8.jpg
    155.7 KB · Views: 76
  • Com AA Pyrography Fountain Pen 7.jpg
    Com AA Pyrography Fountain Pen 7.jpg
    143.8 KB · Views: 68
  • Com AA Pyrography Fountain Pen 6.jpg
    Com AA Pyrography Fountain Pen 6.jpg
    132.1 KB · Views: 61
  • Com AA Pyrography Fountain Pen 5.jpg
    Com AA Pyrography Fountain Pen 5.jpg
    114.3 KB · Views: 61
  • Com AA Pyrography Fountain Pen 4.jpg
    Com AA Pyrography Fountain Pen 4.jpg
    93.8 KB · Views: 63
  • Com AA Pyrography Fountain Pen 3.jpg
    Com AA Pyrography Fountain Pen 3.jpg
    106.5 KB · Views: 57
  • Com AA Pyrography Fountain Pen 2.jpg
    Com AA Pyrography Fountain Pen 2.jpg
    115.6 KB · Views: 49
  • Com AA Pyrography Fountain Pen 1.jpg
    Com AA Pyrography Fountain Pen 1.jpg
    118.2 KB · Views: 51
  • IMG_0054 copy.jpg
    IMG_0054 copy.jpg
    226.5 KB · Views: 52
  • IMG_0036.jpg
    IMG_0036.jpg
    814.1 KB · Views: 85
Signed-In Members Don't See This Ad
Absolute zero experience in anything remotely like this , but a few questions . I assume the missing water holes are the white groups of 4 circles on a diagonal in your 3rd photo . If they were painted on , what would be the difference between those and the raspberries? in red on the 4th photo , or the flowers farther down in that photo ? Were they painted on with a different class of paints ?

Love what you are trying to do . Think you need to work with the artist to solve the problem .
Hi Wayne,

Thanks for your reply and questions. So its actually large circles with the black lines. The middle the artist had painted on paper and stuck it into the middle of the circle. So they came off. If you look at the second last picture you can see the blanks before I applied CA and you can see that the center of the circles were actually colored. But they were not painted directly on there, instead it was painted and stuck on there. She uses different techniques. So they are the ones that came off making them rather colorless in the final finish. I will work with the artist for sure, I guess the painting directly may be the better way to go. She sometimes uses holographic paper and various forms of art paper. I guess that didn't work in this case. Thanks for asking.
 
I like where you are going with these blanks. I have a suggestion. Try UV cure resin as a coating rather than the CA or casting. It is a form of polyester resin and can be applied in layers, staying "wet" until exposed to UV light or sunlight. Then it is cured and if thick enough you can go to sanding or add more layers, thick enough to turn, sand and buff. I watched a symposium demonstration on using it on small wood turnings and think it has lots of potential. Do a test sample by having the artist decorate a small square of wood using all her techniques to make sure they are compatible with the resin.
 
I like where you are going with these blanks. I have a suggestion. Try UV cure resin as a coating rather than the CA or casting. It is a form of polyester resin and can be applied in layers, staying "wet" until exposed to UV light or sunlight. Then it is cured and if thick enough you can go to sanding or add more layers, thick enough to turn, sand and buff. I watched a symposium demonstration on using it on small wood turnings and think it has lots of potential. Do a test sample by having the artist decorate a small square of wood using all her techniques to make sure they are compatible with the resin.
Thanks very much. I will have to see if I can get the UV cure resin here in Australia. Certainly sounds good. I did consider casting in resin as well but then I would have to have a suitable tube in mold because have already turned the timber to size
 
I'd be surprised if it isn't available. It was first developed for surfboard makers. They would resin the fiberglass on the surfboard and take it outside to cure. A short time later bring it inside and do the other side. A search or two should find it.
 
I like where you are going with these blanks. I have a suggestion. Try UV cure resin as a coating rather than the CA or casting. It is a form of polyester resin and can be applied in layers, staying "wet" until exposed to UV light or sunlight. Then it is cured and if thick enough you can go to sanding or add more layers, thick enough to turn, sand and buff. I watched a symposium demonstration on using it on small wood turnings and think it has lots of potential. Do a test sample by having the artist decorate a small square of wood using all her techniques to make sure they are compatible with the resin.
Thanks very much. I will have to see if I can get the UV cure resin here in Australia. Certainly sounds good. I did consider casting in resin as well but then I would have to have a suitable tube in mold because have already turned the timber to size
I'd be surprised if it isn't available. It was first developed for surfboard makers. They would resin the fiberglass on the surfboard and take it outside to cure. A short time later bring it inside and do the other side. A search or two should find it.
Ok that context of surfboard will surely help. I've just checked and it is freely available. One example: https://shapers.com.au/uv-active-surfboard-filler-resin-250ml/
Thanks mate much appreciated. Cheers Sean
 
There are products better suited to what we do rather than the resin you found. Keep looking.

Something along these lines. https://solarez.com/diamond-glaze.html Solarez was among the first to have UV cure resins.

Some of the big arts and craft selling stores sometimes carry products. I have to say that the first bottle I bought from one of them here never set up right so might have been old stock or my Amazon blacklight flashlight might not be the right wavelength.
 
I found this one. I use this company to buy my casting resin. I think this would do the job:
 
Back
Top Bottom