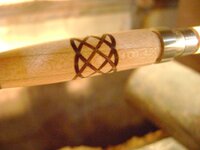
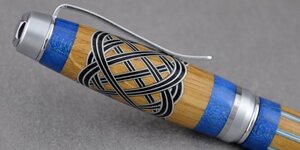
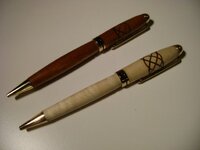
6 Sided Celtic Knot

Signed-In Members Don't See This Ad

stevemorris

Member
Joined
Oct 13, 2014
Messages
33
Location
ontario
this will be a description of my method to achieve a the 6 sided knot in my other thread:

http://www.penturners.org/forum/f14/celtic-knot-152604/

since this seems to be the place for blank fabrication!

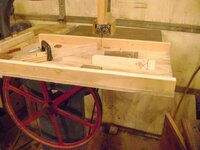
here is my crosscut sled for my bandsaw, it cuts a kerf of a little less than 1/32, I also cut my own veneer strips on my table saw

the first step is prepping the blank material and cutting it into a hexagon.

I start with 4/4 lumber, dress it to 7/8 thick, width doesn't matter, but the material must be accurately dressed 3 sides; 2 faces and one edge

to be continued....
 

Attachments

  • DSC01290.jpg
    DSC01290.jpg
    58.9 KB · Views: 504
  • DSC01274.jpg
    DSC01274.jpg
    71.2 KB · Views: 479
Signed-In Members Don't See This Ad
I understand what 4/4 means, ...

but I don't get what you mean when you say " the material must be accurately dressed 3 sides; 2 faces and one edge "

Could you please explain that part.. Thanks
 
I understand what 4/4 means, ...

but I don't get what you mean when you say " the material must be accurately dressed 3 sides; 2 faces and one edge "

Could you please explain that part.. Thanks

sure, the second edge doesn't matter, its the first edge that gets ripped off with two 30 degree bevel cuts. i'll be posting about cutting the material to a true hexagon tomorrow with pictures
 
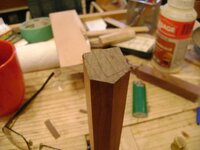
so to make the "six loop" celtic knot is a little more complicated. the piece of material must be cut into a true hexagon. "true" meaning all six faces are identical, therefore you cannot start with a square piece.

a hexagonal piece sitting on one face is wider than it is thick. the major dimension(across the points) is about 15% bigger than the minor dimension(across the sides), its actually 15.5% bigger.

if a hexagon is 1 inch across the faces, the major dimension across the point is 1.155 inches

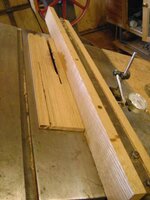
I started with a carefully dressed piece(2 sides and one edge), 1.000 inches by about 1 1/4, and ripped two 30 degree bevels off the undressed edge. then I moved the fence towards the blade and ripped the other edge twice.

I then measured the minor dimensions, one is still 1.000 inches, the other two are oversized, so move the fence again and recut two bevels along the same edge. repeat until the face to face dimension is the same in all three directions. with vernier calipers, very accurate results are easy. a dial indicator on the fence helps too

the fence on my 70 yr saw is very accurate but it moves when I lock it down, so its a little fiddly. also note that my tablesaw is a tilt top, not tilt arbour, so the picture might look a little odd!!

the 30 degree bevel angle is critical too, I use a wixey angle guage to accomplish that.
 

Attachments

  • DSC01291.jpg
    DSC01291.jpg
    60.5 KB · Views: 364
  • DSC01292.jpg
    DSC01292.jpg
    72.9 KB · Views: 336
  • DSC01295.jpg
    DSC01295.jpg
    66 KB · Views: 357
Last edited:
That looks great, Steve, and thank you for the details.

I've done 8-sided, but not 6-sided.

attachment.php


I'm lazy, though. Instead of using a tablesaw, I use a router table and chamfer bit. That requires a bit more fiddling, but I feel safer that way than trying to cut bevels on the tablesaw.

I've learned it's wise to determine how many "sticks" you think you need, add 20%, then triple or quadruple that total so that you have ample stock and don't need to mill more for a long, long time. :biggrin:

that's too funny, I feel safer using the table saw, even my tilting table saw!
I make my blanks about 12-14 inches long, long enough for 3 pens. before the bandsaw/insert work I cut the piece in half and do the bandsaw/insert work on both ends of one halfpiece and one end of the other. more details coming. Im also doing several pieces, 5 right now, so enough to create 15 pen blanks
 
I've learned it's wise to determine how many "sticks" you think you need, add 20%, then triple or quadruple that total so that you have ample stock and don't need to mill more for a long, long time. :biggrin:

YES! When I cut the slots for my 12 or 9 slots trim rings I do as many as I would want for 6 months. The dust in the shop is brutal even with a cyclone filter, overhead filter, and full respirator. My set up is not the problem, just the mess.
 
Thanks for the posting. Here's another method I've used to make hexagon blanks with good results.
Easiest Way to Make Octagons for Wood Turning. NO MATH OR MARKING! YAYY!: 3 Steps (with Pictures).
Mike

that's an octagon(8 side), not a hexagon!!

an 8 piece insert is going to get really busy looking but I may try it later

Yes I have jig that can cut a perfect 8 sided blank centered on the hole. An 8 sided knot unless you use really thin stock (not 1/16" like I did) or a really fat pen its not a knot but more of a blob. Wish I took a pic of it.

I would be interested in the jig. im working the other way, now that have some of blanks completed, the issue is locating the centrehole correctly so that the knot is symmetrical all around. I usually drill my centre holes ysing the lathe and a 4 jaw chuck, but centering a 6 sided piece has been problematic so far or time consuming for sure!

Here is an old thread.

http://www.penturners.org/forum/f30/celtic-knot-squaring-jig-132105/
 
interesting jig, food for thought

my method works so far, I can get nicely formed symmetrical knots, maybe im just being lucky. but its finicky finding and drilling the centre hole perfectly.

I need a drive cone on the chuck end and cone over the tailstock so that I can turn the blank round, then I have to cut the remaining hexagonal piece off the chuck end...... sorry just thing out loud here!!
 
Yes I have jig that can cut a perfect 8 sided blank centered on the hole. An 8 sided knot unless you use really thin stock (not 1/16" like I did) or a really fat pen its not a knot but more of a blob. Wish I took a pic of it.

The knot lamination I used in the pen posted above is about a Post-it and a half thickness over 1/16". The aluminum flashing is 1/128", and the black veneer is 3/128". I had to use three Post-its between my stop and the blank to increase the kerf enough to allow the lamination and adhesive fit in the kerf.

I set the angle to 52° to lessen the blob look on the cigar.
 
I understand what 4/4 means, ...

but I don't get what you mean when you say " the material must be accurately dressed 3 sides; 2 faces and one edge "

Could you please explain that part.. Thanks

Accurately Dressed =
1 side, which we'll call the face, is a flat plane, no twist, bow, curve or cup.
The two adjacent sides are at EXACTLY 90 degrees to the face, AND the are parallel to one another. And they are also flat planes.
 
Hmmm..... the photo I attached and referenced has disappeared. :confused: I'll figure out what happened later.
 
Last edited:
I understand what 4/4 means, ...

but I don't get what you mean when you say " the material must be accurately dressed 3 sides; 2 faces and one edge "

Could you please explain that part.. Thanks

Accurately Dressed =
1 side, which we'll call the face, is a flat plane, no twist, bow, curve or cup.
The two adjacent sides are at EXACTLY 90 degrees to the face, AND the are parallel to one another. And they are also flat planes.

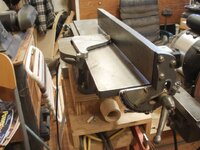
yes, this is important for an accurate knot. a decent table saw and a jointer are the best tools. my jointer that I use for pen blanks is a 1950's beaver/Rockwell 4 inch machine. I have a big jointer too, but the little one is ideal for pen stuff. a planer is nice too, but not really needed
 

Attachments

  • P2120010.jpg
    P2120010.jpg
    200.9 KB · Views: 235
continuing on, cutting the slots and inserting the veneer strips
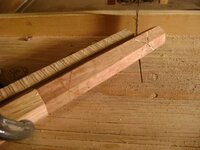
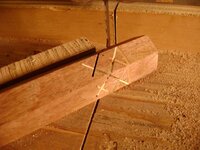
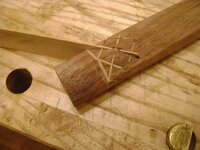
im using my sled on the bandsaw, with the hexagonal blank, its important that the face of the blank be against the fence instead of on the base. so the blank is "up on an edge"

I cut most of the way through as shown.

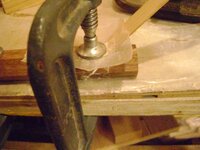
check the fit of the veneer, a little sanding if needed, then glue it in, plenty of glue!

clamp it to a solid flat surface, this maintains the geometry of the hexagon nicely
 

Attachments

  • DSC01327.jpg
    DSC01327.jpg
    75.6 KB · Views: 279
  • DSC01328.jpg
    DSC01328.jpg
    80.6 KB · Views: 228
  • DSC01329.jpg
    DSC01329.jpg
    69.9 KB · Views: 247
  • DSC01330.jpg
    DSC01330.jpg
    69.9 KB · Views: 253
Back
Top Bottom