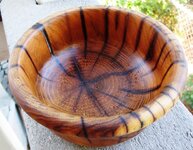
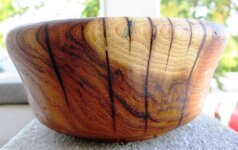
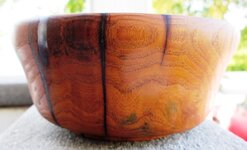
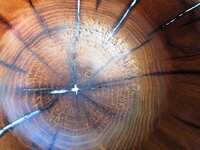
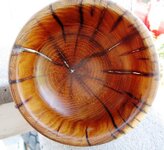
Well it was a full two weeks until I had time to do the turning. Work and blacksmithing got in the way but on the positive when I demoed blacksmithing I made bowl scrapers and gouges. Then yesterday I went to a class and made a tomahawk. So I finally got to turn today and here is the bowl. The cracks are opaque.
Please C&C welcome and suggestions on how to improve.
G'day mate,
Your bowl show plenty of character and you are turning them the hard way, there is, through their end-grain which is some woods can be a bit of a bear to cut and or cut smooth and that is what happened to the surface of the inside of the bowl.
I don't know if you only use the tools you make and if so, there are a couple of old style turning tools that are specially design for hollowing, I call them the "hooks", if sharpen right they are capable to make a fair smooth finish and then sandpaper does the rest.
In you case, the sandpaper used wasn't "aggressive" enough to cut the bottom surface wood to remove the wood "rips" from the cutting tool, this is when mechanic sanders are especially hand. They allow to use very coarse grits 40 -60 grits that cut fast and level the wood well then, finer grits will smooth the wood and remove the scratch marks from the coarser grits.
There are a variety of possibilities when it comes to tools to use, for narrow but deep hollowed pieces, you need a long neck or an extension to reach that far, one of the simple tools you can make and use, it all starts with a 4" grinder and a panels beater's 2" sanding pad and disk, I exemplified in one of my recent threads
http://www.penturners.org/forum/f30/blowouts-my-solution-110460/, how to adapt these type pads and disks to the 4" grinder but in you case, you need to make and extension that will increase the length possible between the grinder body and the sanding pad working surface. You can make as many extensions and you wish, each one with a different length, depending upon the depth of the piece you are working on. The tool itself as shown on that thread (no extension) is also great to work on the outside of the piece however, I would suggest to use the flap disc instead...!
As for the fillings, the calcification of the wood next to the cracks almost look like it was "burnt" as an effect, the black colourations of it would be a lot better matched with something like grind coffee beans, either fresh or after used (darker), mixed with any glue, it does a great job on pieces like this one, instead of the white "stuff" you used that doesn't do the piece any justice.
All by observations are made solely as constructive criticism, they are my views on that piece work, and techniques used. Any further questions, please ask...!
Cheers
George

