1014 Jet Mini Won't Turn On

Signed-In Members Don't See This Ad

MrPukaShell

Member
Joined
Jan 23, 2008
Messages
361
Location
Simi Valley, CA, USA.
Got a good buy on ebay, I think. It is a Jet Mini with the bed and stand extension for $100.00 He did say that it was running prior to the move but when they moved it and plugged it back in it would not turn on. I got it home and it is in better shape than the one I have it is just not the VS model. Do you guys have any ideas? Is there a reset button or anything like that? A fuse? I looked at PSI and the have the VS conversion kit and I was thinking about going that route if I have to replace the motor.

Let me know what you think.
 
Signed-In Members Don't See This Ad
Mr. Puka Shell.

The motors on those little guys are throw away motors. I found out the hard way. No brushes no armature no one will work on them. I was going to upgrade mine to a VS but sold it. I know this is not good news but the one hundred dollar investment is still a good one.
 
First thing is to check if you have power on both sides of the switch. A little corrosion will kill any operation.
 
There is a little capacitor on the motor that from time to time may blow out, if you replace it, you may be surprised and find that it runs like new. It is the cheapest and easiest fix available. If you can't do the change, feel free to ship the motor to me and I will do it for you.
 
Check the switch, sometimes dust gets in there and keeps it from contacting. On mine, when the capacitor burnt out, it would smoke and make a noise when turned on. The capacitor from Jet was $10 I think and the wires need soldered on. I ended up getting a replacement motor under warranty.
 
Most likely, it is the switch. They have a rep for misbehaving. They are easy do disassemble and clean out which is usually all it takes.

If it is the capacitor, the motor will still run; but you have to spin the handwheel to get it started.
 
Thanks Randy,
Went back to the lathe and took the switch off and by passed it with some jumper cables and it fired right up. So it is time to replace the switch. Thanks for all of the responses.

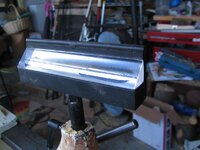
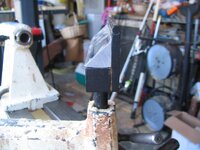
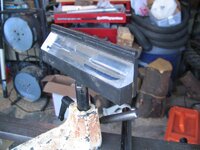
When I get it cleaned up and the switch replaced I will post a few pictures. One more question. Did the jet mini's ever come with a tool rest that has a clear acrylic piece on it? Just trying to figure out how old the lathe is. or if the tool rest is an add on item. There is a longer one but the post is snapped off. They do have a little round bar on the top edge of the rest so it may not gat marks as bad as the cast tool rest, and Yes it is time to clean the shop.
 

Attachments

  • IMG_3469.jpg
    IMG_3469.jpg
    53.4 KB · Views: 190
  • IMG_3470.jpg
    IMG_3470.jpg
    55.1 KB · Views: 156
  • IMG_3471.jpg
    IMG_3471.jpg
    61 KB · Views: 192
has anyone replaced the switch on a Jet Mini? If so how do the wires hook up on the back of the switch?
White & Black wires do they line up on the back? what I mean is does the white line up side by side or do they alternate. white top going in but white bottom going out?
 
That depends on the switch. USUALLY the same color wires will stay on the same side of the switch, parallel to the switch's lever-throw.

I don't have the non-VS so can't check mine (not to mention I replaced my switch some time ago so it isn't stock).
 
Most likely, it is the switch. They have a rep for misbehaving. They are easy do disassemble and clean out which is usually all it takes.

I've dealt with that issue on my Jet mini a number of times. Like Randy says, disassemble it, clean it and put it back together. I've never had any other problem with it.

But when it first happened - I almost sold it. Glad I didn't.
 
has anyone replaced the switch on a Jet Mini? If so how do the wires hook up on the back of the switch?
White & Black wires do they line up on the back? what I mean is does the white line up side by side or do they alternate. white top going in but white bottom going out?

I've had my Jet Mini for several years now and have pretty much had most of it disassembled at one time or another. Not for a repair, of which there have been none; but just out of curiosity to see how the thing was put together. So this seemed to be a good opportunity to take a closer look at the switch which I had never examined before. Here is the way mine is wired.​

Looking at the switch from the "FRONT":

1. Black power lead goes to upper left lug.
2. White power lead goes to lower right lug.
3. Black motor lead goes to lower left lug.
4. White motor lead goes to upper right lug.

Note: From what I know about electricity and switch construction, I am reasonably sure that either white lead can go to the top lug with the other going to the bottom. Same for the black leads, either one can go to the top lug and the other to the lower lug.​

Similarly, the wires can go to either side of the switch, left side or right side; "BUT", the same colored wires need to be on the same side of the switch..... both blacks on the left side of the switch or both blacks on the right side of the switch.

I "DID NOT" put my volt meter on the switch to be absolutely sure the above is correct so I would advise not experimenting with the wiring of the switch unless you are familiar with electricity and have the ability to test the switch to be sure an alternative wiring is safe.​

If you do mess up and mis-wire the switch, you could blow a circuit breaker/fuse on your electric panel and you might damage the switch, so do be careful!!!
 
Last edited:
I took the switch apart and cleaned all of the crud out of the contacts and plugged it back in. Purrs like a kitten. The only thing missing was the drive center. I will clean it up a bit and put the stand together and take some picks. Thanks for all of your help guys.
 
Back
Top Bottom