Wmcullen
Member
I'm not sure if this process is right or wrong; unique or common. But it works for me and I want to share in case it's interesting. |
04: Bingo Chip Laminates
last post: 03-Miter Cut Blank Laminates

last post: 03-Miter Cut Blank Laminates
Finding inexpensive materials to insert into pens has become an interesting "sub hobby."
Old gift cards... yep.
Cut-up soda cans... yep.
Colored card stock... big yep.
Bacon... not saying.
Plastic chips... yep.
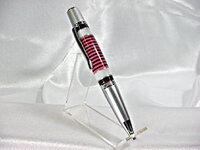
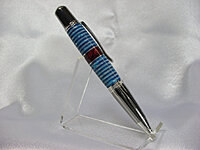
I came across these inexpensive translucent bingo chips (which you might find at a dollar store) and wondered how they would look.

The Problem
Stacking the chips with CA glue makes them a little slippery. I wanted to find a simple way to hold them in place while they dried.
Here's my process
(Not rocket surgery, just how I did it.)

1. Instead of drilling a 7mm hole straight through my blank, I split it into a "top" and "bottom" section and only drilled through the "bottom."

2. Using a 3/4" spade bit, I drilled into the "bottom" to create a well.

3. I put down alternating layers of CA glue and plastic chips until it reached the top of the well.
4. The "top" piece was glued onto the stack of chips.

5. Turning the blank over, I continued drilling the 7mm hole from bottom and through the top.
(Be careful. Drilling through the chips too fast may melt the plastic!)

6. Once drilled, I inserted a brass tube and continue processing the blank normally.


Summary
Looking for interesting materials to laminate reminds me of those stories of Thomas Edison trying to find electric light bulb filaments. It required experimentation and evaluation... and could be a lot of fun in its own right.
I wonder if Edison ever considered bacon.
Old gift cards... yep.
Cut-up soda cans... yep.
Colored card stock... big yep.
Bacon... not saying.
Plastic chips... yep.
I came across these inexpensive translucent bingo chips (which you might find at a dollar store) and wondered how they would look.
The Problem
Stacking the chips with CA glue makes them a little slippery. I wanted to find a simple way to hold them in place while they dried.
Here's my process
(Not rocket surgery, just how I did it.)
1. Instead of drilling a 7mm hole straight through my blank, I split it into a "top" and "bottom" section and only drilled through the "bottom."
2. Using a 3/4" spade bit, I drilled into the "bottom" to create a well.
3. I put down alternating layers of CA glue and plastic chips until it reached the top of the well.
4. The "top" piece was glued onto the stack of chips.
5. Turning the blank over, I continued drilling the 7mm hole from bottom and through the top.
(Be careful. Drilling through the chips too fast may melt the plastic!)
6. Once drilled, I inserted a brass tube and continue processing the blank normally.
Summary
Looking for interesting materials to laminate reminds me of those stories of Thomas Edison trying to find electric light bulb filaments. It required experimentation and evaluation... and could be a lot of fun in its own right.
I wonder if Edison ever considered bacon.


