Cholla Band-It

Signed-In Members Don't See This Ad
See more from JohnU

JohnU

Member
Joined
Jan 31, 2008
Messages
5,146
Location
Ottawa, Illinois
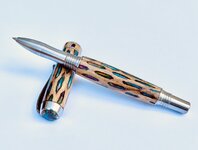
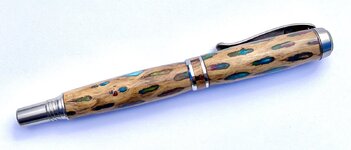
I've had this blank on my shop counter for over 2 years, tubes up and ready to turn. I finally took a little time to finish it for an upcoming demo I'm doing on custom center bands. The parts are the new stainless steel Band-It from Exoticblanks and the blank was a custom cast I kept out of a group I made with the intent to make me a rollerball. I like the end results… the pictures, not as much.
Thanks for looking!
 

Attachments

  • IMG_8892.jpeg
    IMG_8892.jpeg
    162.2 KB · Views: 170
  • IMG_8870.jpeg
    IMG_8870.jpeg
    142.5 KB · Views: 166
Signed-In Members Don't See This Ad
Once again John you never cease to amaze me. That is a sharp looking pen. The only problem I have is your starting to use up some of my ideas. The kits are ordered so once they get here I can start playing around. Thanks Ed for spending the time and money for a kit that really caters to pen turners that are looking to customize their pens. Thank you John for spending time and sharing your techniques to help us get started.
 
Thanks Ed, I agree, the cholla on the cap really gave it more depth.

Thanks Kenny, I've really enjoyed making all of them. I just cast some dried flowers I picked last year so I'll probably try one of them out on there next. Lol
 
Wow. That's just gorgeous. Knowing the depth that just doesn't come through in the pictures, I can only imagine how fantastic it is. Looking forward to the video. - Dave
 
That is really sweet. The bandit pen, with the open center band, such a simple concept but opens up so many possibilities. I love it.
 
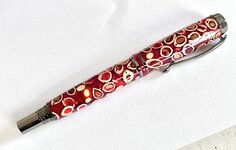
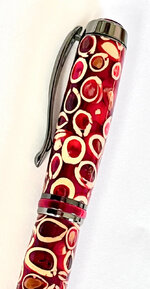
Thanks for all the comments and likes. I wasn't sure if the multi colored cast would look as nice as the solid red, blue or black cholla I cast, but I like it.

I didn't shoot a video on this one but I used the same process on it as I did in the color cast Band-It video. It's very easy to do.
 
Of all the weekends for me to miss an IAP meeting to coach softball.....

Now I'll have to drive to Ottawa!
 
Wow, I love this. The blank is awesome, love the colors in it. The finial is definitely a "crown" on this pen, too.

I like the band-it pens, but can't help but think this would be easier to do on the standard diamond knurl rollerballs.
 
…I like the band-it pens, but can't help but think this would be easier to do on the standard diamond knurl rollerballs.
I've done this in both and also the jr gents. The diamond knurl is definitely easier to disassemble only you have to turn the center band to finished size and part it off because of the plating on the metal. After doing several Band-It sets I like how I can just turn it down to size on the center band and not worry about the finished size before I part it off and can't change it afterwards, like on the diamond knurl. They take about the same amount of time. I think it's just what you get used to doing. I also like to do the finial on to complete the look on the Jr's and Band-It.

I appreciate all the comments.. thanks!
 
Wow, I love this. The blank is awesome, love the colors in it. The finial is definitely a "crown" on this pen, too.

I like the band-it pens, but can't help but think this would be easier to do on the standard diamond knurl rollerballs.
The band-it is definitely geared towards an inlay process. It would be next to impossible to use that process on a standard diamond knurl without damaging the platings. Plating issue aside it would be extremely difficult to inlay the standard diamond knurl since there's no defined channel.
 
The band-it is definitely geared towards an inlay process. It would be next to impossible to use that process on a standard diamond knurl without damaging the platings. Plating issue aside it would be extremely difficult to inlay the standard diamond knurl since there's no defined channel.
Yes, with the diamond knurl rollerball and Jr's you have to turn the piece completely down to size and then install it. There's no turning it on the metal center band piece. They are much thinner but very doable.
 

Attachments

  • IMG_8901.jpeg
    IMG_8901.jpeg
    263 KB · Views: 52
  • IMG_8902.jpeg
    IMG_8902.jpeg
    212.5 KB · Views: 50
The band-it is definitely geared towards an inlay process. It would be next to impossible to use that process on a standard diamond knurl without damaging the platings. Plating issue aside it would be extremely difficult to inlay the standard diamond knurl since there's no defined channel.
I definitely wouldn't want to mess with turning something glued onto a regular DK and scrape up (or off) the plating. My thought was with a band that didn't specifically use inlay material, because you have to make the custom band, cut it, then glue it back together in the channel on the band-it. John probably does a lot cleaner job than I would of that, though. If you prefer to use stainless, this is the way to go unless a stainless version becomes available in the standard DK version.
 
Todd, I have no doubt that you could successfully replace the center band on the DK rollerball. It's not hard once you've don't one. The hard part is convincing yourself to take it apart. Lol.
 
Todd, I have no doubt that you could successfully replace the center band on the DK rollerball. It's not hard once you've don't one. The hard part is convincing yourself to take it apart. Lol.
Oh, I've done a few. My comment was just that, if you weren't filling the band in the band-it pen, It seems it would be easier to just use the DK rollerball. Don't get me wrong, I'm not being critical. I'm very impressed with what you have done on the band-it pens you have shown (including the videos) (and pretty much all of your blanks and pens).
 
Oh, I've done a few. My comment was just that, if you weren't filling the band in the band-it pen, It seems it would be easier to just use the DK rollerball. Don't get me wrong, I'm not being critical. I'm very impressed with what you have done on the band-it pens you have shown (including the videos) (and pretty much all of your blanks and pens).
Can you share any tips or tricks on how to press the Diamond Knurl center band apart without damaging the plating? I've watched an old YouTube by Lynn Lacey (2016) on making custom center bands, but the center band assembly he had just slipped right apart. The Diamond Knurls I have feel like the center band is pressed together really tightly and are not likely to come apart without some kind of fixture or something. - Dave
 
Can you share any tips or tricks on how to press the Diamond Knurl center band apart without damaging the plating? I've watched an old YouTube by Lynn Lacey (2016) on making custom center bands, but the center band assembly he had just slipped right apart. The Diamond Knurls I have feel like the center band is pressed together really tightly and are not likely to come apart without some kind of fixture or something. - Dave
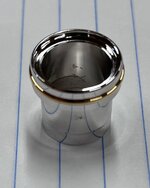
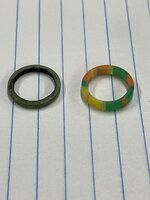
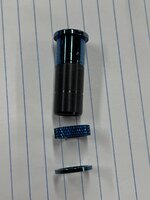
The Diamond Knurl Rollerballs I have just slide apart, but the Jr's are pressed tightly together. To disassemble them I place them upside down. Then I drill a hole in a piece of corion that just slips over the chrom edge and rests on the thin gold center band. Then I tap the corion down the band, moving the gold center band and lower chrome ring done the center of the assembly. It will slide off easily after you tap it down the assembly. After I make the new ring, I slip it all back on and press it gently together as I assemble the pen. Just make sure your custom center piece is a little loose or it could crack.
 

Attachments

  • IMG_8904.jpeg
    IMG_8904.jpeg
    227.4 KB · Views: 40
  • image.jpg
    image.jpg
    278.7 KB · Views: 36
  • image.jpg
    image.jpg
    230 KB · Views: 37
The Diamond Knurl Rollerballs I have just slide apart, but the Jr's are pressed tightly together. To disassemble them I place them upside down. Then I drill a hole in a piece of corion that just slips over the chrom edge and rests on the thin gold center band. Then I tap the corion down the band, moving the gold center band and lower chrome ring done the center of the assembly. It will slide off easily after you tap it down the assembly. After I make the new ring, I slip it all back on and press it gently together as I assemble the pen. Just make sure your custom center piece is a little loose or it could crack.
Thanks John. - Dave
 
Back
Top Bottom