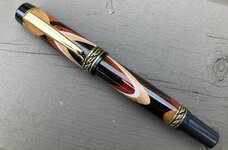
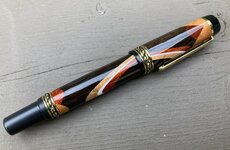
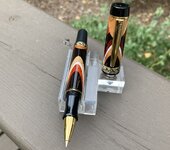
I missed this the first time around but I was out of town for 3 days.
BEAUTIFUL. Well deserved Front Page!
I am not generally a fan of segments of wood on wood, but yours is exceptional. I like brass, copper or aluminum shims separating different colored woods but in your case, it is stunning!
I think (and am guessing) that you cut your angles very carefully with a sharp TableSaw or Byrnes type of saw. The way the segments are so smooth suggest it was not done by a Band Saw - UnLess you fine sanded the matching segments after cutting! The segments do not feather out unevenly as BS can cause. EXCEPTIONAL! AND the Finish also!
Thanks Hank. Truth be told, I made this blank the same way I make a lot of blanks - I cut the blank on my table saw using a jig to hold the blank at (in this case) a shallow angle. You can see from the picture how the blank went together.
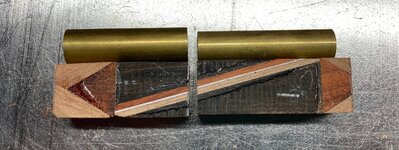
Because the stripe is at a shallow angle, it flattens out when it hits the outer edge of the blank. Then, as I turned it, the stripe became rounded on the end. The combination of my turning, and finish sanding seemed to give the stripe some good crisp lines.
The other end of the stripe is cut off by the chevron (more bad design on my part than anything intentional).
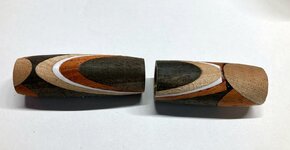
I guess I just got really lucky with the finished pen. I had made several others with the same woods, and the combination of ebony, padauk and mahogany always seems to go together well. I like the white PVC cardstock to provide some crisp separation - some thing I learned from Mark James' pens when I first joined this group.
Anyway, that's all there is to it. I was very surprised, and quite happy to make the front page. I am delighted that others like the pen.

EDIT - I should add one more explanation on this pen. Several months ago I posted about Fat vs normal pens - I have a customer who really likes the larger diameter pens - I was concerned at the time about how a Celtic knot would look on a larger diameter (it looks fine).
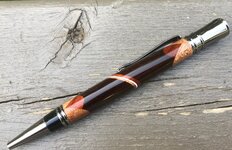
Anyway, my customer saw one of my earlier pens and asked if I could make something similar for him in an Olympian Elite 2, with the larger diameters. Below is a photo of the Executive pen that was the original inspiration. I made it about 2 years ago.
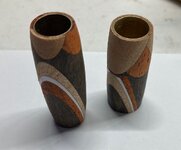
When my customer asked for this, I set about making the blank I showed above. But I made a key mistake - with my customer wanting large diameter segments, there is less opportunity to remove wood from a normal (3/4") blank. As such, I could not remove enough material to blend in the ends of the stripe, and the scallops were not fully developed. I basically threw the turned blanks you see in the photos above into my scrap bin, and started over on the pen, using 1" thick blanks.
Here is a photo of the finished pen I ended up making for my customer:
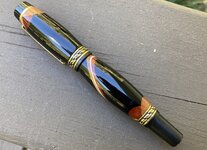
After I completed this pen, I started wondering what the original pen would look like if I threw it back on the lathe, and turned it to the bushing diameters. So I dug the blanks out of the scrap bin and finished turning them. The result is what I posted here last week, and it ended up on the front page.
Apologies for the long post, but I thought I would share with the message that not everything that goes in the scrap bin is beyond being salvaged.
