Dale Lynch
Member
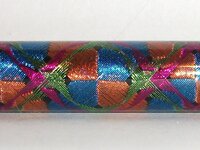
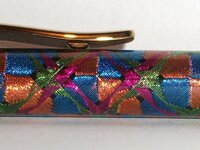
Hi fellas, I took some pics of the crosswrap I finished recently. The pattern I tried to do is called Dropbox - Sky Sharks.pdf - Simplify your life ,I don't see sharks but whatever.
I have been asked in the past how i do it, so I took some pics of the process Some bad, some worse but I zoomed them in so you can still see the individual threads.
I am including a couple of links to the resources I used to learn how to do decorative wraps. Tribute-to-BD-Ehler.pdf , Cross Wrap Pattern - Posts | Facebook
first ,the finished pics for those not interested in how the sausage is made. .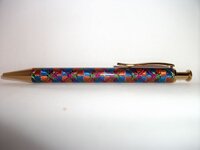
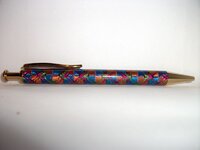
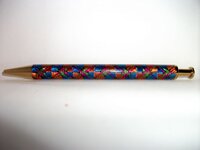
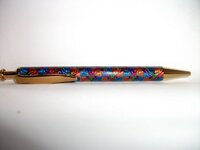
Now on to the threads,making wraps is basicly just a bunch of X's Spacing for this diameter tube is 31mm, and I started with flat black lining it up with the centerlne and spacing lines.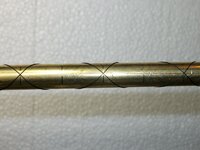
The second thread is wrapped to the left side of the first, creating a box.
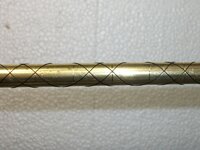
Next we are changing colors to metallic magenta,one X to the left of the box and one X to the right of the box.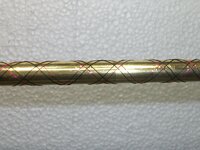
Back to flat black, place X's to the left and right of the magenta thread.
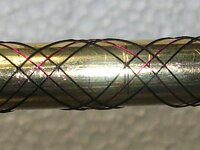
Next thread is metallic lime.Wrap X's to the inside of the outer black box on both the left and right hand side.
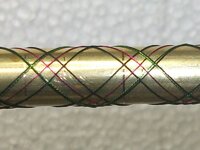
Back to black,Wrap X's starting with the inside box left side then right side toward the center, then the outer box left and then right to the outside. do this twice.We are done with black now. this is the basis of the pattern to which the reat of the pattern follows.
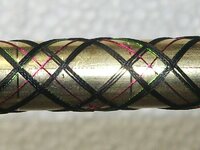
The next series of pics is combined is considered one pass. Starting with magenta wrap one thread to the inside of the left and right hand sides of the box.Then lime to the inside of the left and right hand sides of the box.
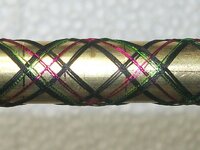
the next part of making a pass is the most difficult and time consuming part. Starting with the left hand side of the inner black box I use metallic gold going to the right and metallic blue to the left. Do the same thing on the inner right, twice. the outer box is done in the same manner going outward, gold to the right blue to the left.Do this three times.
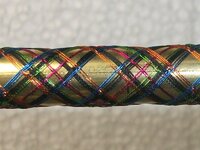
The previous two pics are considered a pass. 1 magenta left and right. 1 lime left and right, 2 gold/blue left and right one at a time.3 gold/blue left and right one at a time.
The next pic is after 2 more passes wrapped like the first. Now that there are a few more threads holding each other down we can use a blunted O ring pick to pack the threads together. I use a blunted pick because a sharp one tends to break the thread if you slip, and you will.
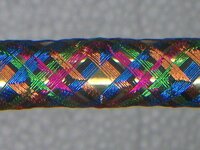
another pass like the last
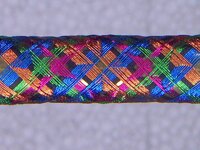
Another pass and I was able to bring the center to a close
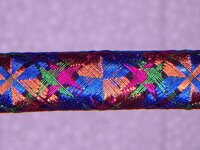
After bringing the the outer portion of gold/blue to a close I had enough room left to make 2 more wraps of the magenta and lime threads.
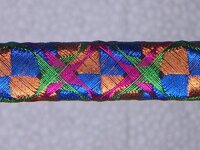
All the thread applied, packed, and burnished.I did the burnishing by letting the lathe spin 750 rpms while applying pressure from the top and bottom simultainiously using 2 glass spice jars. after that give it 2 final lookovers for stray threads that may have moved.
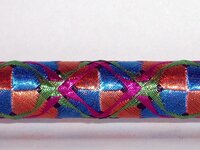
Now is the time to soak the threads with low viscosity CA , protect the bedways with paper towels , be very generous, if the CA didnot drip onto the paper towels you did not use enough.let it cure overnight.
to cut the blank to size I use a skew with the long point down in verticle position to cut through the threads till you get to the brass tubing.Once both sides are cut flip the skew onto its side a score the tubing till its thinn enough to snap off with your fingers.Square up the ends turning it between centers.
After the wrap is done it measured about 10.2mm.Diameter of the components is about 11.2mm so its time to get building up the CA.I make applicators by folding up small sections of paper towel and wrapping it with blue painters tape.
Start by creating a puddle of med CA on the applicator. With the lathe running 750 rpm apply the CA adding drops here and there, try not to fling it on yourself but really slather it on. Once the heavy coat starts to stabilize give it a back anf forth spritz of accelerator,let it spin for 5 min to harden enough not to sag. Let it cure for awhile.
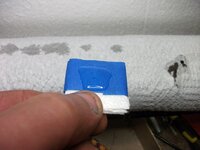
Several applications later and its ready to scrape and sand to size.
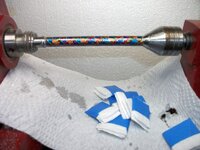
U use the skew on it's side to bring it within .04mm the wet sand 600-2500 grit then I buff with Dico PBC.
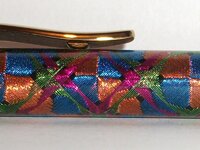
Thanks for reading fellas,I hope it was informative and my pics were less offensive than a nasty fart.
I have been asked in the past how i do it, so I took some pics of the process Some bad, some worse but I zoomed them in so you can still see the individual threads.
I am including a couple of links to the resources I used to learn how to do decorative wraps. Tribute-to-BD-Ehler.pdf , Cross Wrap Pattern - Posts | Facebook
first ,the finished pics for those not interested in how the sausage is made. .


Now on to the threads,making wraps is basicly just a bunch of X's Spacing for this diameter tube is 31mm, and I started with flat black lining it up with the centerlne and spacing lines.

The second thread is wrapped to the left side of the first, creating a box.

Next we are changing colors to metallic magenta,one X to the left of the box and one X to the right of the box.

Back to flat black, place X's to the left and right of the magenta thread.

Next thread is metallic lime.Wrap X's to the inside of the outer black box on both the left and right hand side.

Back to black,Wrap X's starting with the inside box left side then right side toward the center, then the outer box left and then right to the outside. do this twice.We are done with black now. this is the basis of the pattern to which the reat of the pattern follows.

The next series of pics is combined is considered one pass. Starting with magenta wrap one thread to the inside of the left and right hand sides of the box.Then lime to the inside of the left and right hand sides of the box.

the next part of making a pass is the most difficult and time consuming part. Starting with the left hand side of the inner black box I use metallic gold going to the right and metallic blue to the left. Do the same thing on the inner right, twice. the outer box is done in the same manner going outward, gold to the right blue to the left.Do this three times.

The previous two pics are considered a pass. 1 magenta left and right. 1 lime left and right, 2 gold/blue left and right one at a time.3 gold/blue left and right one at a time.
The next pic is after 2 more passes wrapped like the first. Now that there are a few more threads holding each other down we can use a blunted O ring pick to pack the threads together. I use a blunted pick because a sharp one tends to break the thread if you slip, and you will.

another pass like the last

Another pass and I was able to bring the center to a close

After bringing the the outer portion of gold/blue to a close I had enough room left to make 2 more wraps of the magenta and lime threads.

All the thread applied, packed, and burnished.I did the burnishing by letting the lathe spin 750 rpms while applying pressure from the top and bottom simultainiously using 2 glass spice jars. after that give it 2 final lookovers for stray threads that may have moved.

Now is the time to soak the threads with low viscosity CA , protect the bedways with paper towels , be very generous, if the CA didnot drip onto the paper towels you did not use enough.let it cure overnight.
to cut the blank to size I use a skew with the long point down in verticle position to cut through the threads till you get to the brass tubing.Once both sides are cut flip the skew onto its side a score the tubing till its thinn enough to snap off with your fingers.Square up the ends turning it between centers.
After the wrap is done it measured about 10.2mm.Diameter of the components is about 11.2mm so its time to get building up the CA.I make applicators by folding up small sections of paper towel and wrapping it with blue painters tape.
Start by creating a puddle of med CA on the applicator. With the lathe running 750 rpm apply the CA adding drops here and there, try not to fling it on yourself but really slather it on. Once the heavy coat starts to stabilize give it a back anf forth spritz of accelerator,let it spin for 5 min to harden enough not to sag. Let it cure for awhile.

Several applications later and its ready to scrape and sand to size.

U use the skew on it's side to bring it within .04mm the wet sand 600-2500 grit then I buff with Dico PBC.


Thanks for reading fellas,I hope it was informative and my pics were less offensive than a nasty fart.

