How to - carbide tip turning tool

Signed-In Members Don't See This Ad

jjudge

Member
Joined
Nov 27, 2004
Messages
252
Location
Centerville, OH, USA
I've made a couple carbide tipped tools, so I thought I'd capture some details for folks who might want to venture down the same path as I have ...


Introduction
Carbide is common for cutting materials, because it can keep shaper longer. These have long been part of metal milling/lathing, but you are seeing more of these used in woodturning.

So, you probably noticed the >US$100 tools for sale that have a small, carbide, inexpensively replaceable, cutting tips I am horrible at sharpening (I can do it, but I dislike it and not as frequently as I should).

I also notice that the individual cutter tips, sold in woodturning stores, are more expensive than if I just bought the tips direct from the stores that the metal workers use.

Such a tool, with such tips, would be great for me. However, I am either frugal or I convince myself that I am, so I am unwilling to spend that kind of money for a single tool.

I noticed that Captain Eddie Castelin posted a YouTube video -- since removed! -- that walked through making such a tool. Similar video here.

And, I read an IAP thread with some folks sharing info.

Here is my accounting of making some of these tools ...

Carbide Tips
My goal was to have a couple tools with at least one square tip and another with a rounded tip.

I pursued some 14mm x 14mm square cutters tips. This size is so that it would fit on a 1/2" square steel bar. I'm trusting Capt Eddie that 1/2 and 3/8 steel bars would be strong enough. I got:
  • a set of 10 of one of these from Global Tooling @ $1.56 x 10 ($15.60)
  • and bought 5 of these round cutters from Carbide Depot @ 10 x $10.35 each ($51.75! wow!)

Again, I trusted Capt Eddie and purchased an Irwin standard #10-24 tap and drill bit. Then, I went looking for square bar.

I could not find anything but hollow square and round tubes at the Home Depot and Lowes. So, off to Grainger I went. I bought:
  • 1 foot of 1/2" x 1/2" Square Bar, Carbon 4YNC9 @ $12.71
  • 1 foot of 3/8" x 3/8" Square Bar, Carbon 4YNC7 @ $7.76
  • and, some 3/8 round rod to see what it would be like @ $16
(evidently, Grainger prices in-store are different than listed at Grainger online; or I had some discount rate)

In that expensive, Carbide Depot order, I also picked up their special screw & tap. I forgot a drill bit, so that tool waits to be finished. I assume it'd be a 2.5mm (based on this fine chart). They are:
  • TS-35.6-9M1 screw (prod id: CU 90973) @ 2.50
  • M3.5 x 0.6 HSS 3flute plug tap (prod id: CU 210879) @ $6.84

I had some stuff sitting around:
  • osage orange (1.5"x1.5"x 10") @ $3 ?
  • some maple (2x2x12") @ $3 ?
  • some 1" copper couples @ $1 ?
  • some #10-24 and #10-32 machine screws (1/2" length) @ $3-4?
  • two taps & drill bits for #10-32 and for #10-24 @ $10?
Prices are a guess here, as I had these around for a while.

Process - make the tool
  1. Grind the end of the bar. I used the 3/8 bar, since the cutters fit nicely on it and over the edge (less grinding!). I cut a ledge for the cutter to fit, and swept the metal under it away from the cutting edge.
  2. Mark the spot to drill. Use a tool punch that fits in the cutter. Place the cutter forward, a bit, in your ground-out ledge (so that back cutter edge is away from the metal) and knock a small ding so the drill won't wander.
  3. Use the machinists vice, under the drill press, to hold the bar level, and drill out the hole with the #10-24 or #10-32 drill bit. I did one each, then bent the 10-32 drill bit ... so no more of that. Use cutting oil or something to cool & lubricate the metal-to-metal cutting.
  4. Put the tap in a tap holder (oops, I had one of those sitting around, too), and turn the threads down into that hole. Go slow, use lubrication.
  5. Clean the metal bits (swarf) from hole, from bit, from tap
  6. Not done yet -- need a counter sink for these square cutters. Chuck up a larger drill bit (I eyeballed it), and drill a small angled countersink so the machine screw will not sit high/proud up off the metal and never tighten against the cutter.
  7. Ok -- now screw the #10-24 screw through the cutter, and into your new threaded hole at the end of the bar.

Process - handle
I won't belabor this. Chuck up your wood, turn a nice tool shape.
Important details:
  • Cut a tenon on the end, where you'll be drilling in for the insertion of the new tool your created. I measured the copper coupler (1") and turned down to that. Once close, I kept checking diameter of the wood tenon & thinning, so that the copper would fit snug.
  • Tenon length: if you don't want to hacksaw and turn/file/clean the edge of the copper coupler down to a shorter length (I did), then you will have a long tenon.
  • CAREFUL with metal. It will cut you quickly. So, no hand sanding or checking it while its turning. Stay away.
  • Once the coupler fits on the tenon, epoxy it in place.
  • Chuck up your jacobs chuck in the tailstop, and pick a drill bit. Size = the distance between the 2 corners of the 3/8" bar. Math says hypotenuse of 3/8" sided triangle is .53 ... so back to the size chart to find 7/16" bit is close/snug.
  • I drilled in a couple inches, and the bar tested in snugly
  • Part off the handle after sanding and finishing.

Process - set screw
I put the new handle under the drill press and drilled out another #10 hole through the copper & wood tenon under it. And, yes, a countersink.

I put the tool bar in place, and put another tool punch down the new hole -- to mark the bar. I can then just take the tool bar under the drill press and drill & tap a hole through it.

You see -- the 1/2" screws would go through the copper ring, the wood tenon, and still have some amount more. So, I want it to thread INTO the tool bar for a nice/mechanical connection.

So, my set screw isn't really a set screw -- but extends into the bar.

I tapped the tool handle hole, and the bar, and it fits very nicely.

Picts
More picts on the IMGUR album

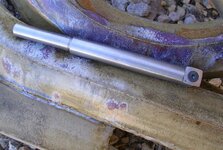
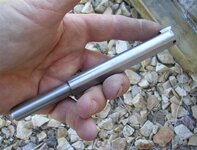
Completed tool, in 3/8 round rod (vs. square bar). Osage orange handle.
6JjXch.jpg


Close up of the cutter and ground end of the rod.
vZLxCh.jpg


Close up of the set screw that goes through the copper, the tenon, and into the tool rod.
8AJnUh.jpg


-- joe
 
Signed-In Members Don't See This Ad
I'd think they'd be (1) slightly more expensive than just buying raw bar; (2) possibly more tempered / harder to cut, tap, drill? maybe; (3) that weird pry-end would need taken off; and (4) that handle might not be as useful as a longer (turners-type) handle.

I need to wander HF to check them out. I love that place.
 
Frugal ... this time, yes.

Frugality check on the pictured tool

Materials were:
  • 1/3 of the 36" round bar = $5.33
  • #10-24 machine screw x 2 = $0.20 (guessing high)
  • osage orange = $3.55 (found price sticker)
  • carbide cutter 14mm = $1.56
  • copper coupler, 1" = $1.00 (guessing high & only used half)
  • epoxy, sand paper, Danish oil, consumables = $1

material cost for just the 1 tool = $12.64

I made 2 this afternoon, and will make the round-cutter ones when I get a drill-bit to match the tap (which matches their special screw).
 
Eddies video is still up here Another E-C Tool - YouTube

I've made a couple using both the round and square bar. I like the round bar for pens but the square for anything larger. I've tried the cheap tips for metal work and the more expensive wood ones from Lee Valley The tips for metal don't seem to cut quite as well, not sure why whether not quite as sharp or the angle is different.
 
I'd think they'd be (1) slightly more expensive than just buying raw bar; (2) possibly more tempered / harder to cut, tap, drill? maybe; (3) that weird pry-end would need taken off; and (4) that handle might not be as useful as a longer (turners-type) handle.

I need to wander HF to check them out. I love that place.

You bring up a couple of good points: I think the HF has to be tempered to some extent. And yes, the handles are not the best for the job.

Rick,

Great video! Thanks!
 
Last edited:
For $25.00 Capt Eddie sent me a 1/2 square bar modified drilled and tapped, and 2 square cutters all I had to do was put on a handle, and that included shipping.
and it works great
 
Eddies video is still up here Another E-C Tool - YouTube

I've tried the cheap tips for metal work and the more expensive wood ones from Lee Valley The tips for metal don't seem to cut quite as well, not sure why whether not quite as sharp or the angle is different.

Rick; Thanks for posting the link. Captn Eddie is a HOOT with good info.

The angle IS different.
If you look at side profile of the bit, the angle between the top of the cutter and the front face.
45 degrees is good for wood, too grabby for acrylic.
80 degrees is good for acrylic, but doesn't cut well and leaves a rough finish on wood.
 
I've done a few of these so far - couldn't find any 1/2" square bar at the local hardware or HD.
But Grainger and Fastenal both carry 1/2" square stock.
The 1/2" round bar will catch if you are not careful using the square cutter.
Works fine with the round cutter.
 
I made mine from the HF prybars and they work great. Even the handle is comfortable to me.
Lee they don't have that much temper as I cut the end off ewoth a hacksaw and finished the rest with a dremel cutoff wheel. Best tool I have and most used.
 
The carbide inserts are 30 degrees and that is the best 'angle' to cut wood blanks and even acrylics. The 'round' 18mm (3/4") solid carbide inserts are also manufactured to cut at a 30 degree angle.
 
Nice looking tool, but does the round insert cut well or does it leave a pretty rough surface, with a good insert you shouldn't need to do much sanding, but the inserts need a 30 degree relief for the best cutting results, which I always thought was the best reason to use carbide but I may be mistaken. the 7 degrees on your 12mm round looks like it would leave a pretty rough surface. I hate sanding almost as much as sharpening, actually I would rather sharpen my tools than sand the wood. (less dust in my lungs)
 
Does anyone on the site sell these all up round with a handle? Been wanting to try these, but not willing to pay the $85 plus for the massed produced catalog cutters.
 
surface

With the square bits, the surface isn't too bad. That is:
  • treating it like a parting tool to quickly turn down to size works well, leaves a smooth surface.
  • treating it like a scraper/parting tool, sweeping left/right, will leave "fur" (like you are cutting unsupported grain), because the corners catch -- unless you are perfect on maintaining perpendicular
  • treating it like a skew, riding the bevel and canting 45 degrees, will live a nice and smooth surface.

So, I'm thinking the radiused corners and/or the radiused edge versions of the square cutters might be a lot better.

I've not used the round cutter, as I just got the right set screw, tap, and drill bit today. I just made the tool (picts!)


Picts =
(1) close of of the 3 tools: round, and 2 square cutters; and
http://i.imgur.com/0RaAF.jpg

(2) wider view of the tall tools in my organizer/holder.
http://i.imgur.com/3bWEu.jpg


-- joe


Nice looking tool, but does the round insert cut well or does it leave a pretty rough surface, with a good insert you shouldn't need to do much sanding, but the inserts need a 30 degree relief for the best cutting results, which I always thought was the best reason to use carbide but I may be mistaken. the 7 degrees on your 12mm round looks like it would leave a pretty rough surface. I hate sanding almost as much as sharpening, actually I would rather sharpen my tools than sand the wood. (less dust in my lungs)
 
I have a question for you. I have a 1/2" by 1/2" x 6" piece of aluminum. Do you foresee any issues with using that to make my own version of a pen pro instead of SS?
 
I have a question for you. I have a 1/2" by 1/2" x 6" piece of aluminum. Do you foresee any issues with using that to make my own version of a pen pro instead of SS?

I would appreciate it if you would not use the Pen Pro name in describing your tool, I've already had this discussion with Crafts USA and Mr. Nish sent me a very nice letter and compensation. Not trying to be a Hard A$$ but I've spent a lot of time and money developing and establishing it as a brand name, I'm sure you understand!!
Thanks
Ken Ferrell
 
With the square bits, the surface isn't too bad. That is:
  • treating it like a parting tool to quickly turn down to size works well, leaves a smooth surface.
  • treating it like a scraper/parting tool, sweeping left/right, will leave "fur" (like you are cutting unsupported grain), because the corners catch -- unless you are perfect on maintaining perpendicular
  • treating it like a skew, riding the bevel and canting 45 degrees, will live a nice and smooth surface.
So, I'm thinking the radiused corners and/or the radiused edge versions of the square cutters might be a lot better.

I've not used the round cutter, as I just got the right set screw, tap, and drill bit today. I just made the tool (picts!)


Picts =
(1) close of of the 3 tools: round, and 2 square cutters; and
http://i.imgur.com/0RaAF.jpg

(2) wider view of the tall tools in my organizer/holder.
http://i.imgur.com/3bWEu.jpg


-- joe


Nice looking tool, but does the round insert cut well or does it leave a pretty rough surface, with a good insert you shouldn't need to do much sanding, but the inserts need a 30 degree relief for the best cutting results, which I always thought was the best reason to use carbide but I may be mistaken. the 7 degrees on your 12mm round looks like it would leave a pretty rough surface. I hate sanding almost as much as sharpening, actually I would rather sharpen my tools than sand the wood. (less dust in my lungs)

I use the radiused cornered ones on mine and they work great. I can't compare to the square corners or full round because I haven't used those... I made a tool similar to yours using 1/2 inch steel and got a little plastic box of 10 inserts for around $15. I've been using mine almost a year now and have probably only used 3 or 4 of the inserts. I just switch after all of the edges "feel" like they are getting dull. I know you can sharpen (or hone them) with a diamond stone, but I haven't even tried that yet. I probably will someday when I use up all of the new ones that I have...
http://www.penturners.org/forum/f45/homemade-carbide-insert-tool-76588/
 
I have a question for you. I have a 1/2" by 1/2" x 6" piece of aluminum. Do you foresee any issues with using that to make my own version of a pen pro instead of SS?

I would appreciate it if you would not use the Pen Pro name in describing your tool, I've already had this discussion with Crafts USA and Mr. Nish sent me a very nice letter and compensation. Not trying to be a Hard A$$ but I've spent a lot of time and money developing and establishing it as a brand name, I'm sure you understand!!
Thanks
Ken Ferrell

He DID say that he wanted to make his own VERSION of a pen pro, so he was actually referring to YOUR tool, not his own. I would take that as a compliment!
 
He DID say that he wanted to make his own VERSION of a pen pro, so he was actually referring to YOUR tool, not his own. I would take that as a compliment!

I'd disagree -- only Ken makes Pen Pros -- originals or "VERSIONS". Anyone else is making a "carbide-tipped pen turning lathe tool".
 
Last edited:
He DID say that he wanted to make his own VERSION of a pen pro, so he was actually referring to YOUR tool, not his own. I would take that as a compliment!

I'd disagree -- only Ken makes Pen Pros -- originals or "VERSIONS". Anyone else is making a "carbide-tipped pen turning lathe tool".

There's nothing really to disagree on. I was stating a fact, that grz5 was not calling his own tool a pen pro...
 
I have a question for you. I have a 1/2" by 1/2" x 6" piece of aluminum. Do you foresee any issues with using that to make my own version of a pen pro instead of SS?

I would appreciate it if you would not use the Pen Pro name in describing your tool, I've already had this discussion with Crafts USA and Mr. Nish sent me a very nice letter and compensation. Not trying to be a Hard A$$ but I've spent a lot of time and money developing and establishing it as a brand name, I'm sure you understand!!
Thanks
Ken Ferrell

He clearly said 'my version of a pen pro', which is what it is. If he had typed "Do you foresee any issues with using that to make a pen pro", then I would see your issue, but he did not.
 
OK, I'll use a software analogy to make my point. Oracle is the distributor of OpenOffice software for PCs. It is an free "equivalent" to Microsoft's Office. (Writer is Word-compatible, Calc is Excel-compatible, etc.)

Nowhere does Oracle say OpenOffice is their "version" of Office. Microsoft would sue. It is not their "version" of Office, it is their free alternative to the MS suite of products.

Subtle, maybe, but there is a difference.

Heck, I don't even own a PenPro yet, just trying to come to Ken's defense of his request. Nuff said, I'm moving on ... :rolleyes:
 
Last edited:
In all seriousness, there are many "office suites" out there other than Microsoft's. OpenOffice it's just an open source productivity suite, they don't need to call it a version of anything...
I think that Ken should be flattered that someone referred to a carbide tool as a pen pro. It's like when people used to call copiers "xerox machines". Heck, it's free advertising for him. Unless someone calls their own tool a pen pro, I don't see where there's an issue. Are there any lawyers among us that can answer that???
 
Guys -- The concept of Trade Mark requires that the owner be diligent in pursuit of exclusive use. If the owner is not diligent, they lose the control of the trademark designation. The classic example is "coke" has become generic and is no longer protected as "Coke Cola" is.

It would be best to help Ken protect his trademark and not use the term "Pen Pro" except to refer to his trademarked product.

(I am associated with a brewery that has had to be very very diligent to protect trademarks -- and the law does not make much room for being gratious and nice about use of trademark name and artwork).
 
Last in line:
How many of you are familiar with Sam Maloof?
Sam's furniture is renowned, particularly his rocking chair.
There are a litany of Sam Maloof inspired rocking chairs.
None have decreased the value of a Maloof original --
a chair which has been purchased by a US President.
It's a chair which has sold for more than $100,000.
It's not a version of the Pen Pro; it's Inspired by the Pen Pro.
Making a "version" of someone else's product is what the Chinese do when
they ignore trade protection laws, steal and sell copies aka knock-offs.

Grz5, don't use aluminum and don't sell it. :wink:

Cheers.
 
One of these days, I'm going to take my camera out to the shop and take some pics of my version of the pen pro or whatever.
 
Thanks for the link to the website. I just found out that Cap'n Eddie lives a few blocks from me. Small world!! I've emailed him yesterday about making some pens for Freedom Pen project. I just emailed him again... hopefully, just maybe, I can get some time to learn face to face from someone who knows their stuff.
 
I made my own but I don't call it "my version of..", I guess at most it would be "an alternative to.." To me, it is just my carbide lathe tool.

Just thought I would add that little bit.

Ray
 
That's a great source for the square carbide inserts. Thanks for posting it.

I just finished a tool holder for carbide inserts last week. I used some 5/8 round stock because I didn't have any square stock on hand and also the metal lathe I can use has a three jaw chuck and not a 4 jaw chuck.

I milled a flat on the 5/8 portion of the tool holder and left it at that.
 

Attachments

  • woodchuck tool1a.jpg
    woodchuck tool1a.jpg
    87.1 KB · Views: 1,035
  • woodchuck tool1b-1.jpg
    woodchuck tool1b-1.jpg
    70.3 KB · Views: 1,188
Good for you. I also have made carbide turning tools. My cost, less handle, is about $10.00. I used standard cold rolled square stock. But it is so tough to drill I will use mild hot rolled next time. Your tips are less expensive than my source. Thanks for the...uh...tip....I'll go to your sources next time.
 
I made mine from the HF prybars and they work great. Even the handle is comfortable to me.
Lee they don't have that much temper as I cut the end off ewoth a hacksaw and finished the rest with a dremel cutoff wheel. Best tool I have and most used.

What brand drill and taps did you use. I purchased Irwin brand at HD and the 6-32 tap broke in the hole. The drill bit for the 10-24 did not even make a dent in the prybar, it just started glowing and melted the end. And yes I know how to drill and tap a hole. I have done it for years.
 
Maybe you would ruffle less panties if you said you based your design off an Easy Wood tool. :biggrin:
 
Maybe you would ruffle less panties if you said you based your design off an Easy Wood tool. :biggrin:

Unless you really like getting letters from Craig Jackson's attorney, I wouldn't use that phrase, "Based your design off an Easy Wood Tool". . Trust me his attorney and I have exchanged several letters. but I'm still here :biggrin::biggrin: Also the Chinese Carbide from Global isn't as durable as the German carbide, but it is about a1/3 the price.

I'm allowed to make anything I want and call it anything I want for personal use.
 
Signed-In Members Don't See This Ad
Try using hot rolled steel.
Cold roll stresses up when it's processed.
Mill finish is not pretty but a few minutes on a belt sander will improve that a lot.
finally put a little gun Blueing on it - i like the dark finish ti helps with the rust.
 
Back
Top Bottom